
How to Draw Anime Face in Profile
Learn how to draw the anime face in profile (side view). Master the two-circle construction, the profile S-curve, and how each feature stacks along the face edge.
Introduction
The profile, or side view, is the cleanest angle in anime drawing once you understand its construction. There are no symmetry decisions to make, no eye spacing to balance — the entire face collapses onto a single flowing line. Because of this, the profile is the fastest angle to learn and the most forgiving of shaky construction skills.
That does not mean it is easy. The difficulty of the profile is that the face reads as a contour, so every feature has to sit on exactly the right point of the curve. Miss the chin placement by a few millimetres and the whole head looks unbalanced. This tutorial gives you a reliable two-circle system for getting the profile right every time.
What You’ll Learn
- The two-circle construction for a profile head
- How the profile S-curve links forehead, nose, lips, and chin
- Where to place the ear, eye, and neck in side view
- The small details that stop a profile from looking like a silhouette
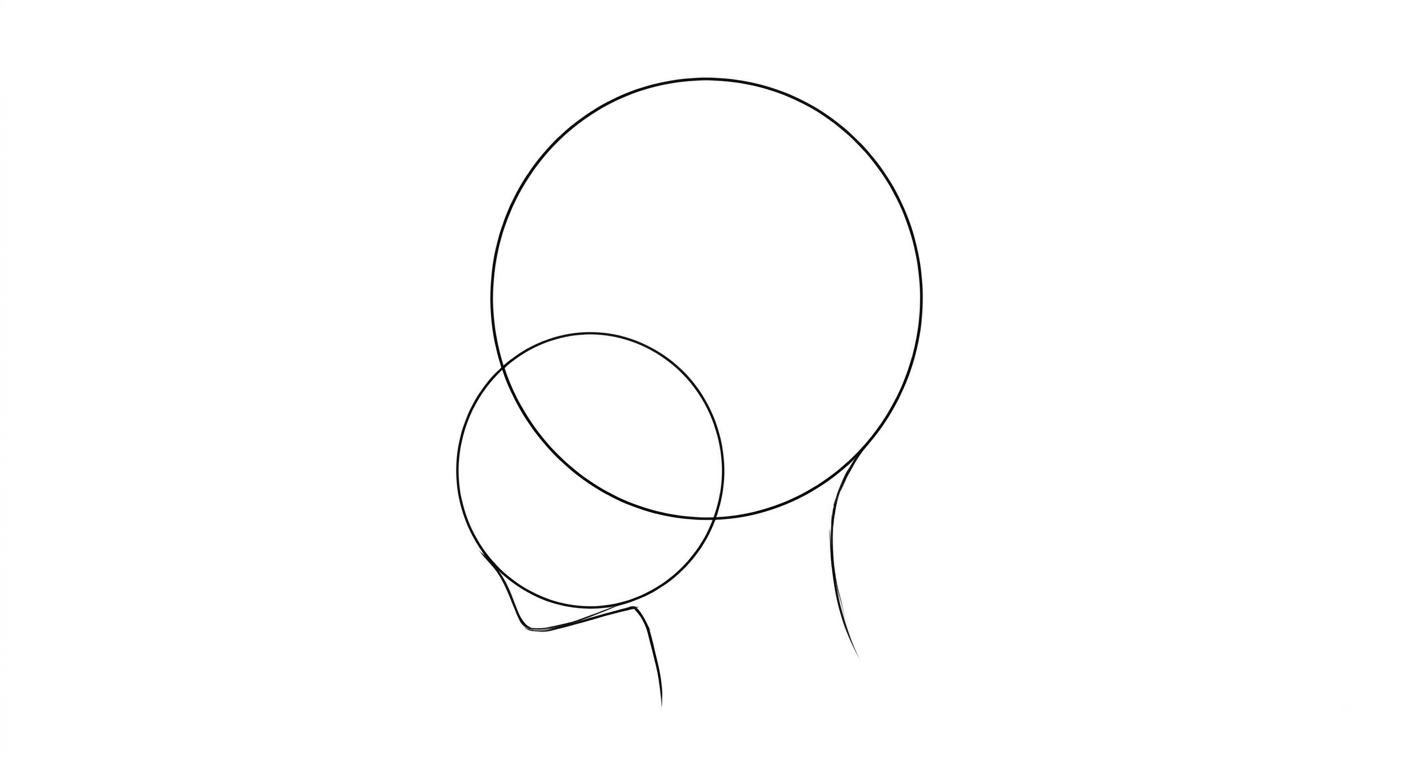
Step 1: Draw Two Overlapping Circles
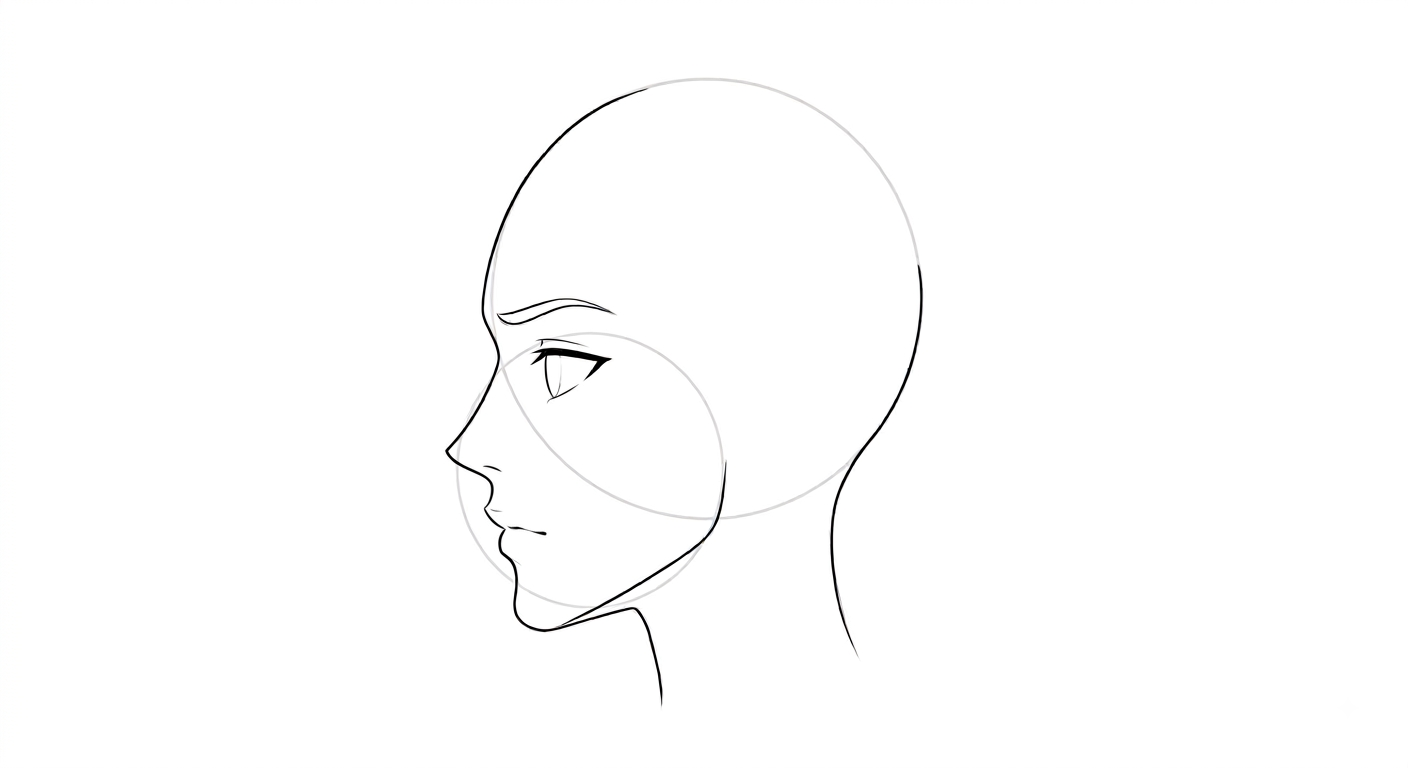
Start with a large circle for the cranium. Then draw a second, smaller circle so that it overlaps the lower front of the first one — roughly where the jaw mass sits. This jaw circle is the single most important part of the profile construction: it defines how far forward the chin comes and how the jaw slopes.
The size and position of the jaw circle is where male and female profiles differ most. For female characters, pull the jaw circle forward and down slightly so the chin tapers to a soft point. For male characters, keep the jaw circle larger and lower so the chin is broader and the jawline more angular.
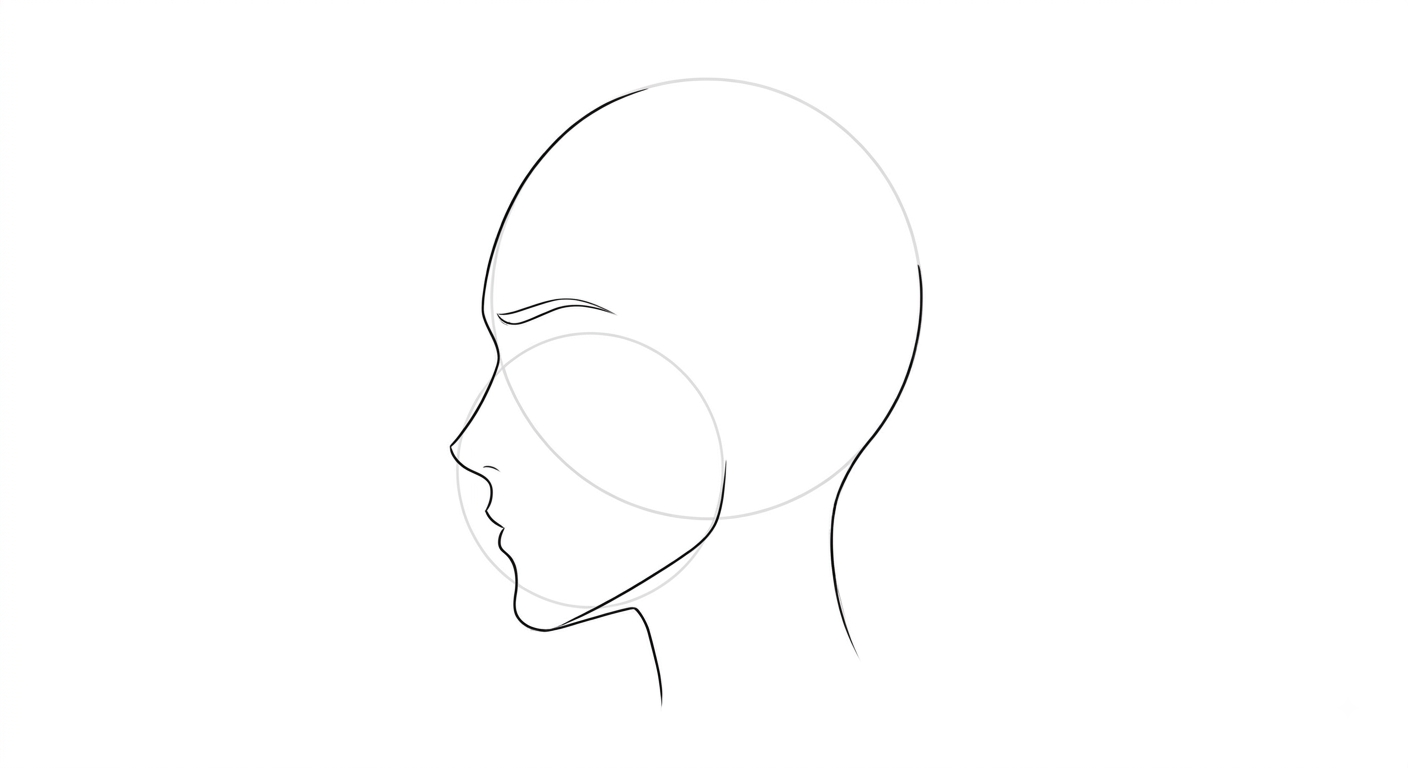
Step 2: Drop the Profile S-Curve
Draw a single flowing line along the front of the head, starting at the top of the forehead. It curves over the brow ridge, dips in at the bridge of the nose, runs down the front of the nose, tucks in at the philtrum, passes over the lips, and finally sweeps out to the chin.
This is the profile S-curve, and it is the backbone of the whole drawing. Keep it smooth: a good profile has one continuous rhythm rather than a series of disconnected bumps. Sketch the line loosely at first, then refine it once the features are placed.
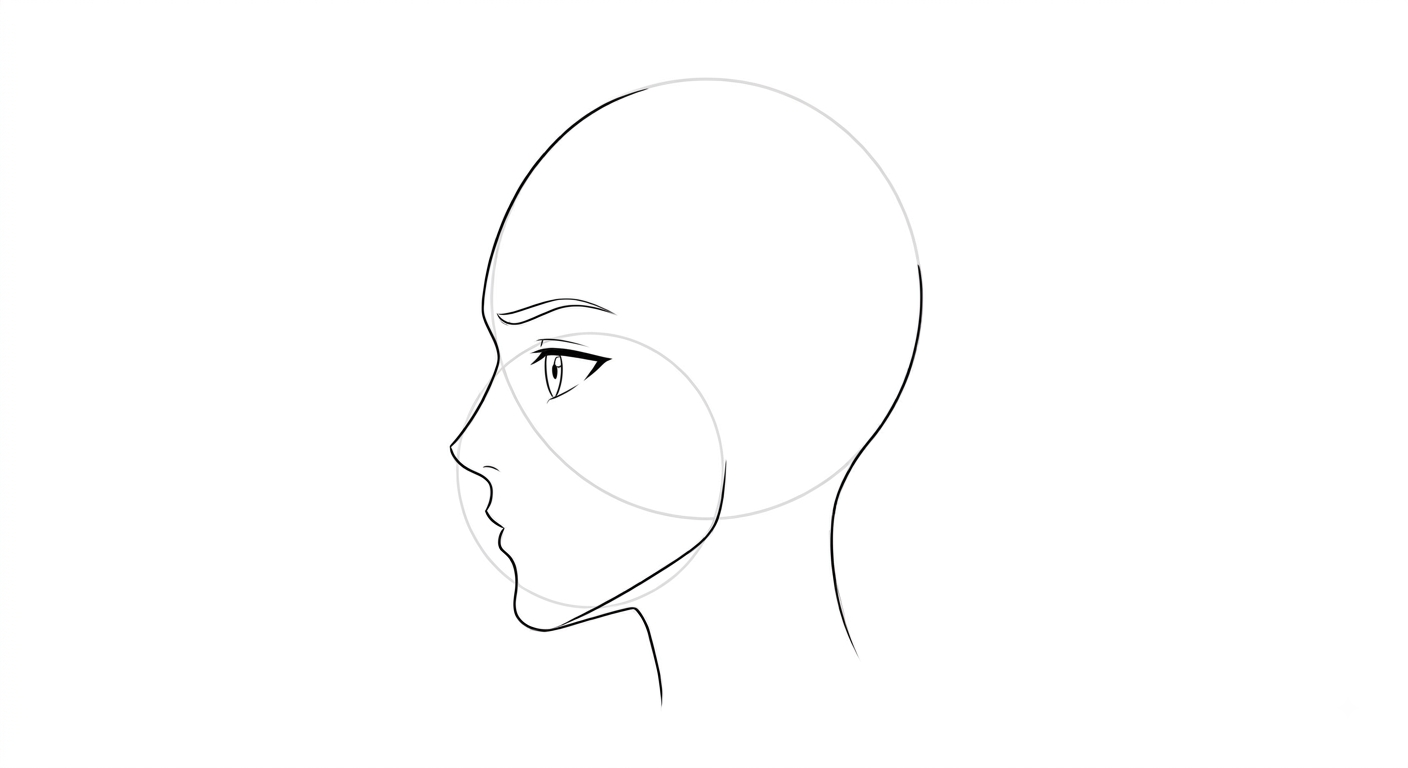
Step 3: Place the Eye as a Wedge
In profile, the eye is drawn as a narrow wedge rather than an almond. The top lid is a long angled line, the lower lid is a short curve, and the iris sits at the open end, angled forward toward the nose.
Position the eye about halfway down the profile curve, slightly behind the nose bridge. In most anime styles the profile eye is small — roughly a third of the length of a front-view eye. Resist the urge to draw it large; oversized profile eyes read as a stylization choice, not as a mistake.
Tip: The eye sits about one eye-width back from the bridge of the nose. Check this distance on every profile you draw.
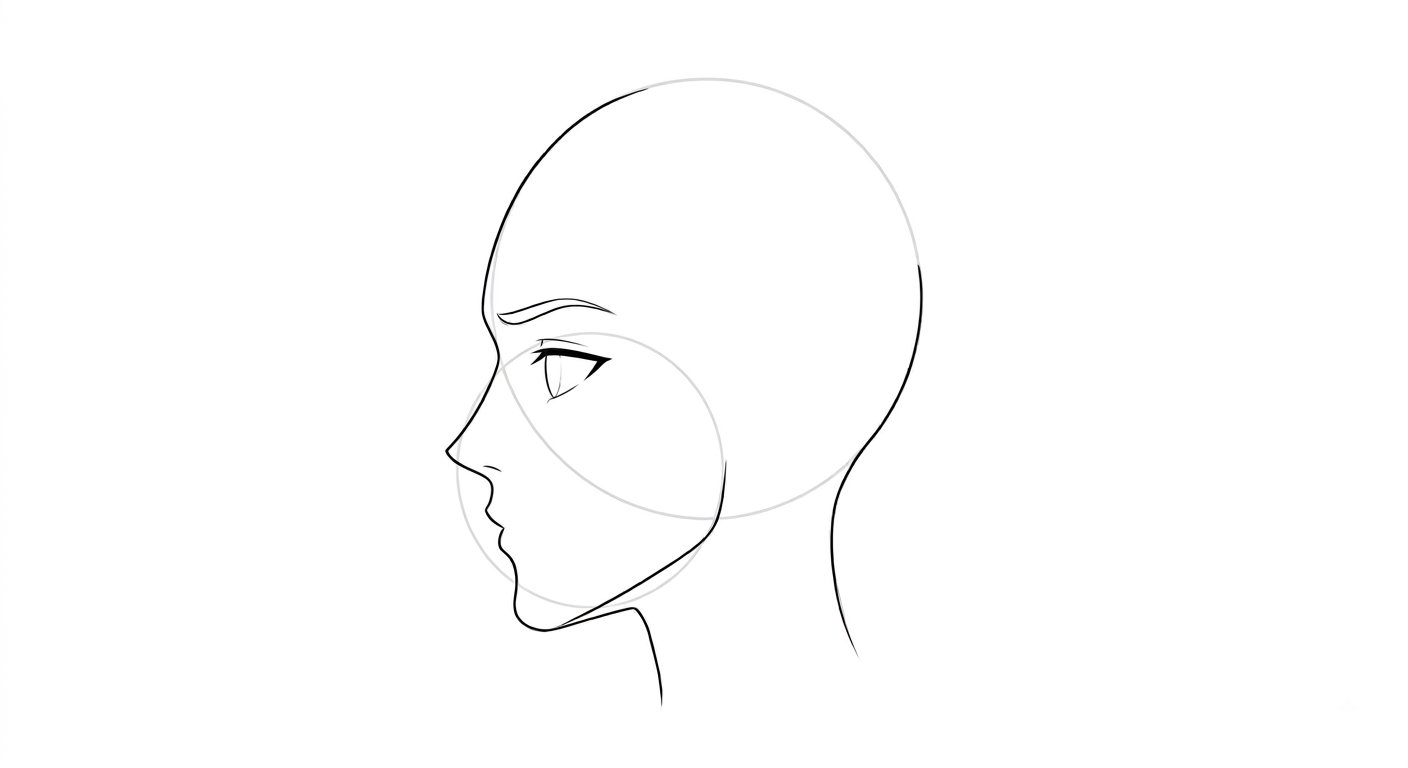
Step 4: Draw the Nose
The anime profile nose is usually a simple L-shape or a short diagonal line that projects out from the S-curve. Some styles show a subtle nostril tick; most stylized anime omits it entirely.
The nose projects forward from the face. Its tip should clearly break the silhouette of the head rather than lying flat against it. The angle of the nose — upturned, straight, or hooked — is one of the strongest tools you have for giving a character personality, so vary it deliberately.
Step 5: Add the Mouth
The lips in profile sit on the S-curve between the nose and the chin, usually about halfway. Anime lips are typically minimal: a soft bump for the upper lip and a slightly stronger one for the lower lip, with a subtle indentation between them.
For a closed mouth, draw a small notch that tucks in at the lip line. For an open mouth, the lower jaw swings down and the opening reads as a narrow triangle. Keep the mouth small and quiet in profile; the nose carries more visual weight.
Step 6: Place the Ear and Neck
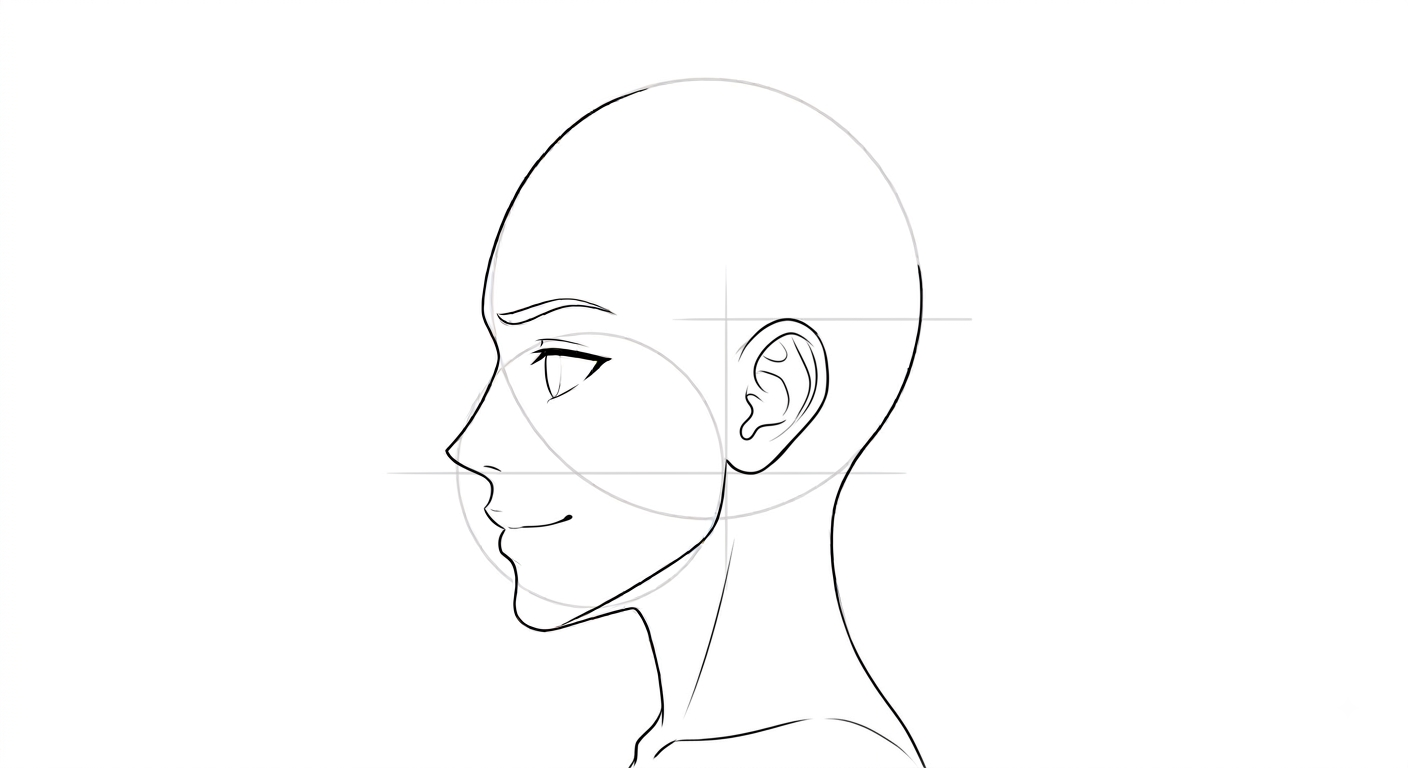
The ear is your main landmark in the profile. It sits roughly level with the eye, behind the jaw circle, in the lower portion of the skull. A useful guide: the ear’s upper point aligns with the eye-line, and its lower lobe aligns with the nose line.
The neck rises from behind the jaw. Its front edge angles down toward the collarbone, and its back edge runs from the skull base. For male characters, add a subtle throat shape and slightly thicker neck; for female characters, keep the neck slender and clean.
Step 7: Add Hair Silhouette
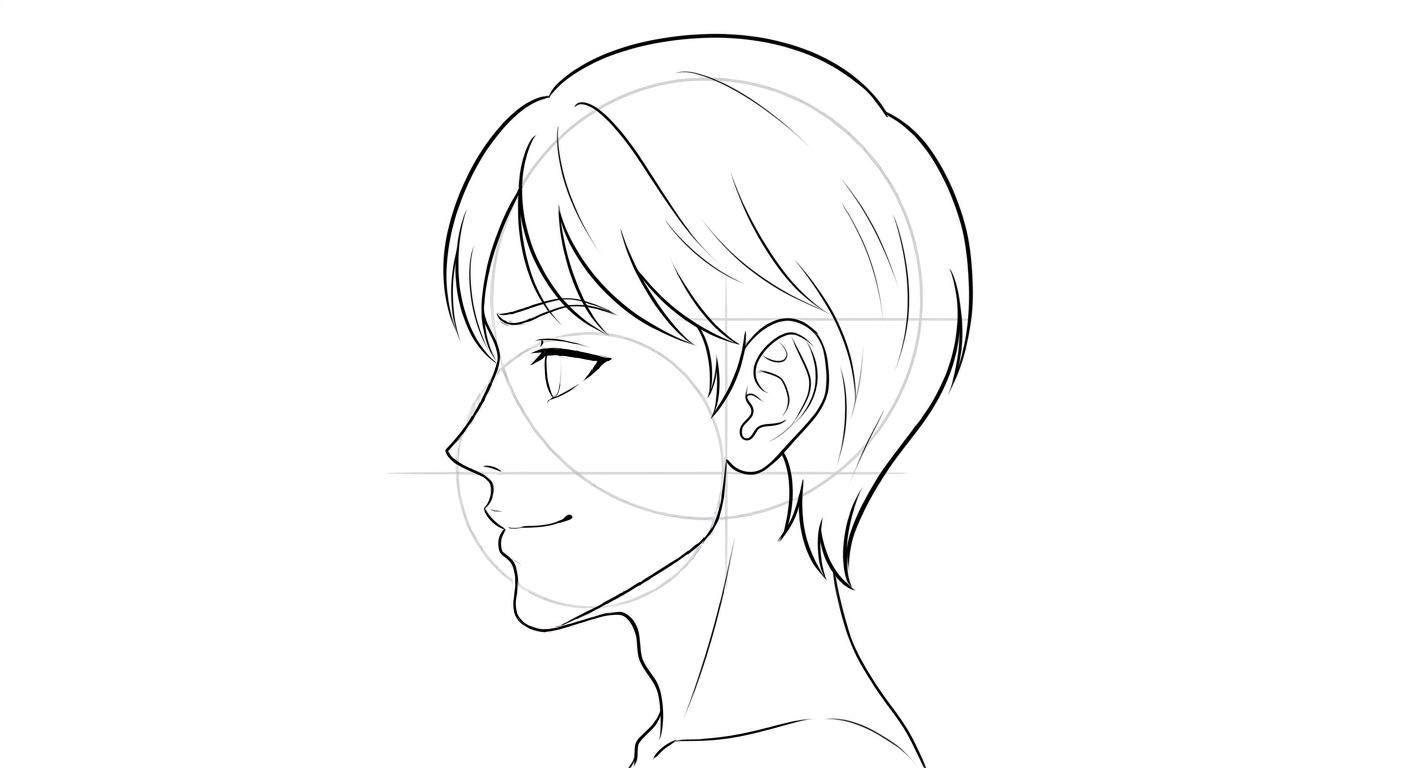
In profile, hair is a single continuous silhouette from the crown down the back, flowing forward over the forehead. Draw the whole hair mass as one shape first, then add interior strand lines to show direction. The fringe compresses against the forehead in side view, and the back of the hair shows its thickness at the nape of the neck.
Step 8: Clean Up
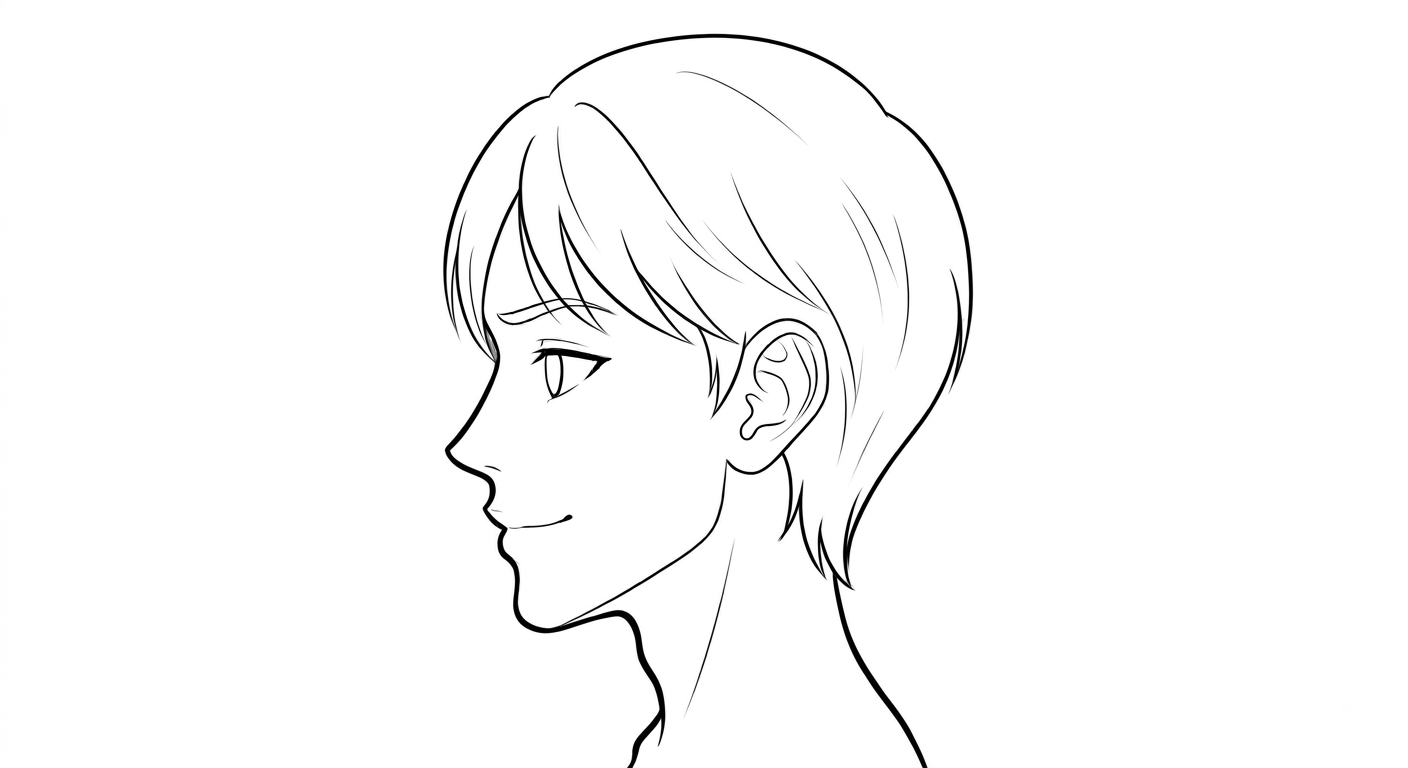
Erase the two construction circles and the S-curve guide, then darken the profile contour. The outer contour of the profile should be the boldest line in the drawing. Interior details — the eye, the nostril hint, the lip line — stay lighter and thinner to keep the silhouette strong.
Common Mistakes
- Chin too far back — the jaw circle controls this; move it forward.
- S-curve with bumps — keep the forehead-to-chin rhythm smooth.
- Eye too large — profile eyes are small wedges, not full almonds.
- Nose flat against the face — let the tip break the silhouette.
- Ear misplaced — it sits on the eye-line, behind the jaw.
Practice Advice
Draw ten profiles using only the two circles and the S-curve, no features. When the silhouette is consistently balanced, add the features one at a time in this order: eye, nose, mouth, ear, hair. Finish by flipping your finished profile and redrawing it facing the other way to train both directions.