
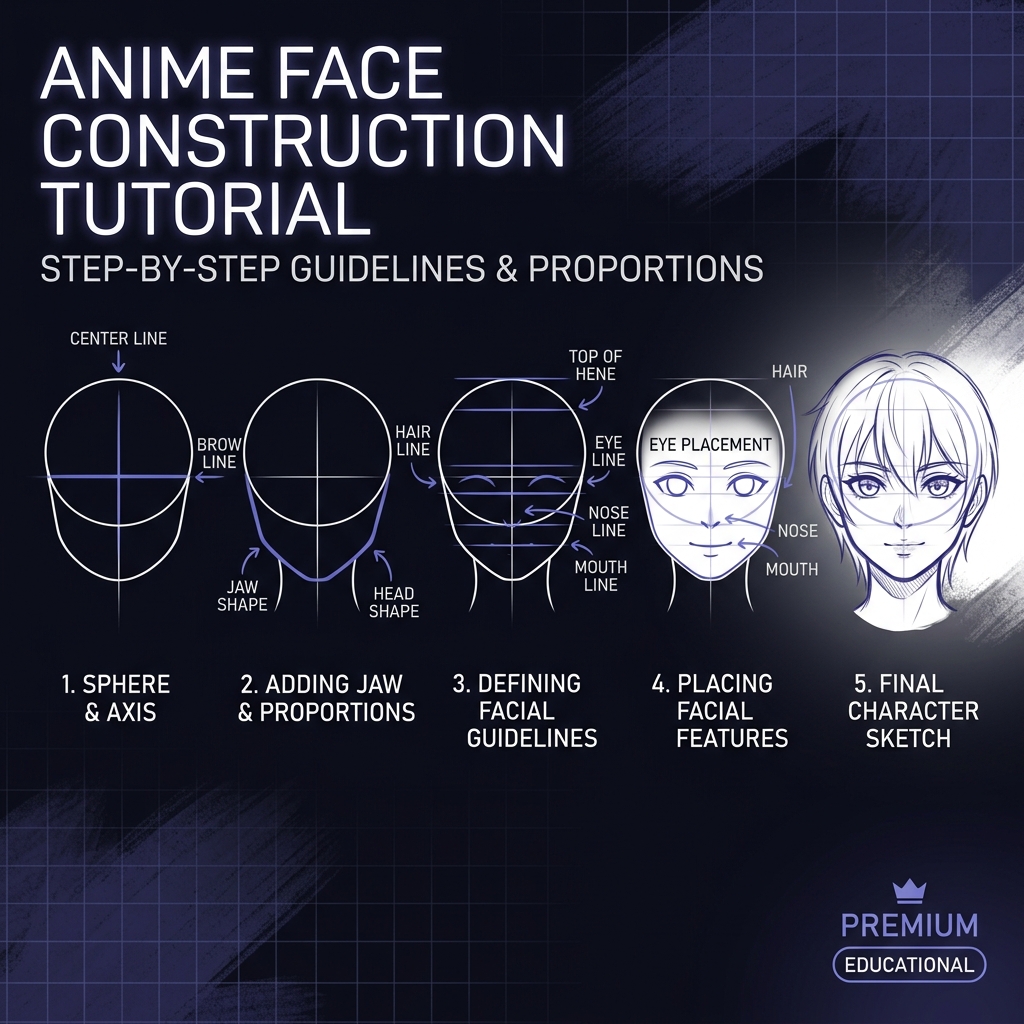
Anime Face Proportions & Construction
Start from the foundation. Learn the circle method, proportion rules, and how to correctly place facial features every single time.
Introduction
Before you can draw a beautiful anime face, you need to understand its structure. This tutorial teaches the construction method used by professional manga artists — a reliable, repeatable system that works every time.
What You’ll Learn
- The circle + cross guideline method
- Head shape construction
- Eye placement rule (the halfway line)
- Nose and mouth placement
- Jawline shaping differences between male and female
- How to remove construction lines cleanly
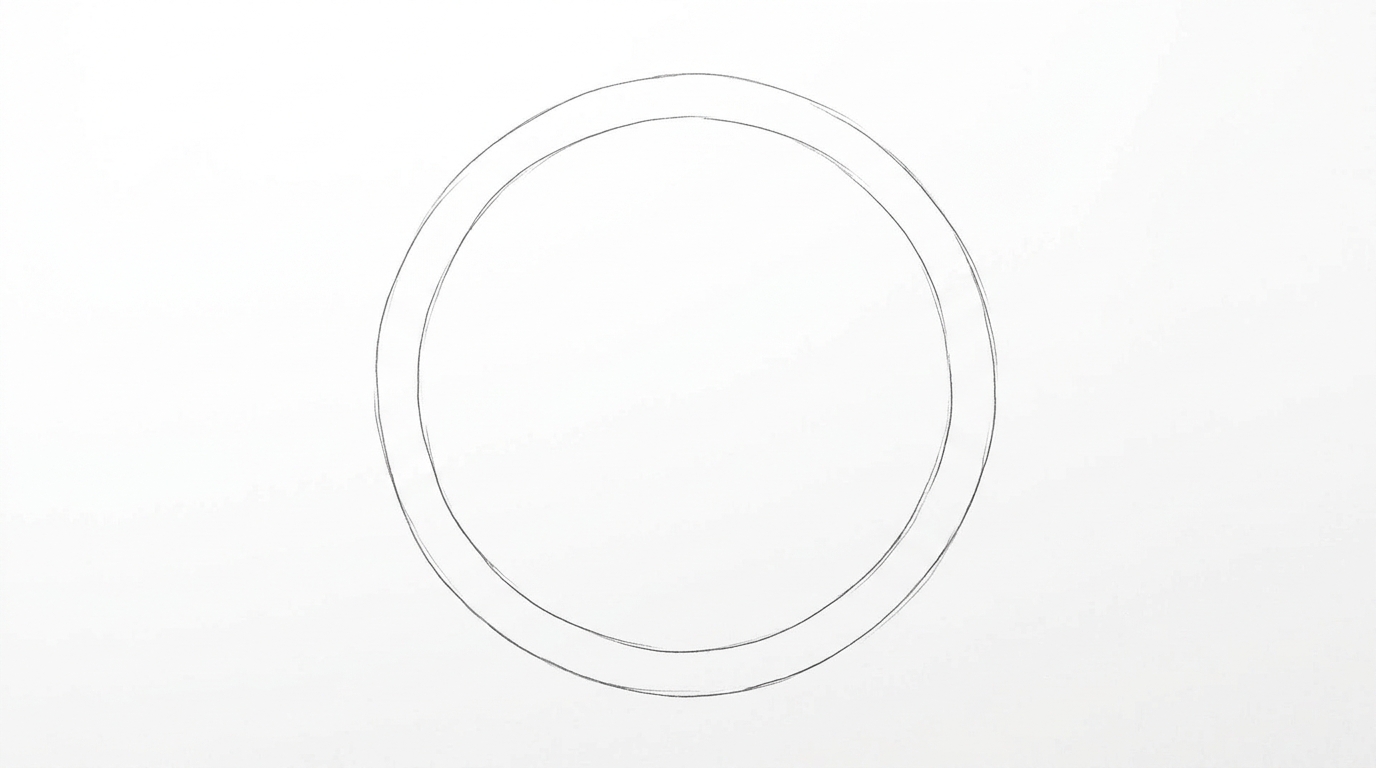
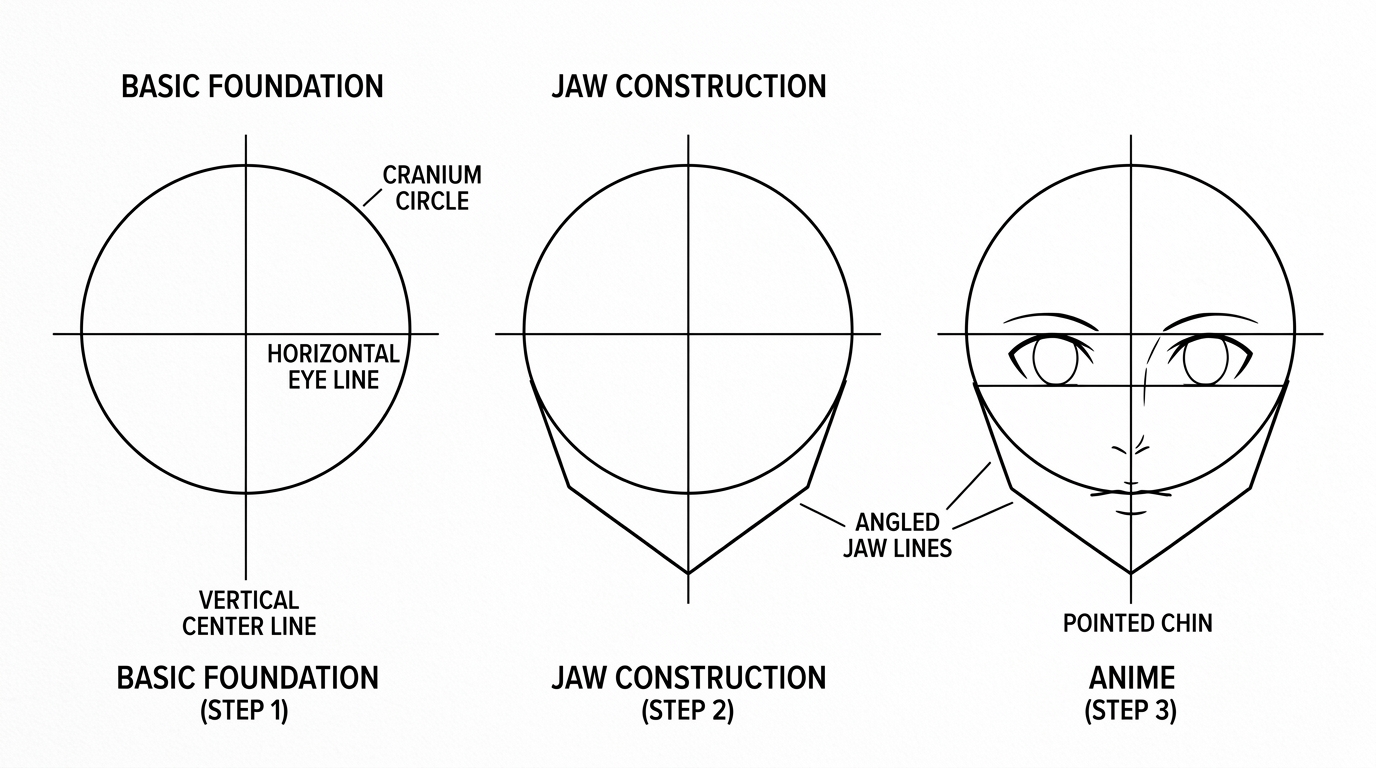
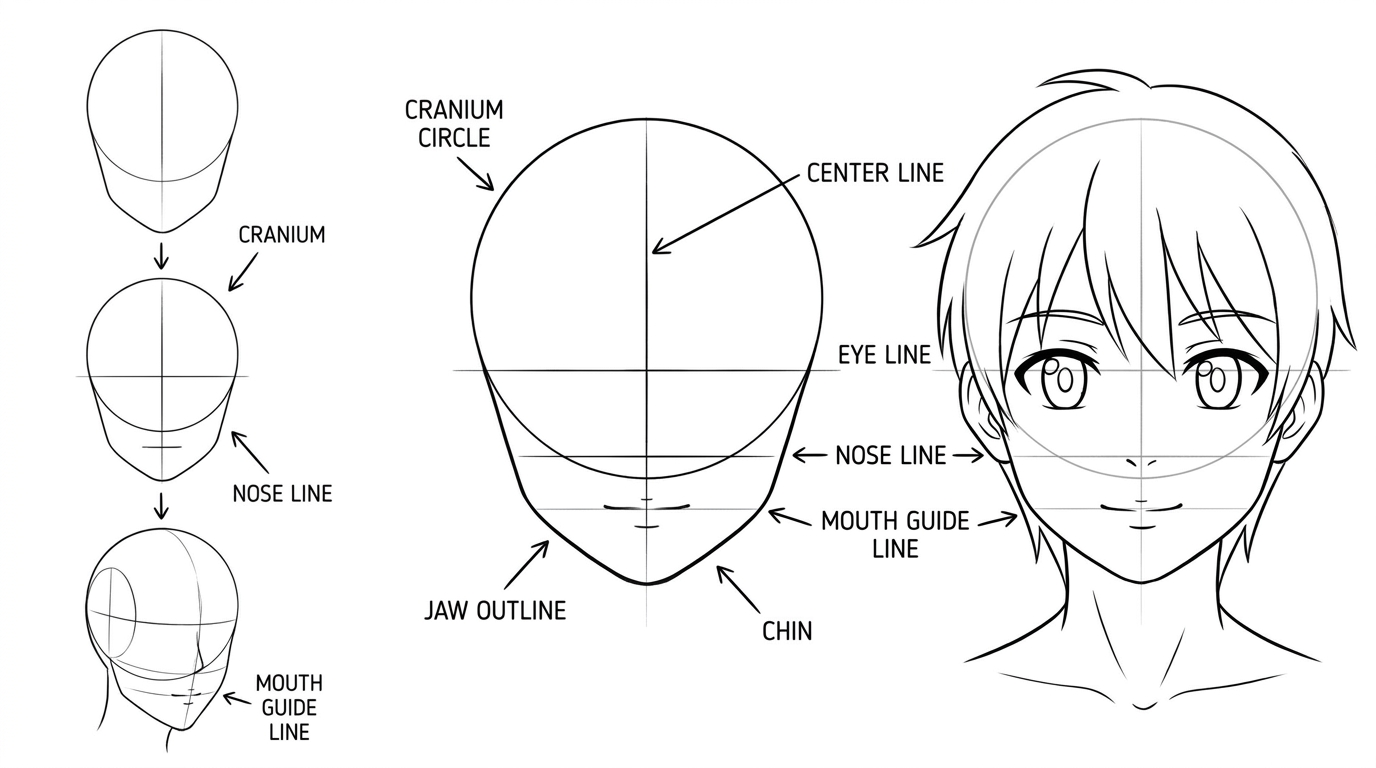
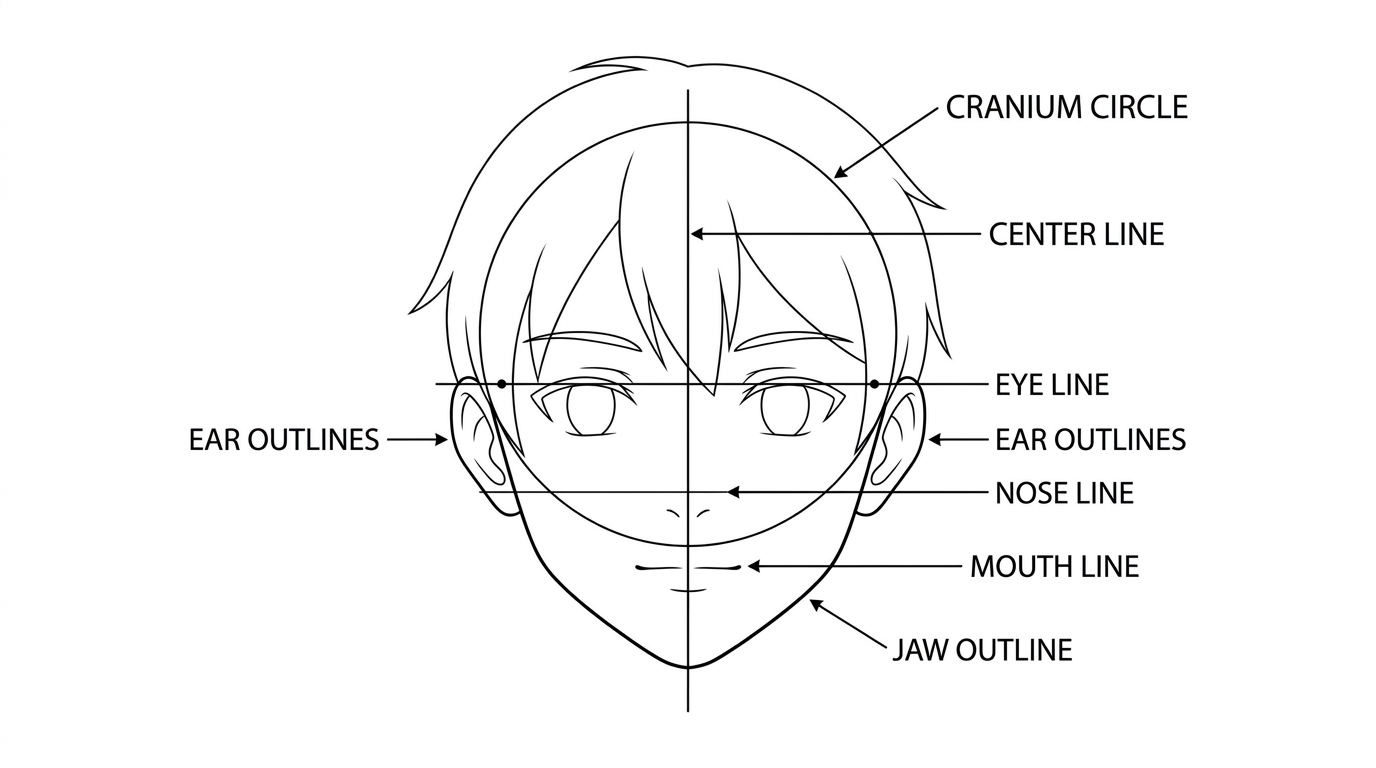
Step 1: Draw the Cranium Circle
Start with a large circle. This represents the upper cranium. Don’t worry about being perfect — a slightly imperfect circle gives the face character.
Step 2: Add the Vertical Center Line
Draw a vertical line straight through the center of the circle, extending below it. This is your symmetry guide.
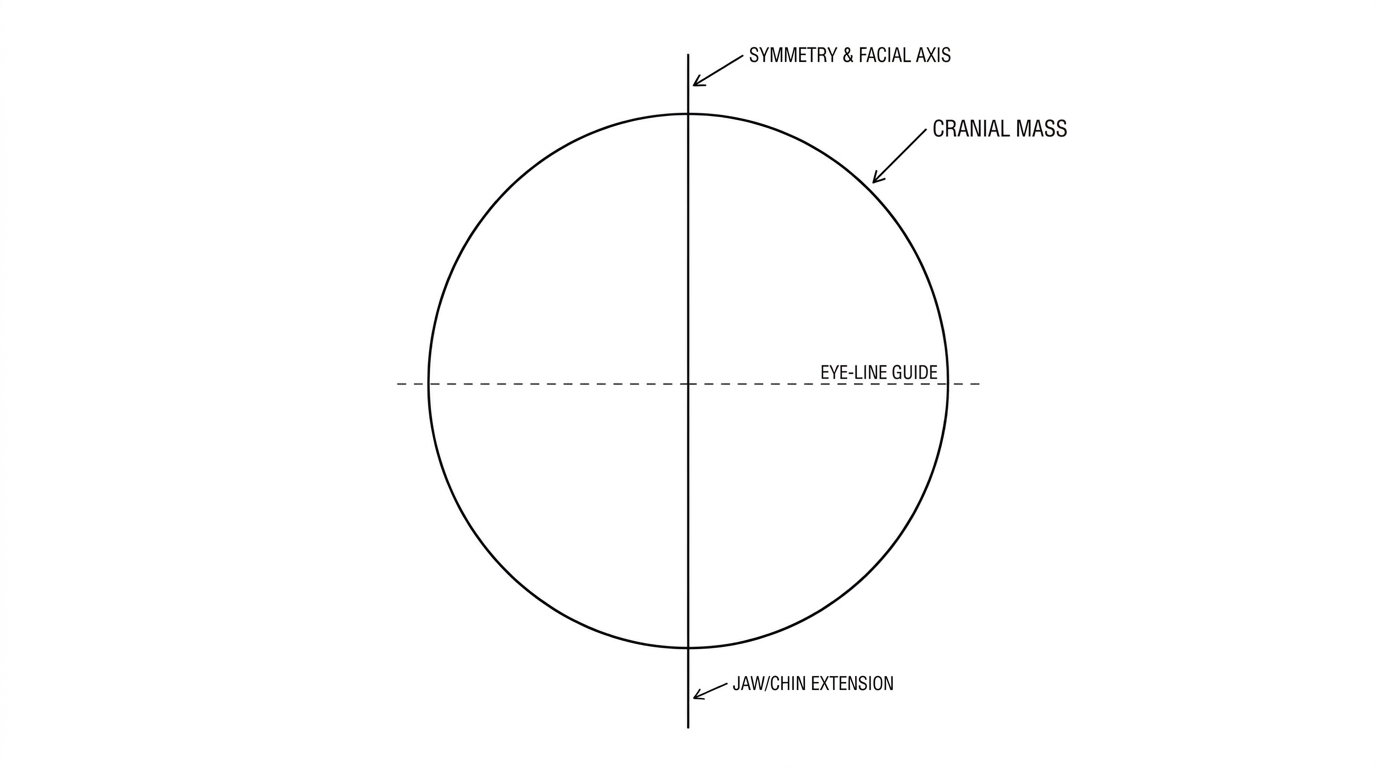
Step 3: Add the Horizontal Eye Line
Draw a horizontal line at the center of the circle. This establishes the halfway line of the total head height, which is where the eyes will sit.
Key rule: In anime, eyes sit at the halfway point of the total head height.
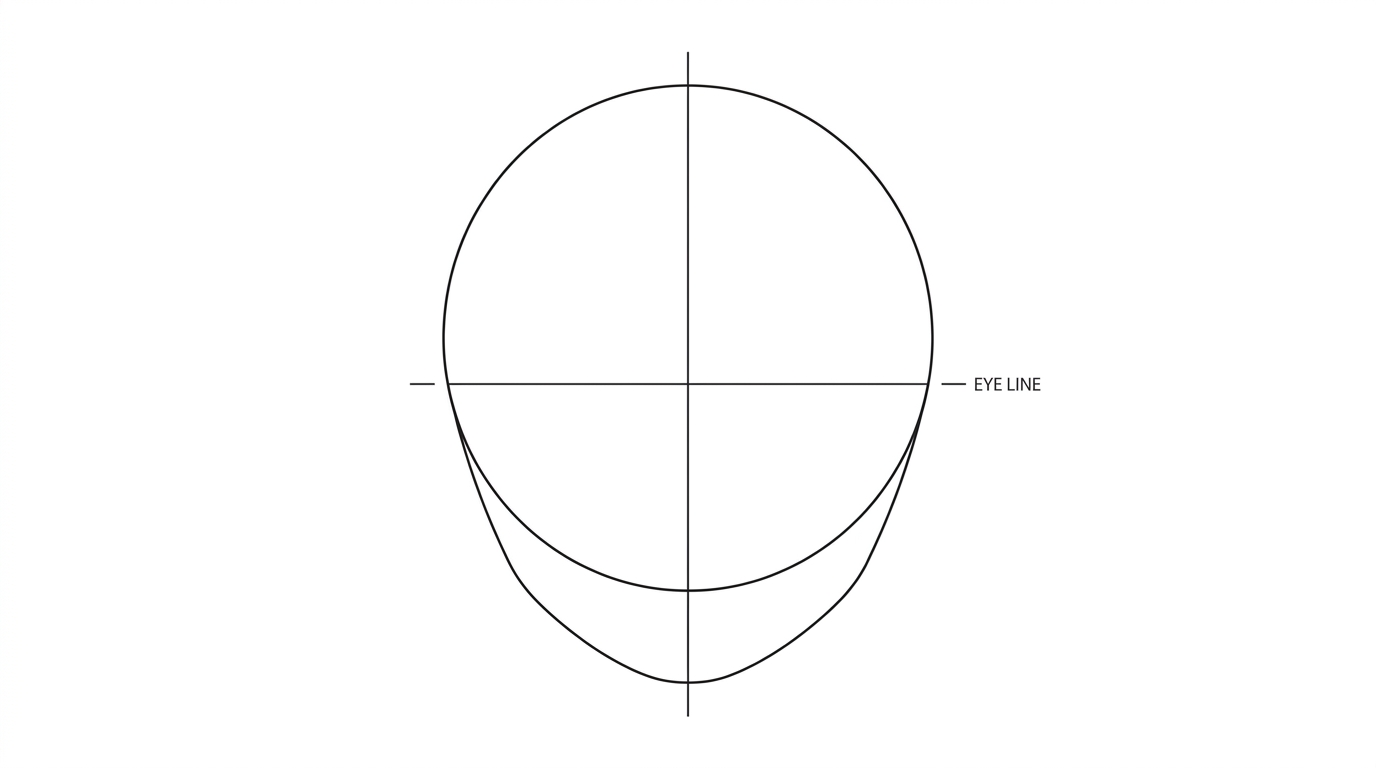
Step 4: Shape the Jaw
From where the circle’s sides meet the horizontal guideline, draw two angled lines meeting at a point below to form the jaw and chin. Female jaws tend to be softer and more curved; male jaws have sharper angles.
Step 5: Draw the Neck
Draw two vertical lines extending down from the jaw to form the neck. Keep the neck relatively slender for standard anime proportions.
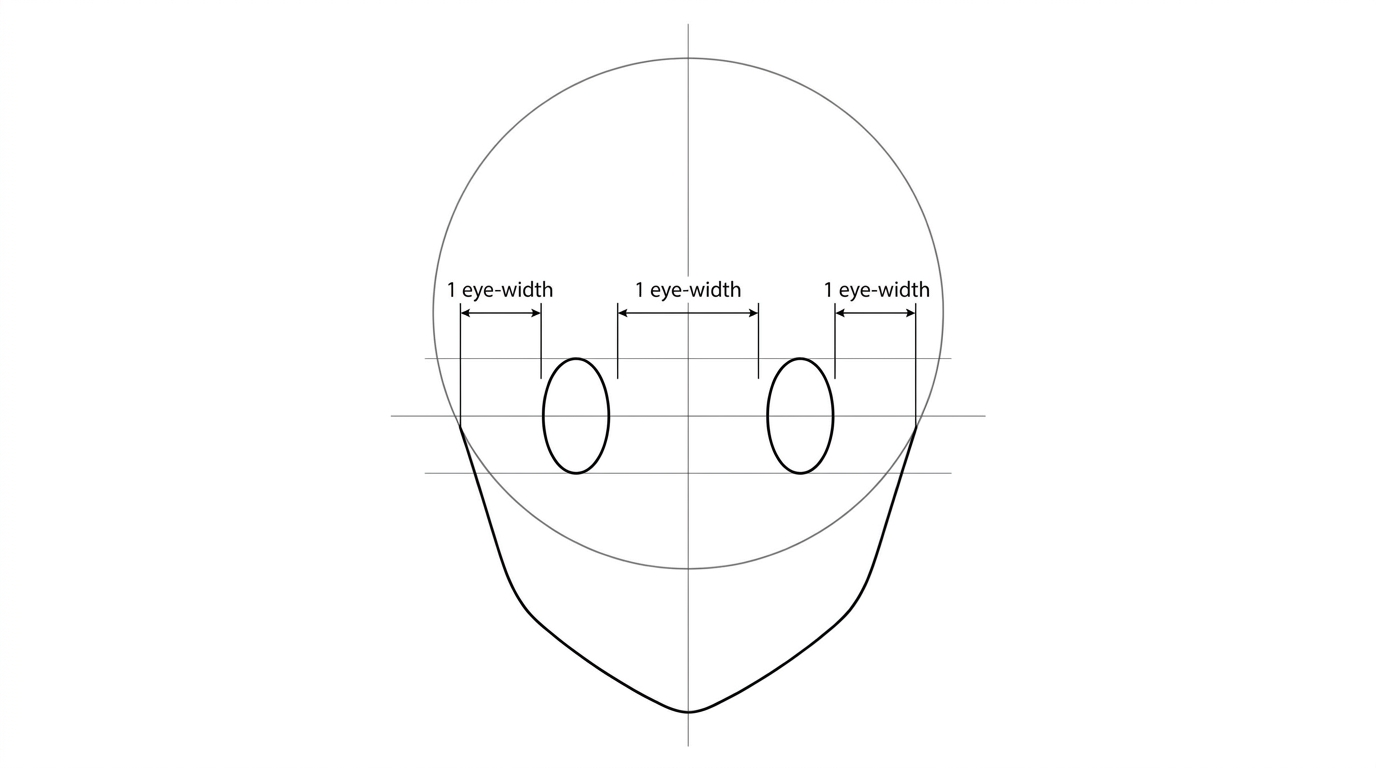
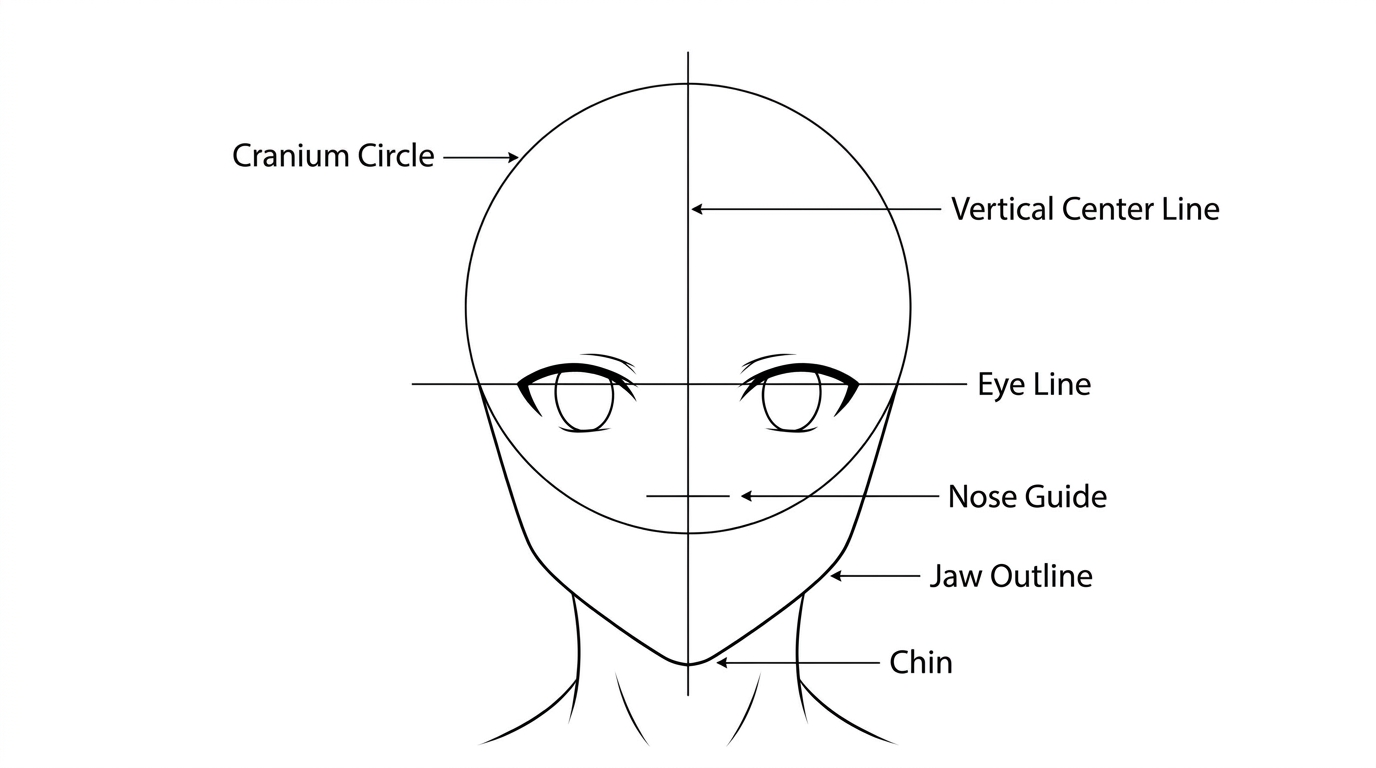
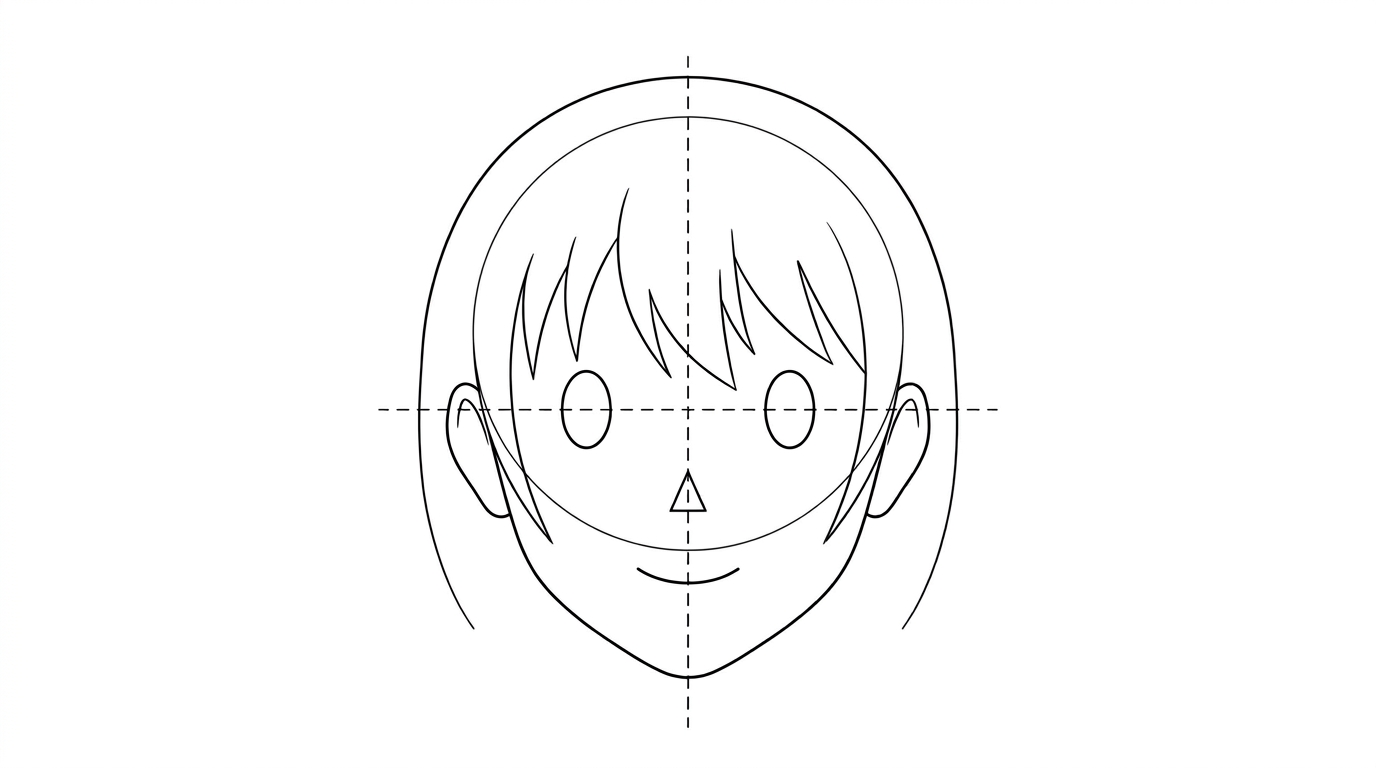
Step 6: Block in the Eye Outlines
Position and sketch the outlines of the eyes on the horizontal guideline. Ensure there is roughly one eye-width of space between them and equal margins on the outer edges.
Step 7: Add Eyebrows, Nose, and Mouth
Sketch the eyebrows slightly above the eyes. Add the nose (a small mark or triangle halfway between the eye line and chin) and the mouth (a simple curved line halfway between the nose and chin).
Step 8: Draw the Ears
Add the ears on the sides of the head. Their height should align between the horizontal eye guideline and the nose position.
Step 9: Outline the Hair
Draw the hair contour. Remember that anime hair has volume and sits slightly above the cranium circle, rather than hugging it flatly.
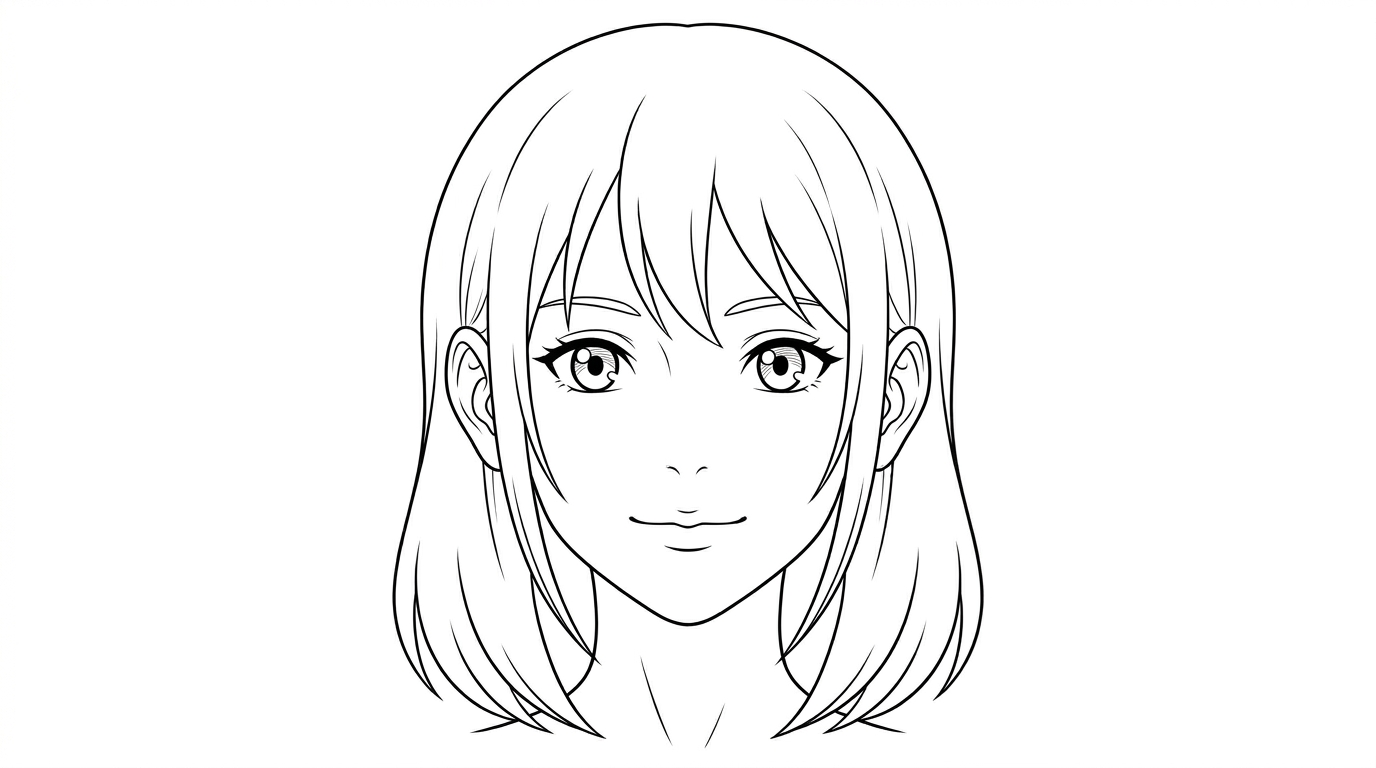
Step 10: Clean Up and Refine
Erase all construction guidelines, darken your final lines, and add finishing touches to the eyes and hair to complete the front-facing character head.
Common Mistakes
- Jaw too large or too small — keep checking the circle relationship
- Eyes not on the halfway line — measure carefully
- Features off-center — always check against the vertical line
Practice Advice
Do this construction 30 times from memory. The moment it becomes automatic, your drawing speed will double.