
Drawing Anime Hair — Complete Guide
From basic flow lines to complex multi-layered styles. Learn how anime hair is structured, how to draw its flow and volume, and how to shade it.
Introduction
Anime hair has its own visual logic — it follows gravity, moves as one cohesive mass, and catches light in distinctive highlight streaks. This tutorial breaks down the system.
What You’ll Learn
- How to think of hair in sections/chunks
- Drawing the hairline and part
- Flow lines for different hair lengths
- Long, medium, and short hair techniques
- Adding volume and depth
- The signature anime hair highlight streak
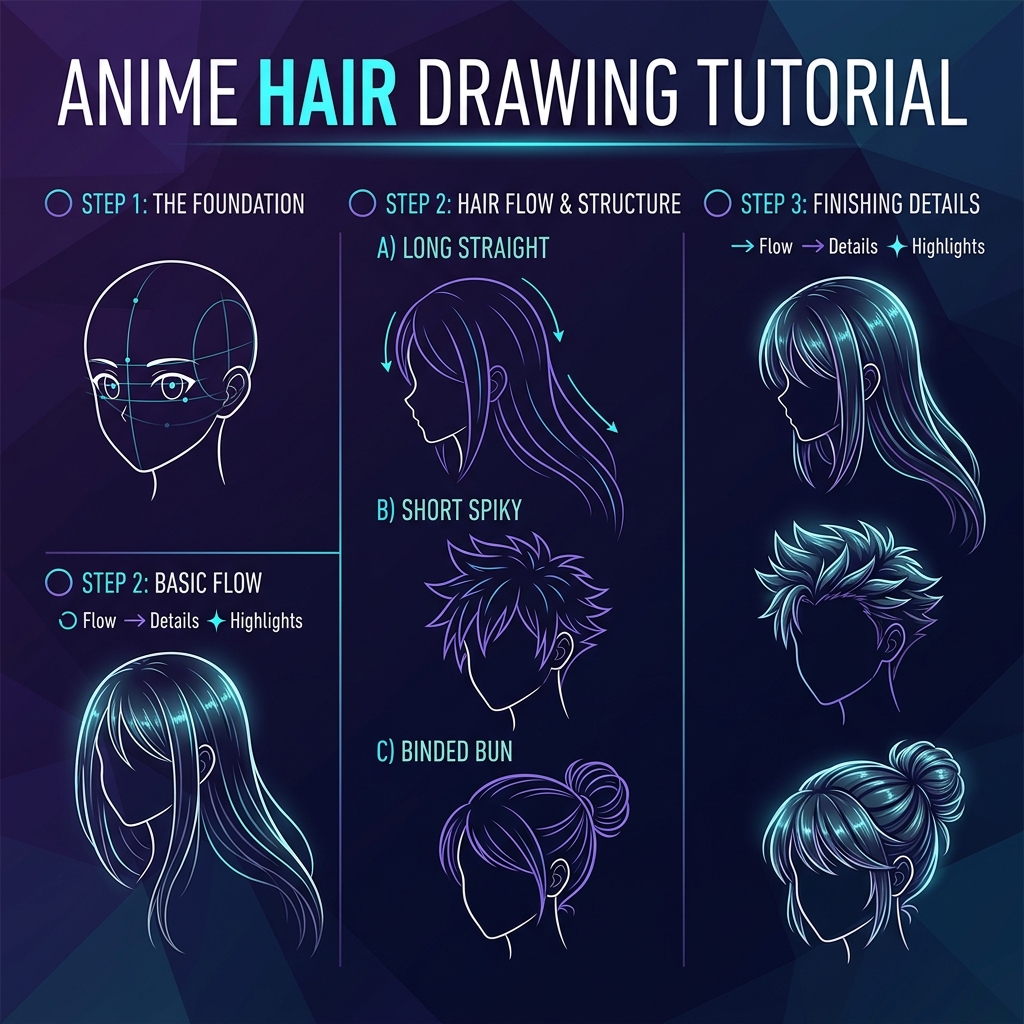
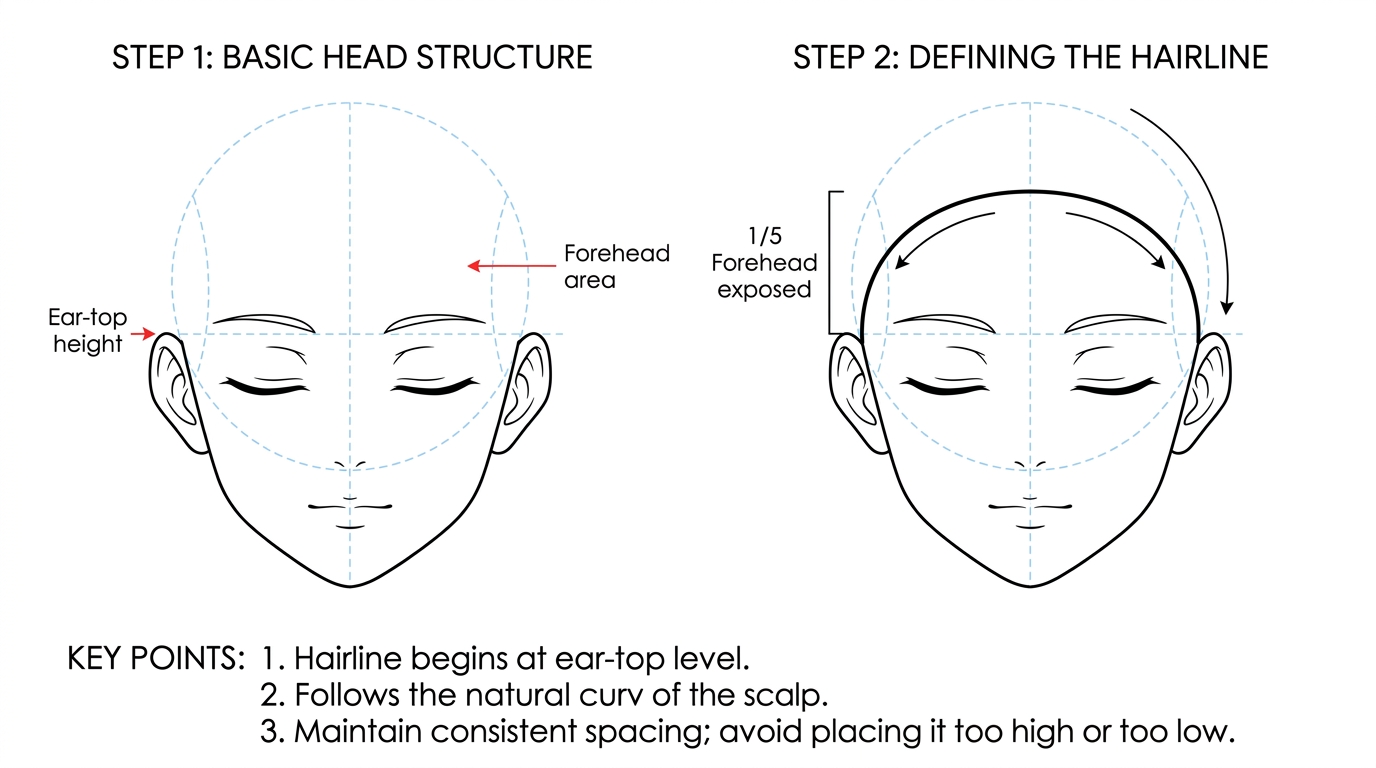
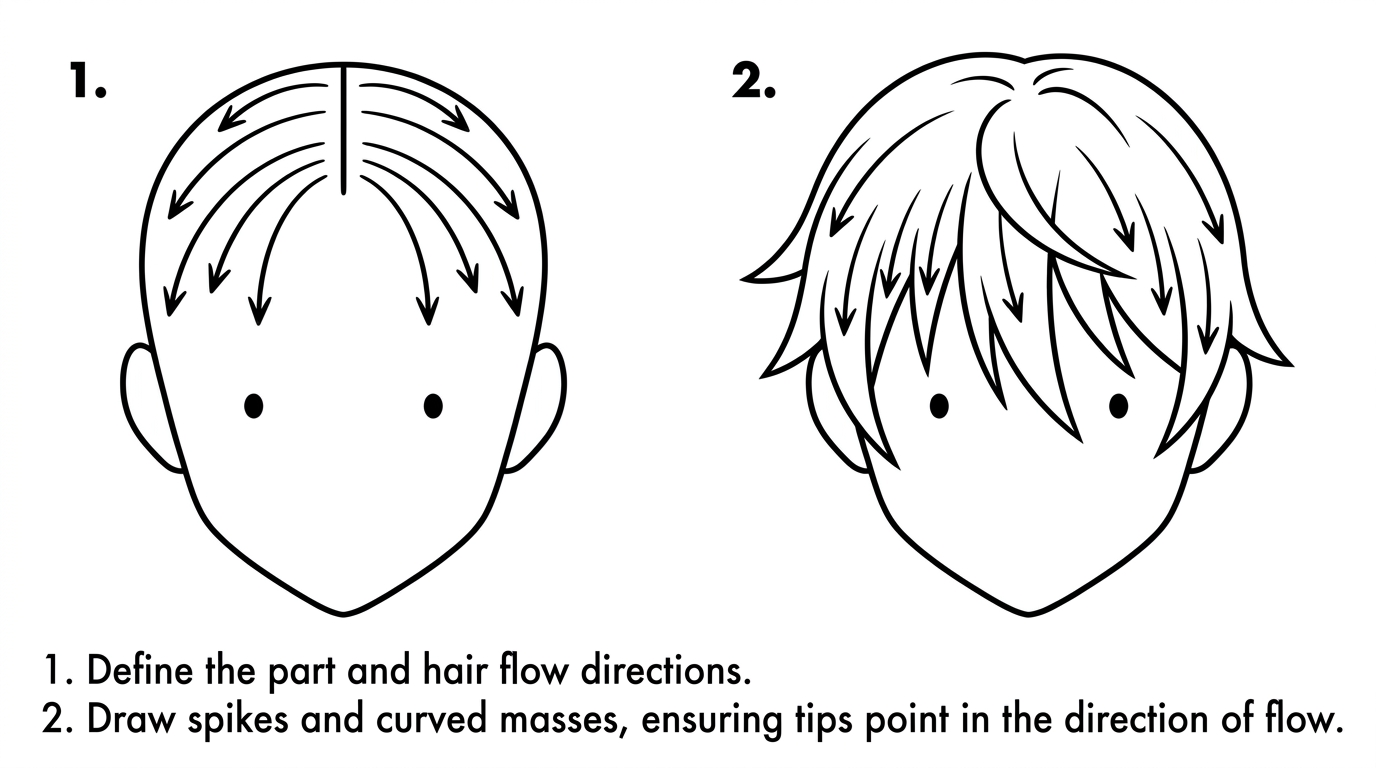
Step 1: Establish the Hairline
Draw the hairline on the forehead. It starts at the sides of the head, roughly at the top of the ears, and curves across the top. Leave about 1/5 of the forehead exposed.
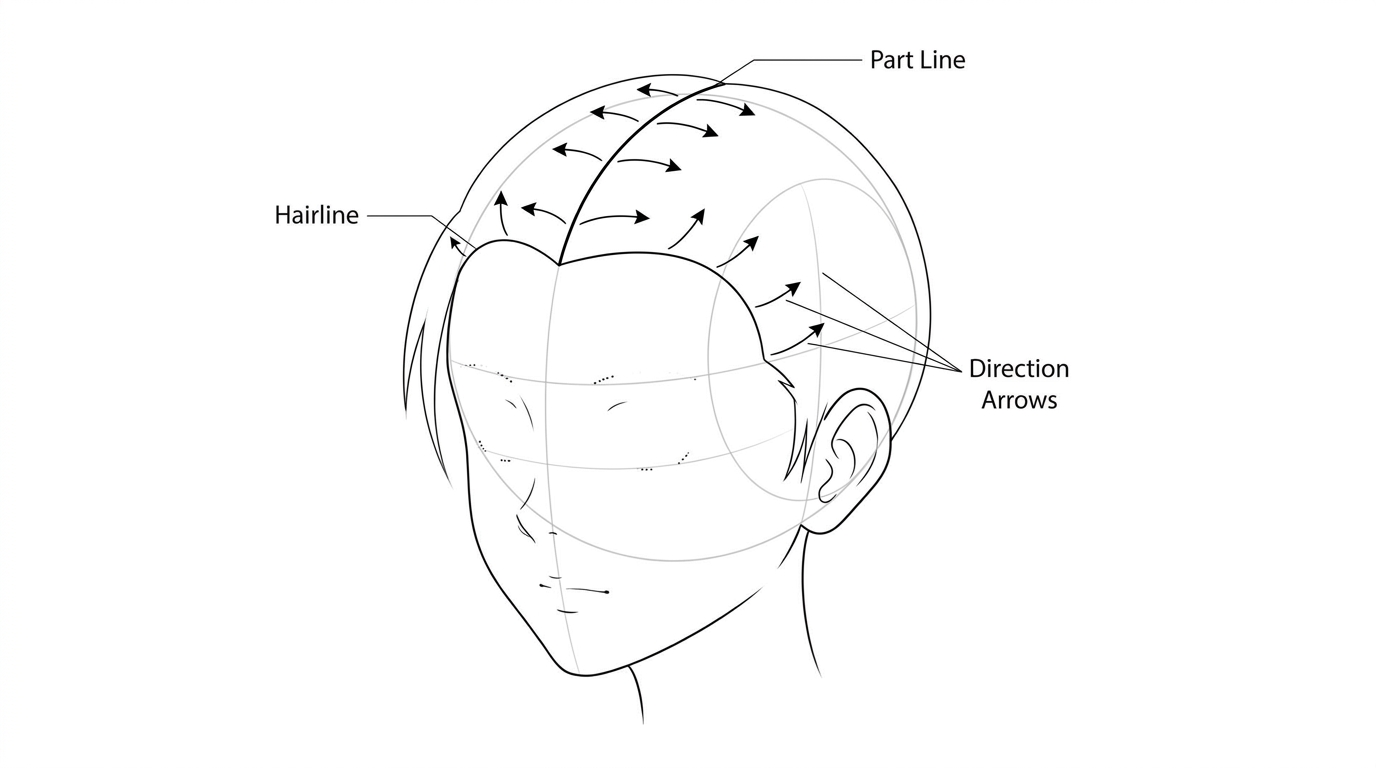
Step 2: The Part
Decide where the part is. Draw a clean line from the hairline at the part. All hair flows away from this point.
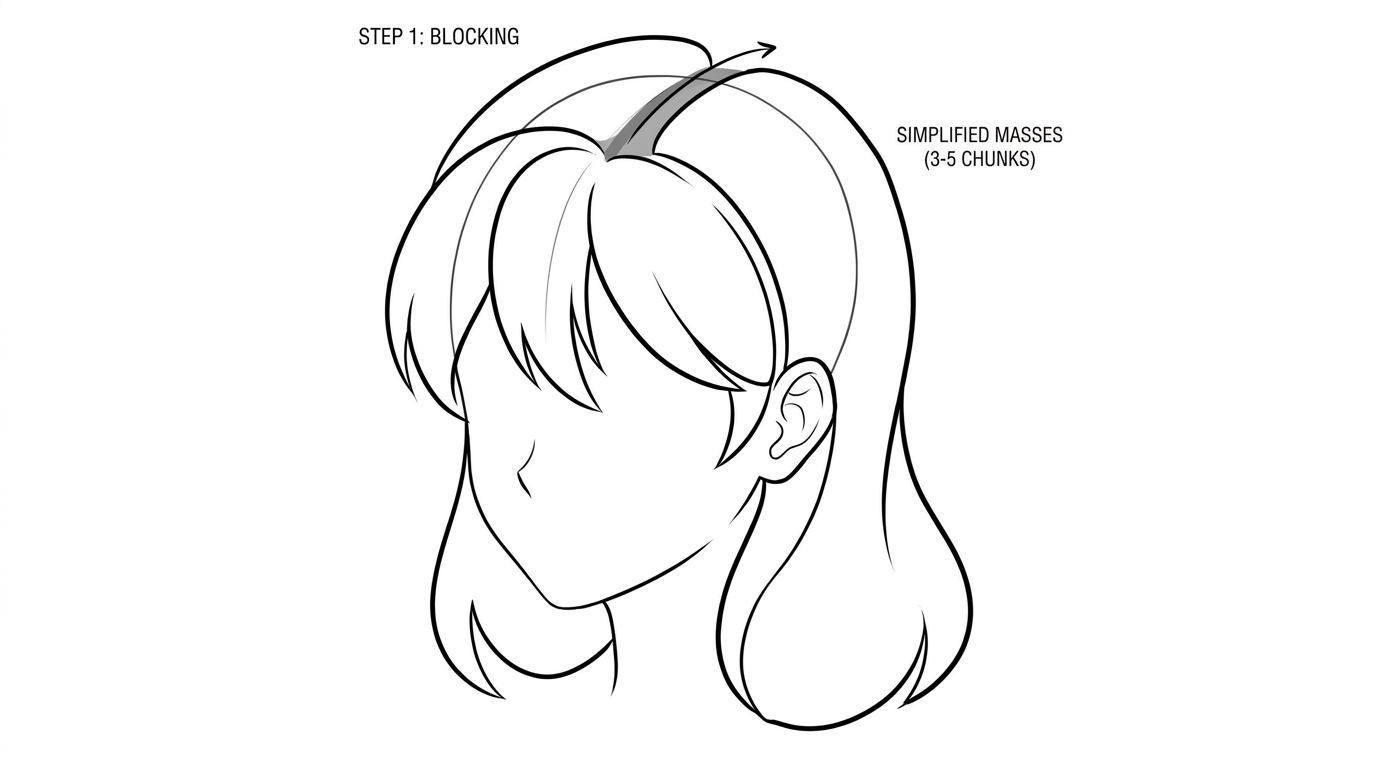
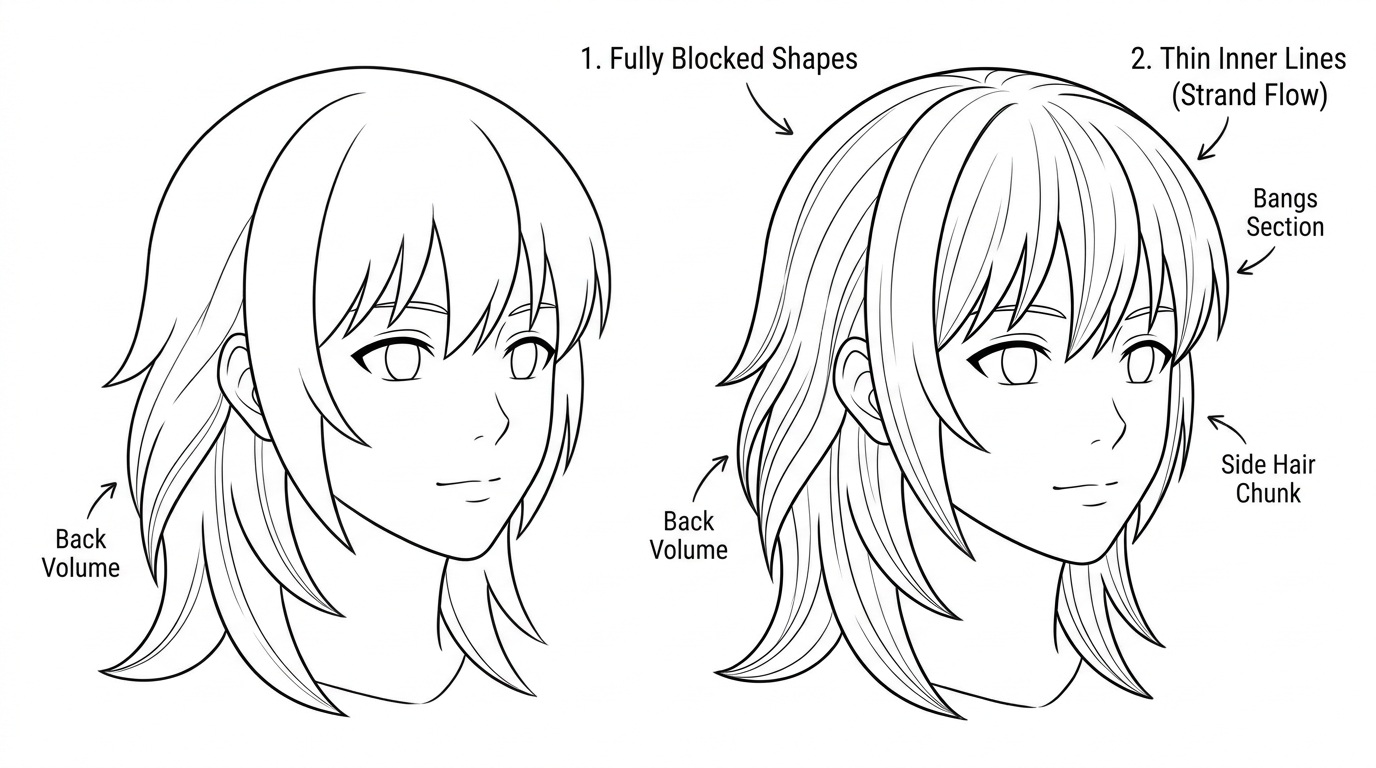
Step 3: Think in Chunks
Don’t draw individual strands. Think of hair as 3-5 large chunks/sections that flow together. Draw the outer silhouette of each chunk first.
Step 4: Fringe/Bangs
Bangs fall from the part and drape over the forehead. Draw them as triangular spikes or curved masses. The tips of each spike should point in the direction of flow.
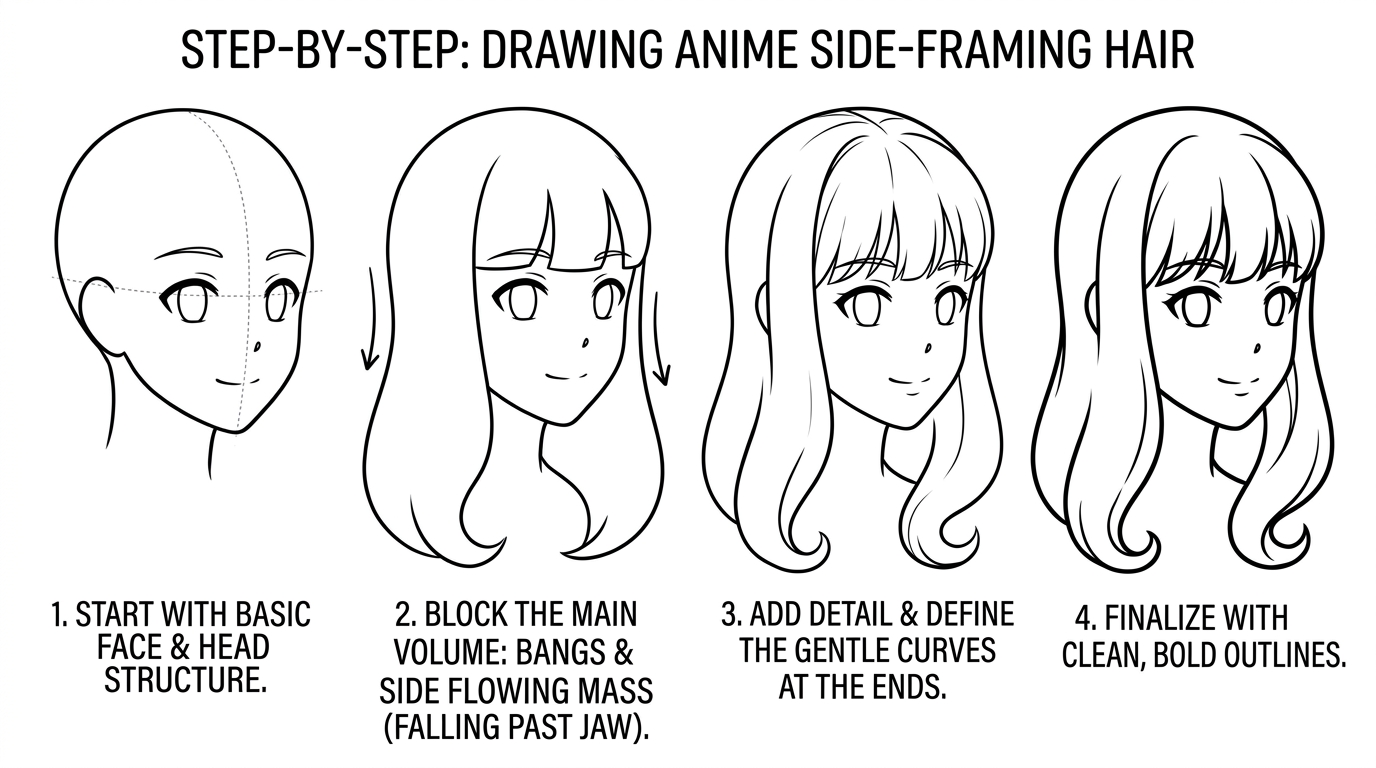
Step 5: Side Hair
Side hair frames the face. For long hair, it falls straight down or curves around the jaw. Draw it as one smooth flowing mass with slight curves at the ends.
Step 6: Back Hair
For long hair, the back mass is the largest chunk. It flows down and slightly flares at the ends. Keep the silhouette interesting — irregular tips add realism.
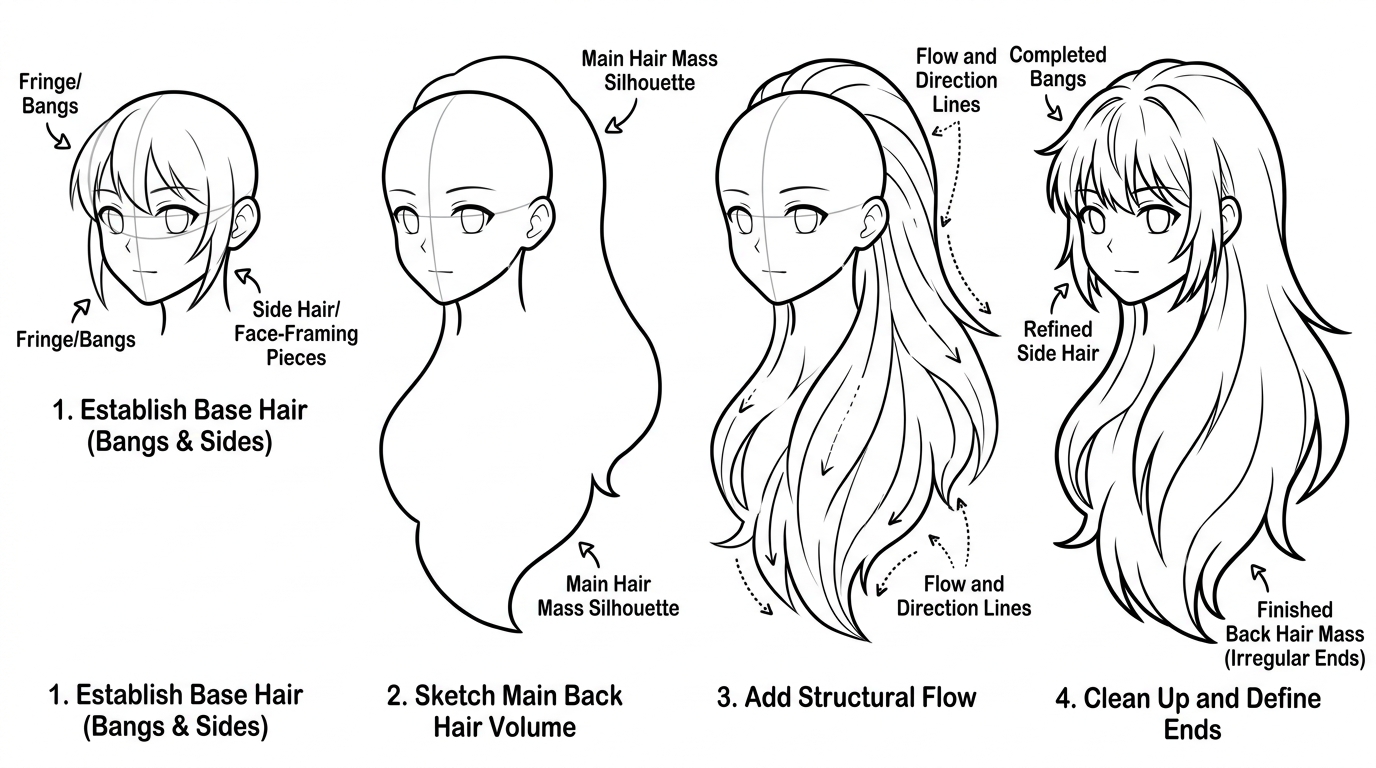
Step 7: Inner Lines
Add 2-3 lines inside each chunk to suggest individual strands. These should flow parallel to the outer edge of the chunk.
Step 8: Flyaways
A few random stray hairs at the silhouette edge add life. Keep them sparse — 2-3 total.
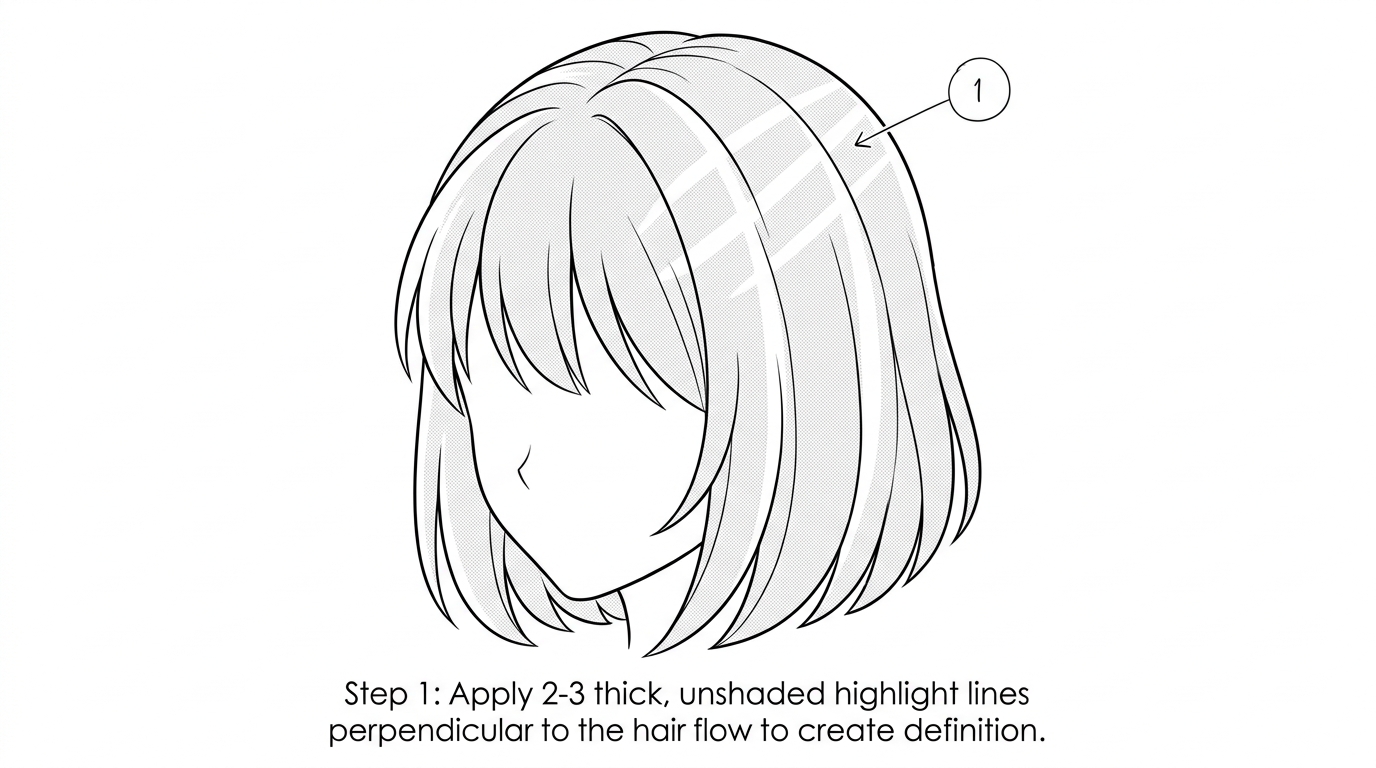
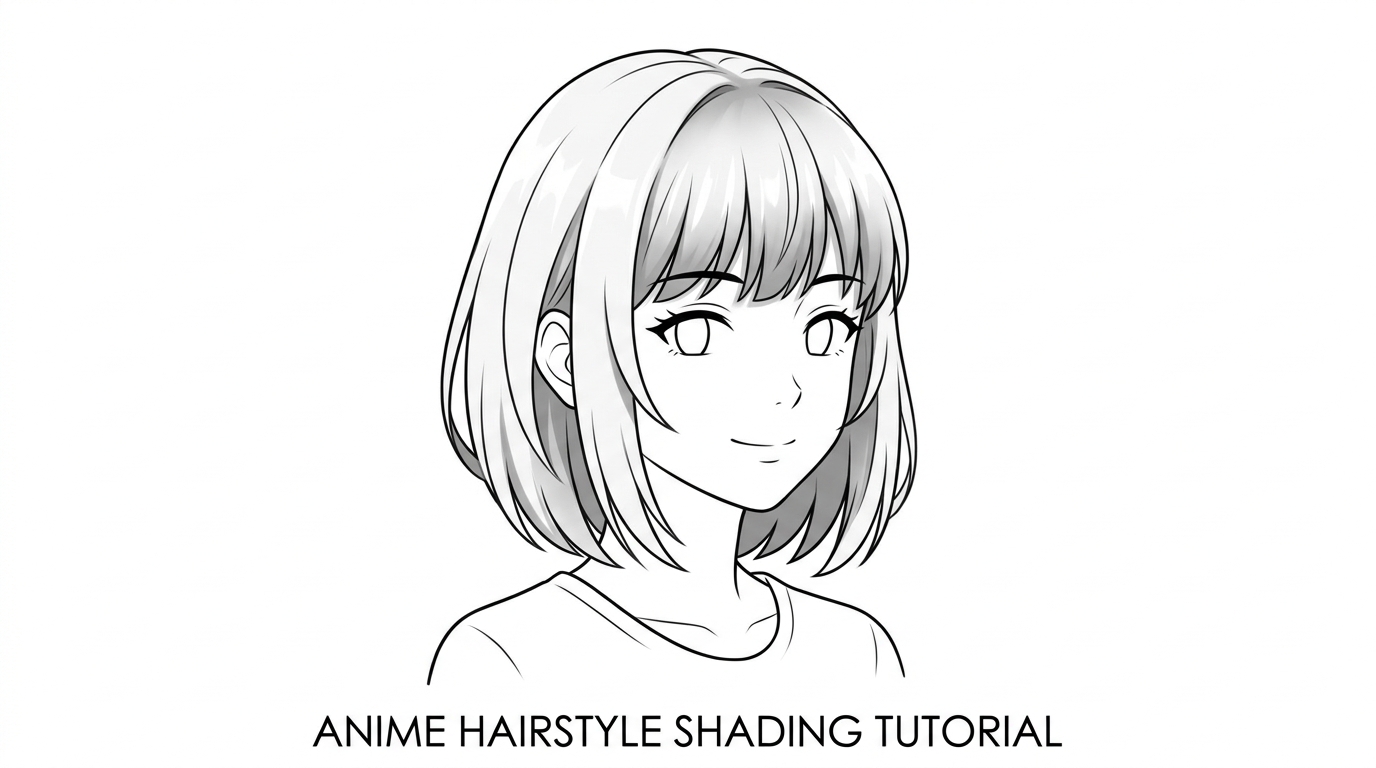
Step 9: Highlight Placement
The main highlight streak runs across the top of the hair, perpendicular to the flow. It’s usually 2-3 thick diagonal lines.

Step 10: Shadow Areas
Shadow falls at the bottom of chunks and where they overlap. Add soft shading at the base of the bangs and under the top layer.
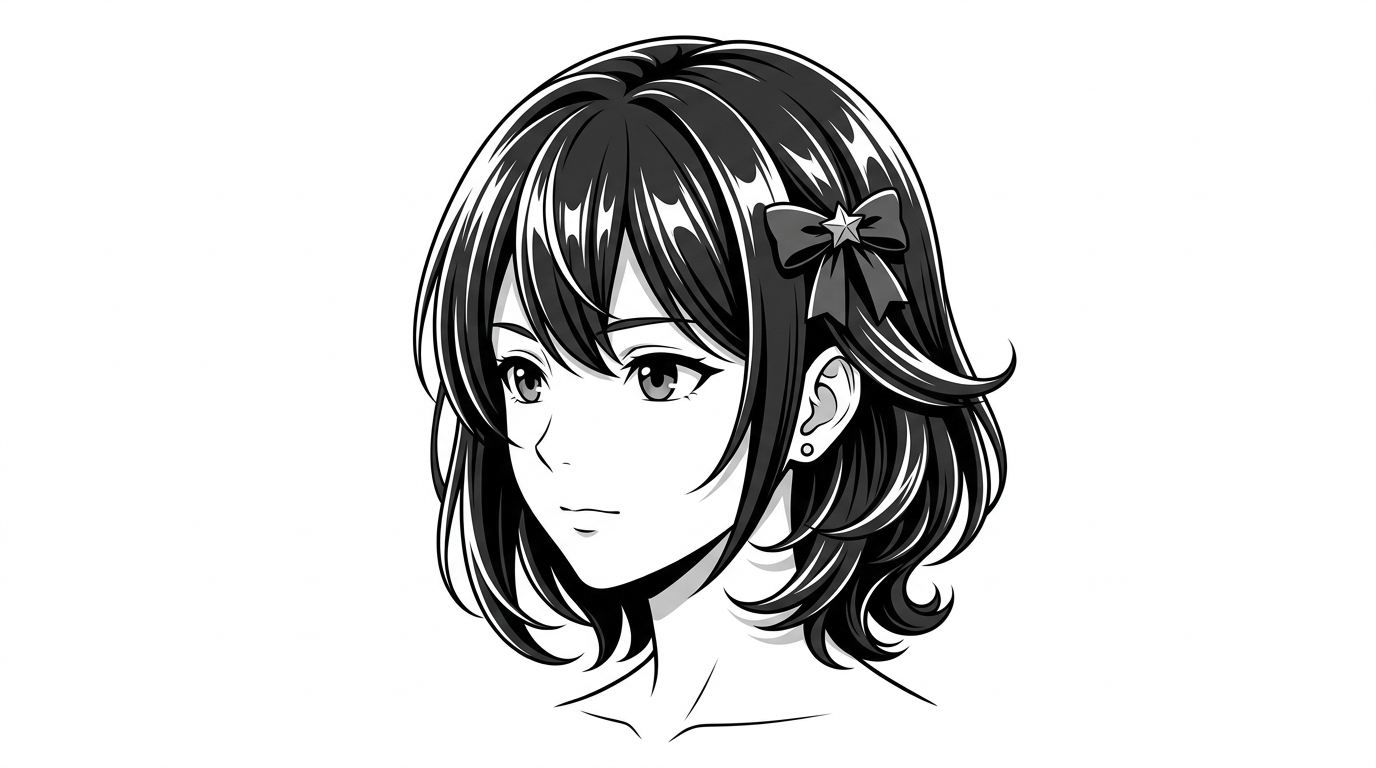
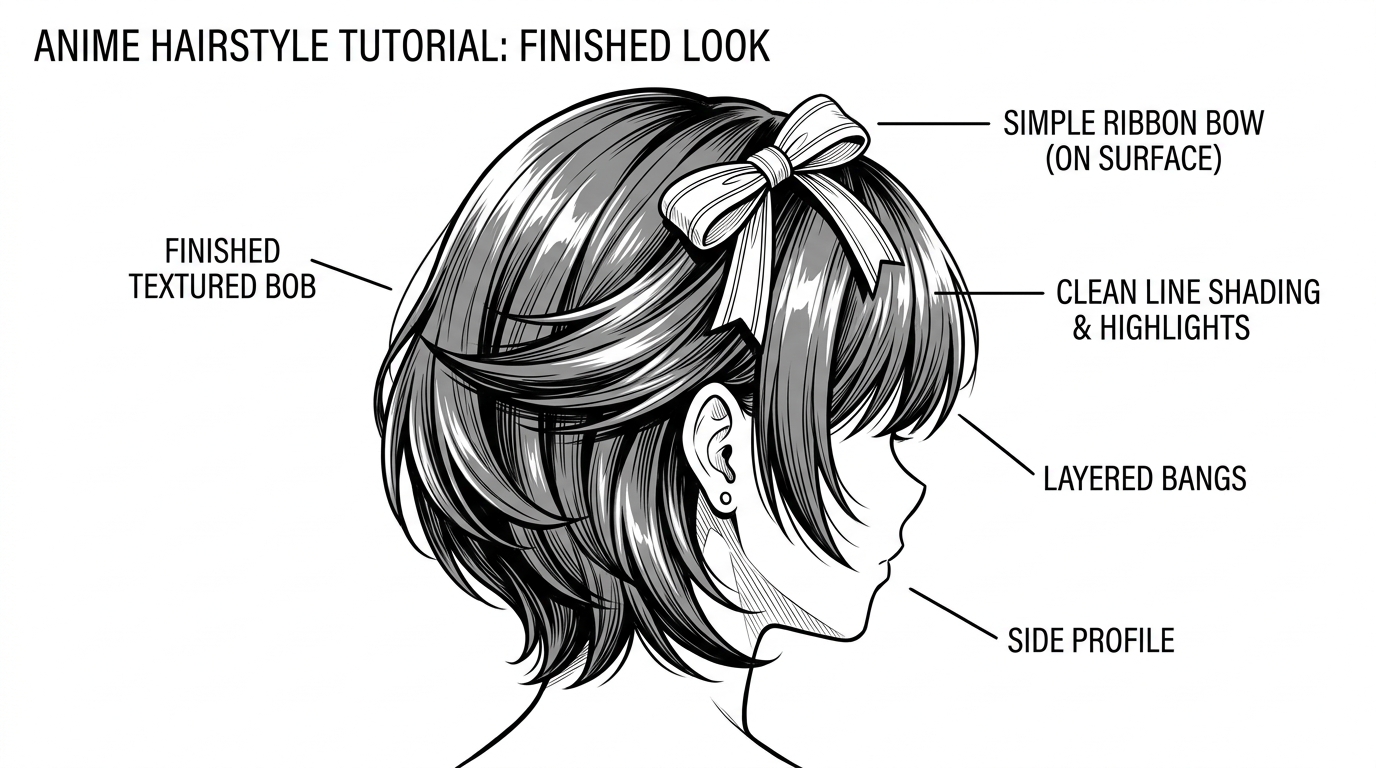
Step 11: Hair Accessories
If adding accessories (ribbons, clips, hairbands), draw them on top of the hair mass — they sit on the surface, not inside.
Step 12: Final Cleanup
Refine the silhouette, clean up inner lines, and make sure highlights are clean white.
Common Mistakes
- Too many individual strands — draw chunks first, details last
- No highlights — highlights are essential for anime hair
- Stiff, rigid ends — let the ends taper and curve naturally
- Hair ignoring gravity — unless styled otherwise, hair falls down
Practice Advice
Study 10 different anime characters’ hair before drawing. Note how the artist breaks it into chunks.