
How to Shade Anime Faces
Learn professional anime face shading from the ground up. Master cel-shading, soft shading, rim light, and ambient occlusion to give your characters dimension and atmosphere.
Introduction
Shading is what separates a flat character design from a character that reads as a real person standing in a real space. In anime, shading sits in an interesting middle ground: it is simpler than realistic rendering but more deliberate than flat colour. A well-shaded anime face uses a small number of shadow shapes, placed with intention, to create volume, mood, and focal hierarchy.
This tutorial teaches the shading system used across most modern anime and manga illustration. You will learn where the shadow shapes go, how to decide on a light direction, how to use shadow to draw the eye to the most important part of the face, and how to finish a shaded face with rim light and ambient occlusion.
What You’ll Learn
- How to choose and lock a light direction
- The five core shadow shapes on the anime face
- Cel-shading vs soft shading: when to use each
- How to shade eyes so they look alive
- Rim light and its role in separating the character from the background
- Ambient occlusion in the corners of the face
- Shading for front, 3/4, and profile views
- How to build a complete shaded face step by step
Step 1: Choose and Lock a Light Direction
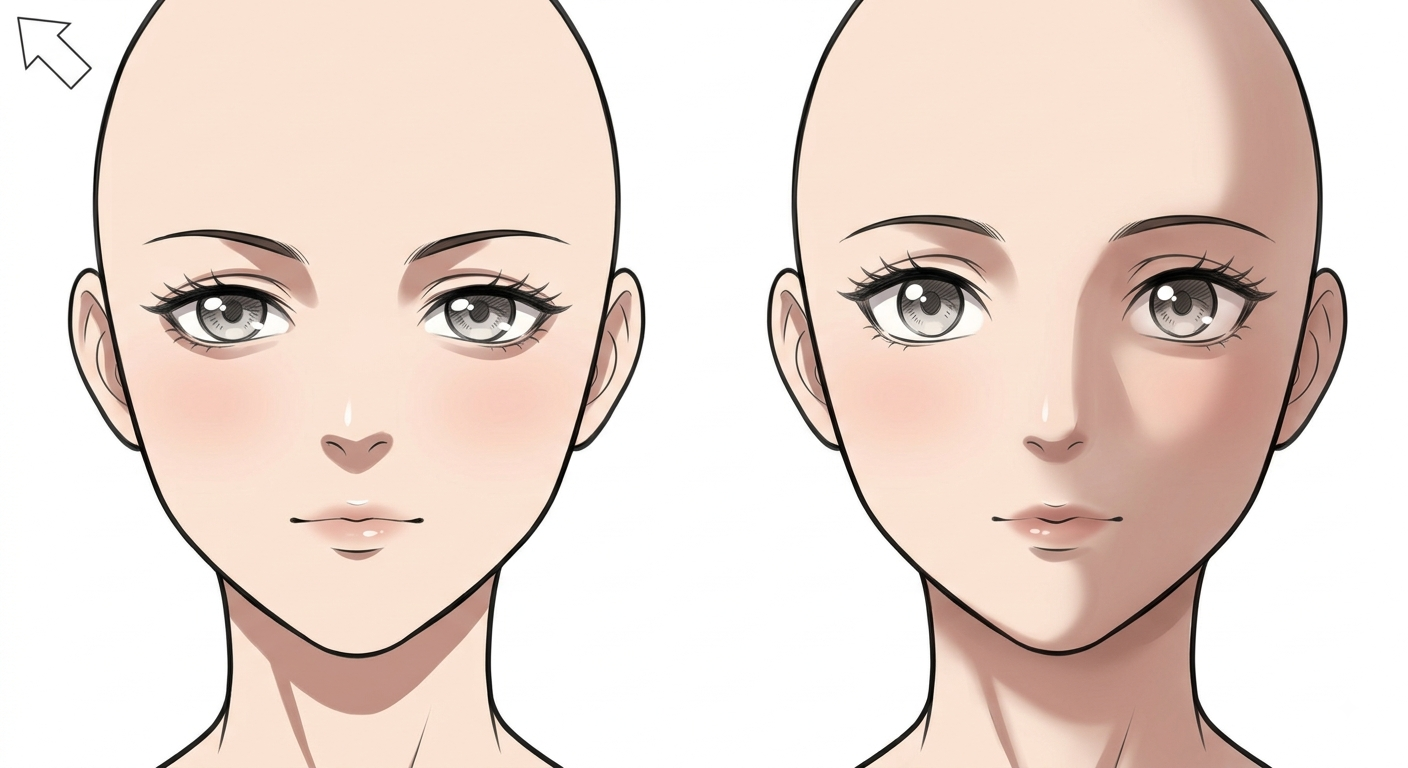
Before shading anything, decide where the light is coming from. The most common setup in anime illustration is a light source coming from the upper front-left of the character. This lights the face evenly, creates a natural shadow under the brow and nose, and leaves the right side of the face in soft shadow.
Once you choose a direction, stick to it for the entire drawing. Inconsistent light is the most common shading mistake. Every shadow shape you draw — under the brow, under the nose, along the jaw — should fall on the same side relative to the light source. If you are drawing a close-up portrait, you can afford to be more dramatic with the light angle. For a standard panel illustration, keep it simple and consistent.
Tip: Draw a small arrow in a corner of your sketch layer pointing toward the light source. It takes two seconds and prevents half your shading errors.
Step 2: Identify the Five Core Shadow Shapes
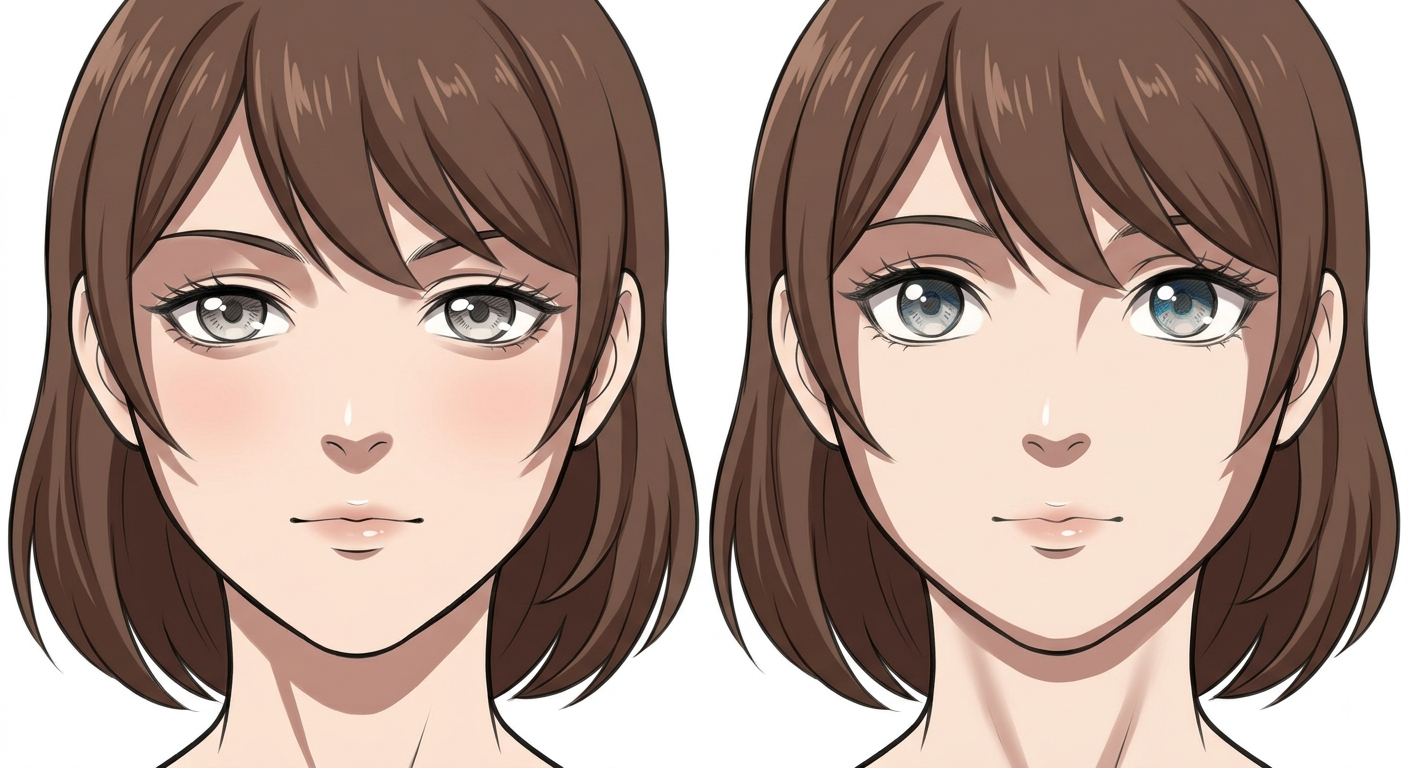
On a standard anime face with light from upper-front-left, you will use five shadow shapes:
- Brow shadow — a shadow cast downward from the upper eyelid and brow ridge onto the eyeball. This is the most important shadow on the face because it gives the eye volume.
- Nose shadow — a small triangular or crescent shadow under the nose tip, cast onto the upper lip.
- Under-chin shadow — a soft shadow under the jawline, connecting to the neck shadow.
- Hair shadow — the underside of the hair mass casts shadow down onto the forehead and the side of the face. This shadow shape is larger than the others and sets the overall tone of the face.
- Neck shadow — the shadow where the jaw meets the neck, often a soft cone of darkness.
In front view these shapes are simple and symmetrical. In 3/4 and profile they shift and compress, but the same five shapes are always present.
Step 3: Apply the Base Shadow Layer
Lock your line-art layer and create a new layer below it for the base shadow. Using a soft round brush at low opacity (15–30%), fill in the shadow shapes with a colour slightly darker than the base skin tone. For warm skin tones, add a small amount of cool blue or purple to the shadow colour. This shift — warm lights, cool shadows — is what gives anime skin its characteristic luminous quality.
The brow shadow is applied first because it sits on the eyeball itself. Paint a soft dark shape under the upper lid, heavier on the side opposite the light source. The nose shadow is a small crescent under the nose tip. The hair shadow falls from the hair mass onto the forehead and the side of the face.
Keep the shadow edges soft in the base layer. Hard edges come later, in the refinement pass.
Step 4: Shade the Eyes
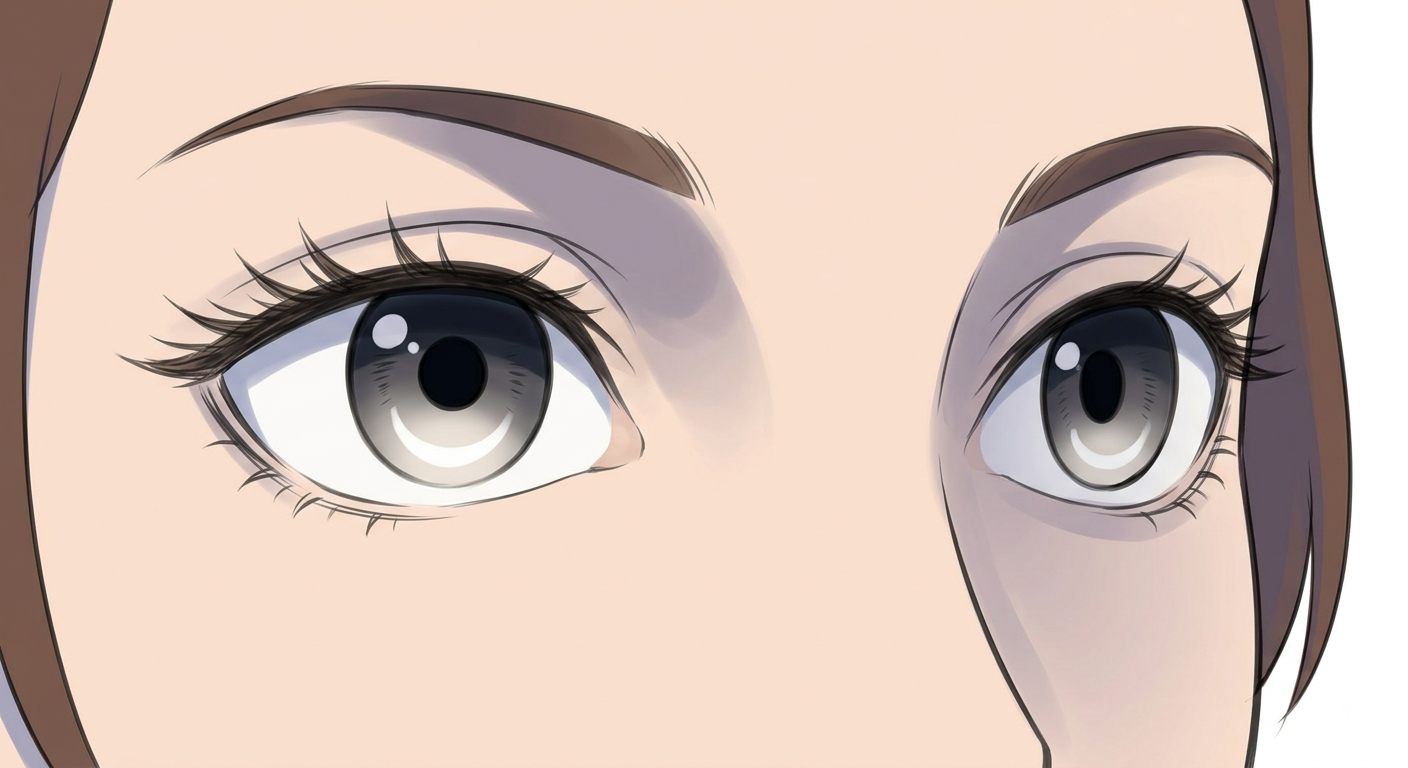
Eyes are the focal point of the anime face and the part that reads as most alive when shaded correctly. The key shading elements for the eye are:
- Upper lid shadow — the bold horizontal band at the top of the iris, cast by the upper eyelid. This is the strongest shadow on the eye and should be the darkest part of the iris.
- Iris gradient — the iris fades from dark at the top to lighter at the bottom, following the same light direction as the face.
- Crescent reflection — the bright semi-circle at the bottom of the iris, opposite the upper shadow. Keep this pure white or very light.
- Sclera shadow — a soft shadow under the upper lid on the white of the eye. This sells the eyeball as a sphere sitting in the socket.
For anime eyes, the pupil stays solid black or very dark. The iris does most of the shading work. The eyebrow casts its own small shadow onto the upper lid.
Step 5: Choose Cel-Shading or Soft Shading
Anime shading broadly falls into two styles, and most artists use both depending on the project.
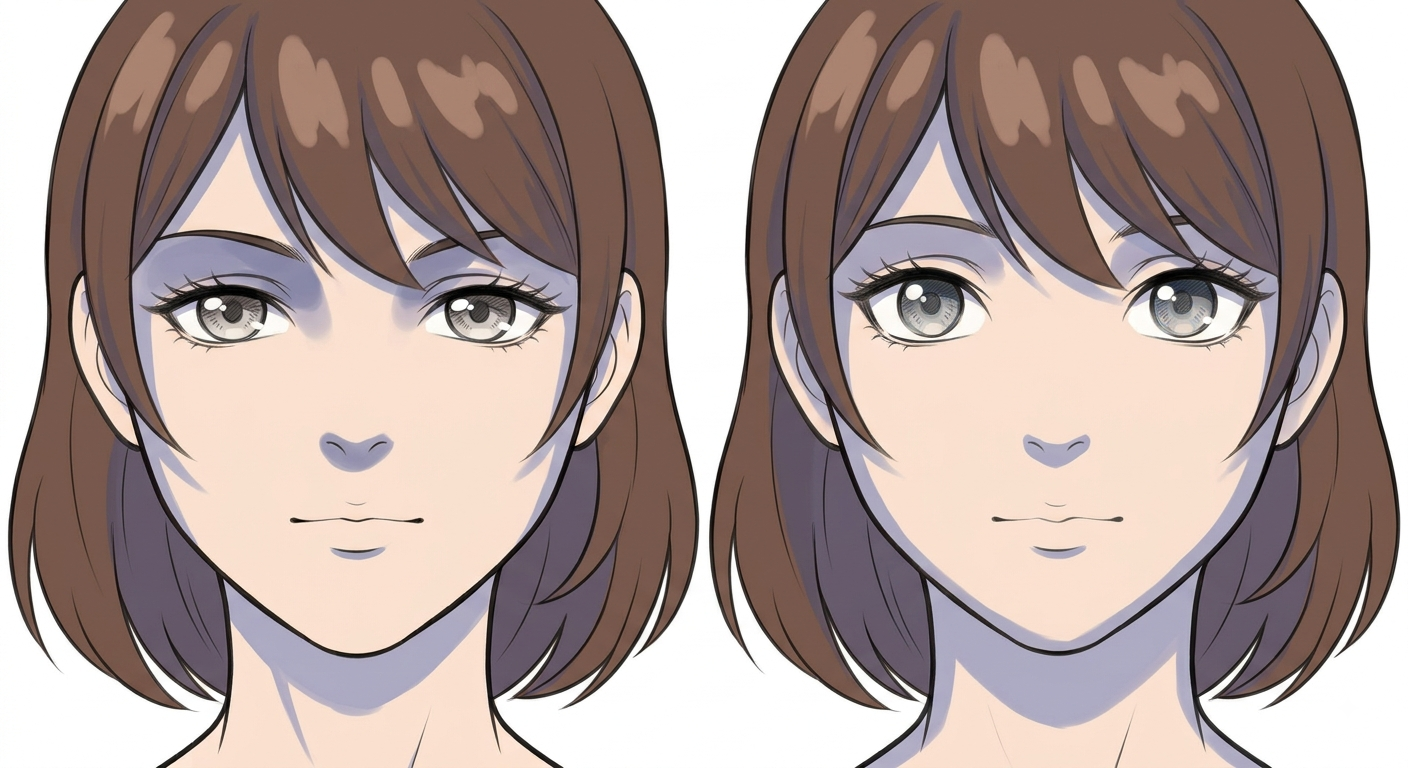
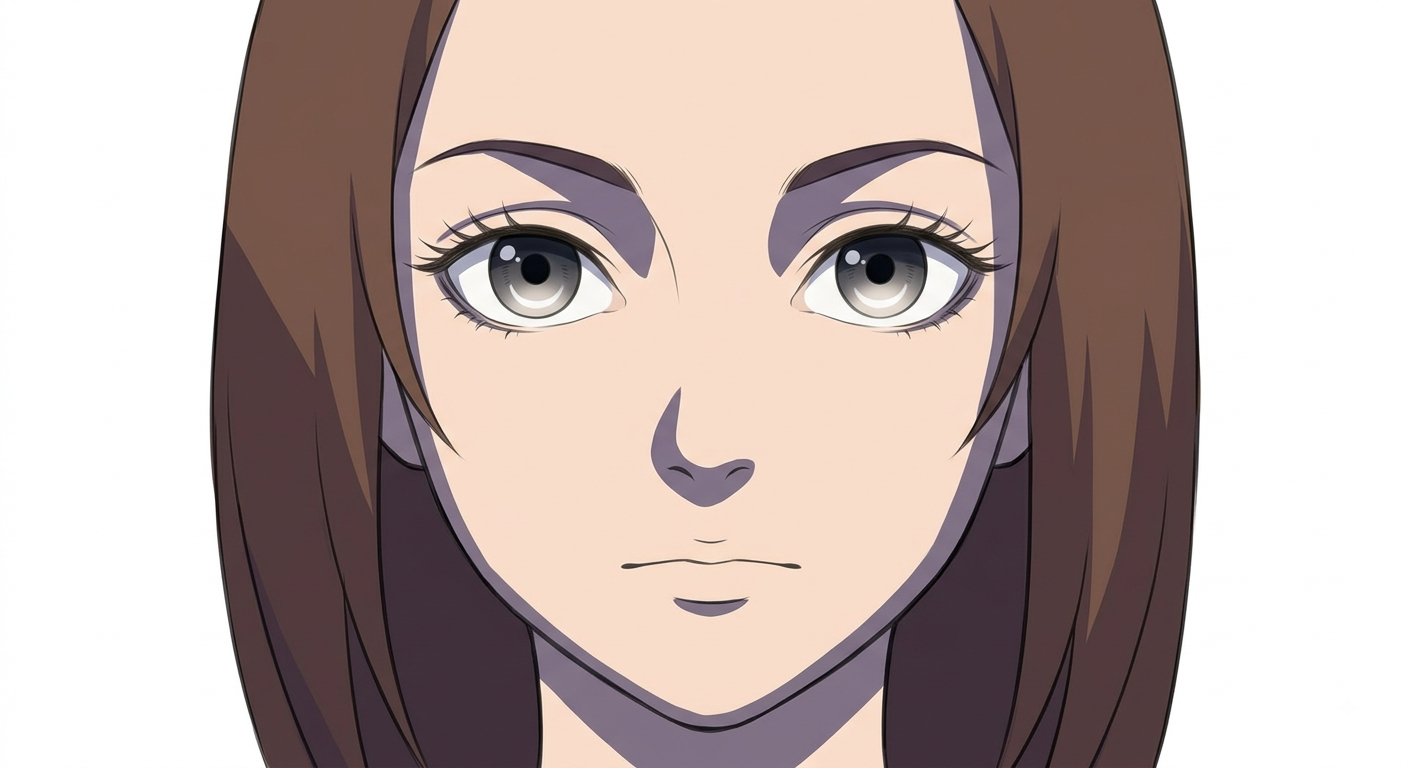
Cel-shading uses hard-edged shadow shapes with little or no gradient. Each shadow is a solid shape placed on the face, and transitions between light and shadow are sharp. Cel-shading reads well at small sizes — in manga panels, on mobile screens, and in animation. It is the default for shounen and most modern anime.
Soft shading uses gradual gradients between light and shadow. Shadow edges are blended and the transition zone is wider. Soft shading reads better in close-up illustrations, key art, and romantic or dramatic scenes where atmosphere matters. It is the default for shojo manga and game character art.
For learning, start with cel-shading. The hard edges force you to be precise about shadow placement, which builds the spatial understanding you need before you can blend soft gradients effectively.
Step 6: Add Rim Light
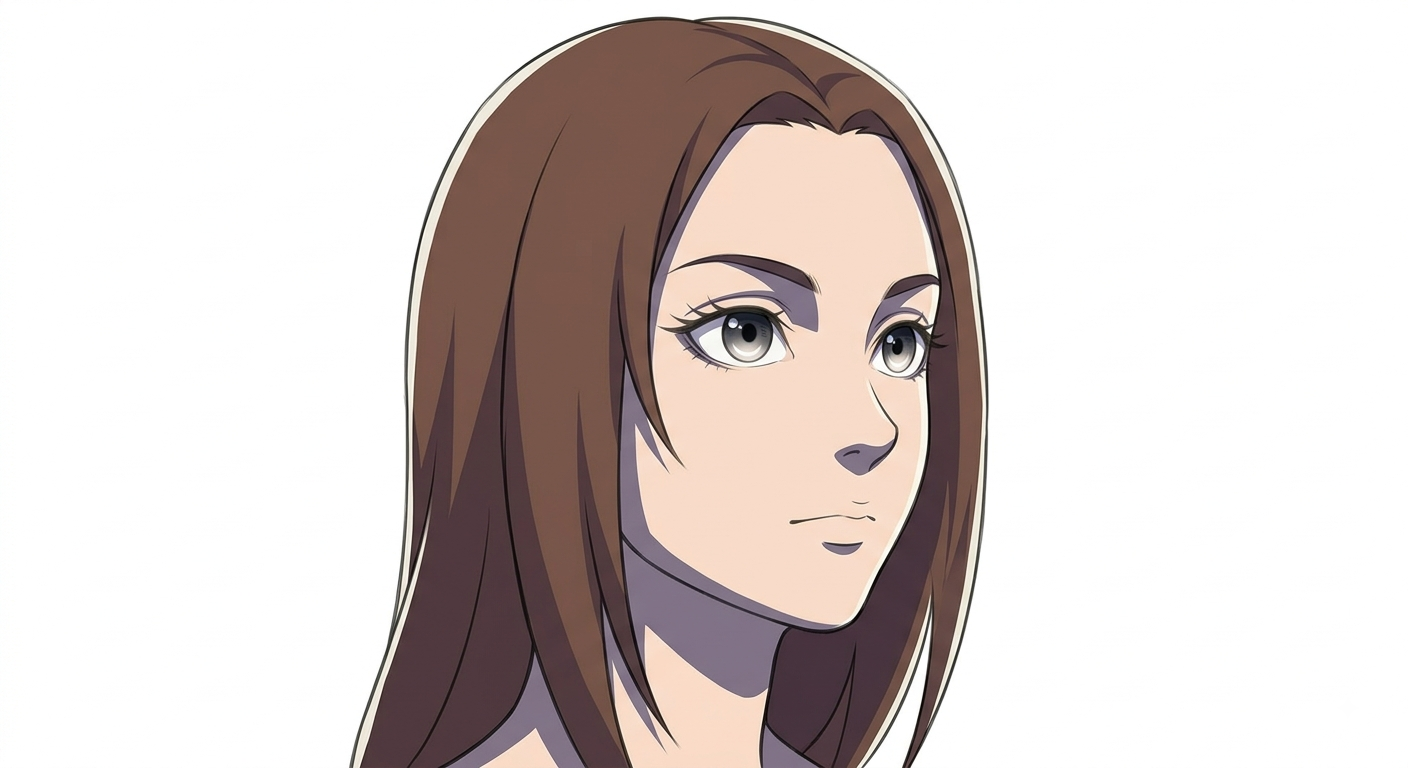
Rim light is a thin bright line along the edge of the character that faces away from the light source. Its job is to separate the character from the background and to suggest the roundness of the head.
In anime, rim light is usually a thin highlight along the jawline, the temple, and the edge of the hair. It is drawn in the lightest colour in your palette — often a desaturated version of your highlight — and kept thin. Too much rim light makes the face look like it is glowing; too little and the character reads as flat against the background.
For a standard upper-left light source, the rim light appears on the right side of the face — along the right jawline, the right temple, and the right edge of the hair mass.
Step 7: Add Ambient Occlusion
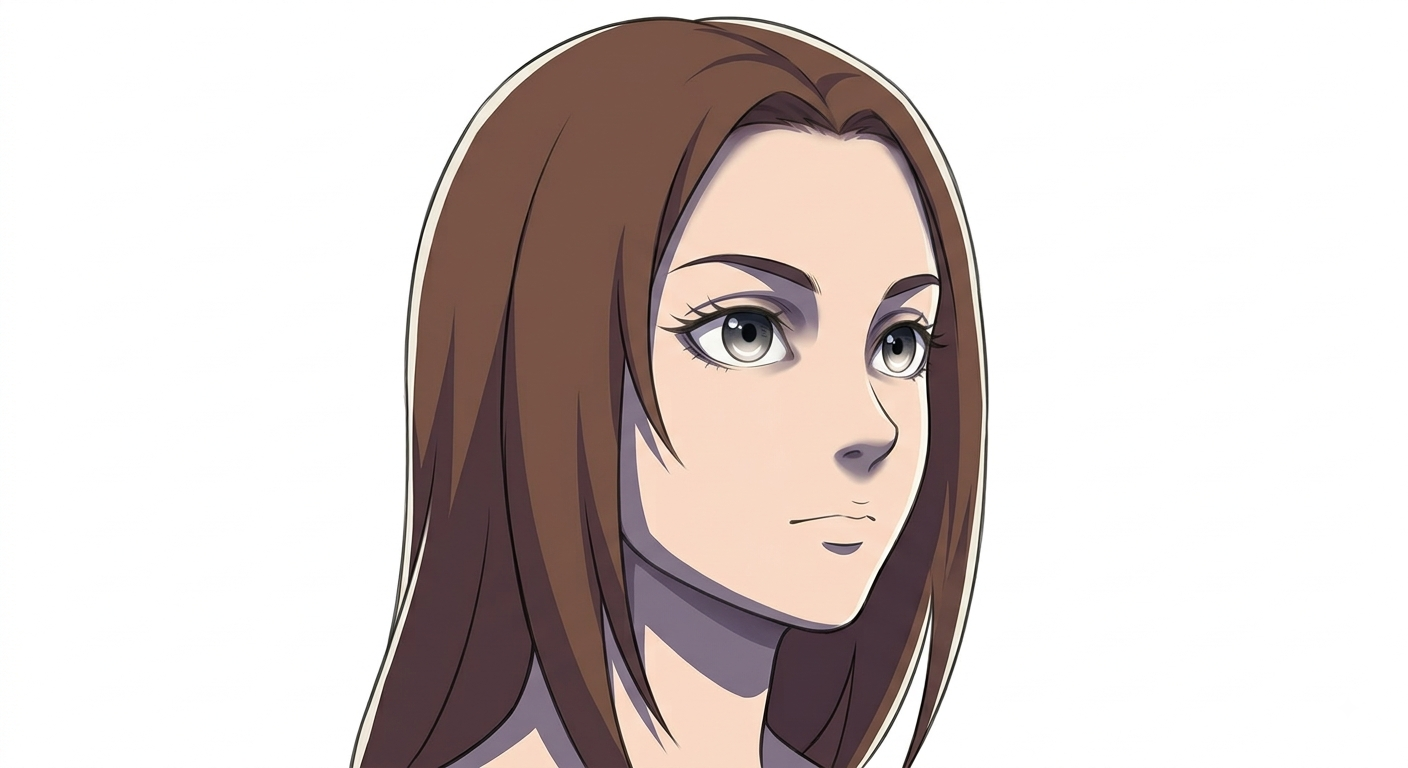
Ambient occlusion is the soft shadow that collects in the corners and crevices of the face where two surfaces meet. In anime, the most important ambient occlusion shapes are:
- Inner eye corners — a soft shadow where the upper lid meets the nose bridge
- Under the nose — shadow where the nose meets the upper lip
- Neck shadow — the shadow where the jaw meets the neck
- Hairline shadow — shadow where the hair mass meets the forehead
These shadows are subtle — usually just a slightly darker version of the base shadow colour — but they add significant depth. They are most visible in 3/4 and profile views where the face geometry is exposed.
Step 8: Refine and Finish
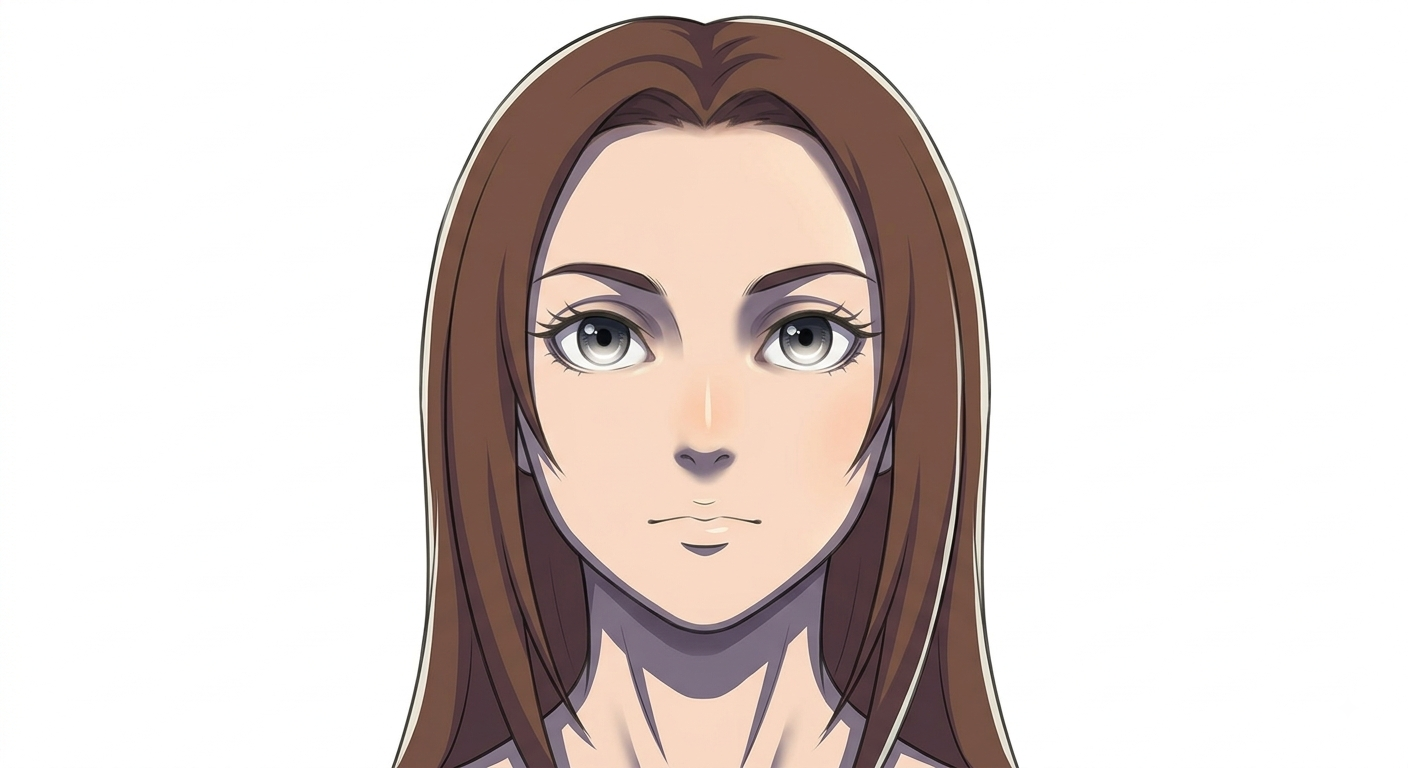
Once the main shadow shapes, eye shading, rim light, and ambient occlusion are in place, step back and check the face for three things:
- Readability from distance — shrink your canvas to 100px wide. Can you still read which side the light is coming from? If not, strengthen the shadow shapes.
- Focal hierarchy — do the eyes read as the brightest, most detailed part of the face? If the cheeks or forehead are competing, reduce their shading detail.
- Colour harmony — do your shadow colours feel related to your base skin tone? If the shadow looks like a different person, warm it up or cool it down to match.
Finish by adding a very subtle warm highlight on the bridge of the nose, the cheekbone, and the forehead on the light side. These tiny highlights are optional but they make the skin feel alive.
Common Mistakes
- Inconsistent light direction — lock the light direction before starting
- Shadows too dark — anime shadows are mid-tones, not black
- No shadow under the brow — this is the shadow that makes the eye readable
- Forgetting the hair shadow — hair casts the largest shadow on the face
- Flat sclera — add a soft shadow under the upper lid on the white of the eye
- Rim light everywhere — keep it thin and only on the far edges
Practice Advice
Draw the same face three times, each with a different light direction: upper-left, lower-right, and directly above. Notice how the shadow shapes change with each direction and how the face’s mood shifts. Then draw the face in cel-shading style, then in soft shading style, so you can feel the difference in technique. Finally, add rim light and ambient occlusion to one of the shaded versions and compare the result against the flat version — the depth difference should be obvious.