
How to Draw Anime Nose: Simple Marks to Detailed Noses
Learn how to draw the anime nose in every common style. From the minimal shadow-dash to shaded 3/4 noses, with placement rules and angle-specific guidance.
Introduction
The anime nose is the smallest feature on the face and, paradoxically, one of the easiest to get wrong. Because it is so small, beginners often skip it entirely or draw it too prominently, which instantly breaks the stylized look. The secret is that the anime nose is mostly a suggestion: a mark, a shadow, or a single line that tells the viewer where the nose is without fully drawing it.
This tutorial covers the range of anime nose styles, from the minimal dash used in cute and shoujo styles to the defined nose bridge used for male and older characters. You will learn the placement rules that work at every angle and how to adapt the nose to front, 3/4, and profile views.
What You’ll Learn
- The placement rule for the nose on any face
- Four common anime nose styles and when to use them
- How the nose changes in front, 3/4, and profile views
- How expressions and shading affect nose drawing
Step 1: Learn the Placement Rule
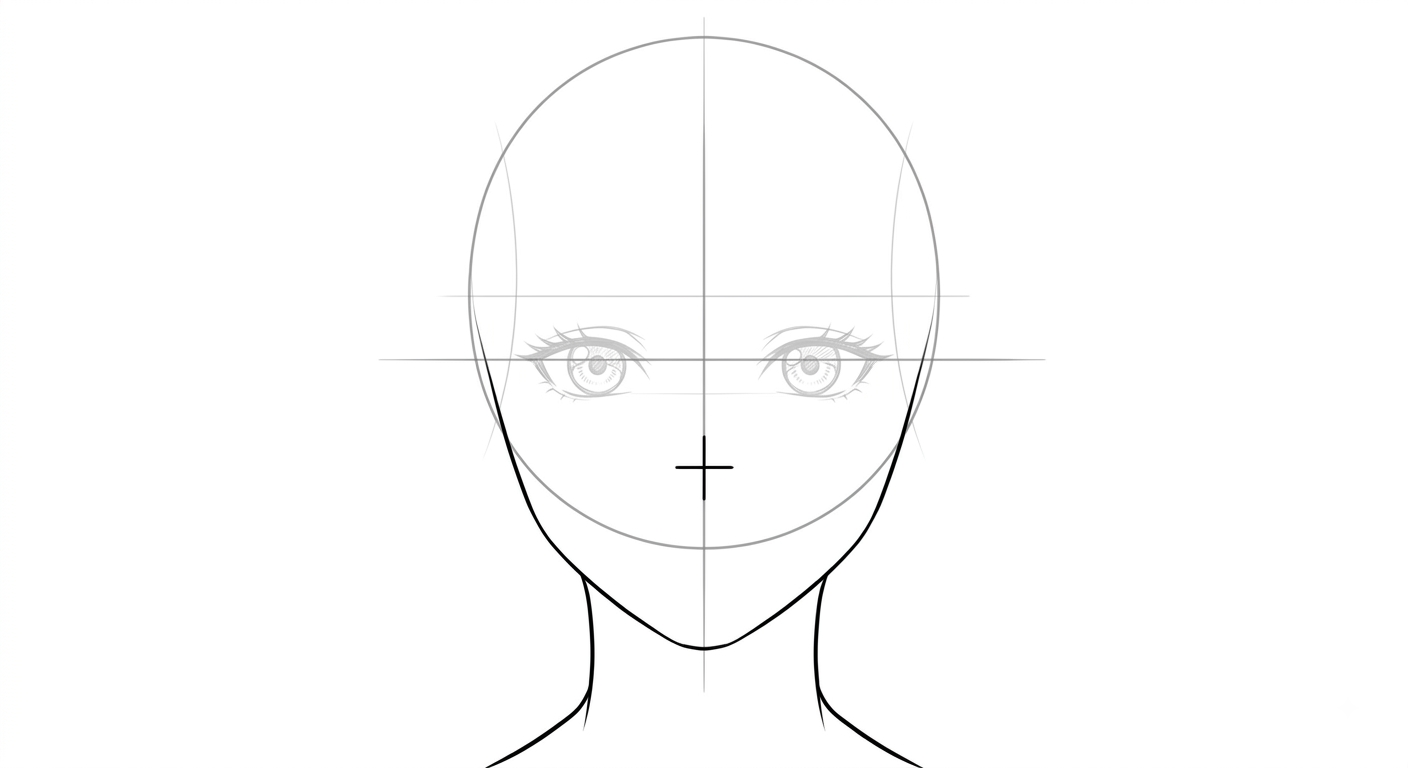
Before drawing any nose, place the construction lines. The nose sits halfway between the eye-line and the bottom of the chin in the front view. Mark that point on the vertical centerline; every nose style, from the faintest dash to a full shaded nose, anchors to this mark.
The ear and the nose share the same vertical zone: the ear’s upper point aligns with the eye-line and its lobe with the nose line. If the ear looks wrong, check it against the nose line first.
Step 2: The Minimal Dot or Dash (Shoujo and Chibi Styles)
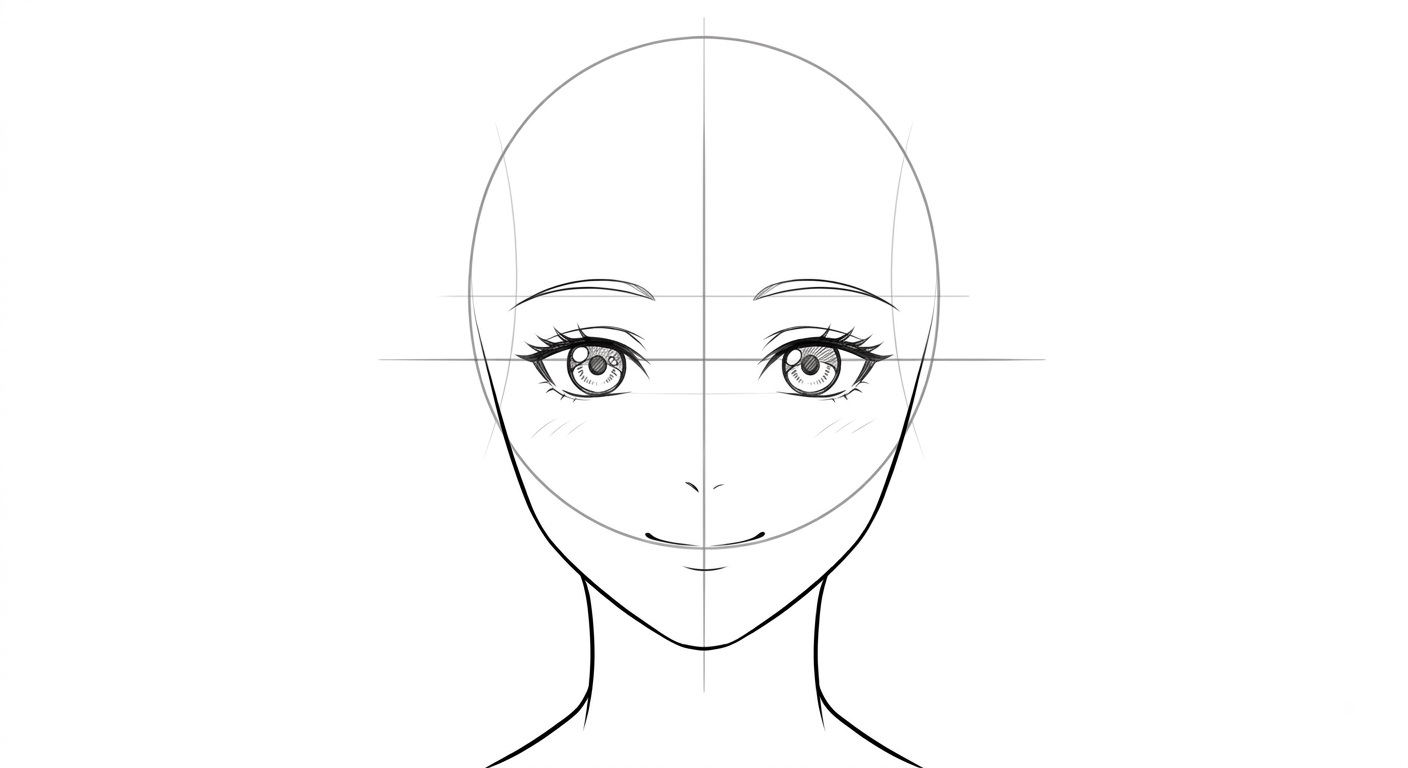
The most common anime nose is a tiny mark: a small dot, a short horizontal dash, or a single downward tick placed at the nose position. This style is used in shoujo, chibi, and most female character designs.
Draw it in a lighter line weight than the eyes and mouth. The nose should read as a soft afterthought, not a hard feature. A helpful trick is to draw the nose in a mid-tone grey rather than solid black, especially in digital art, so it recedes behind the expressive features.
Step 3: The L-Shape or Angle Line (Male and Shounen Styles)
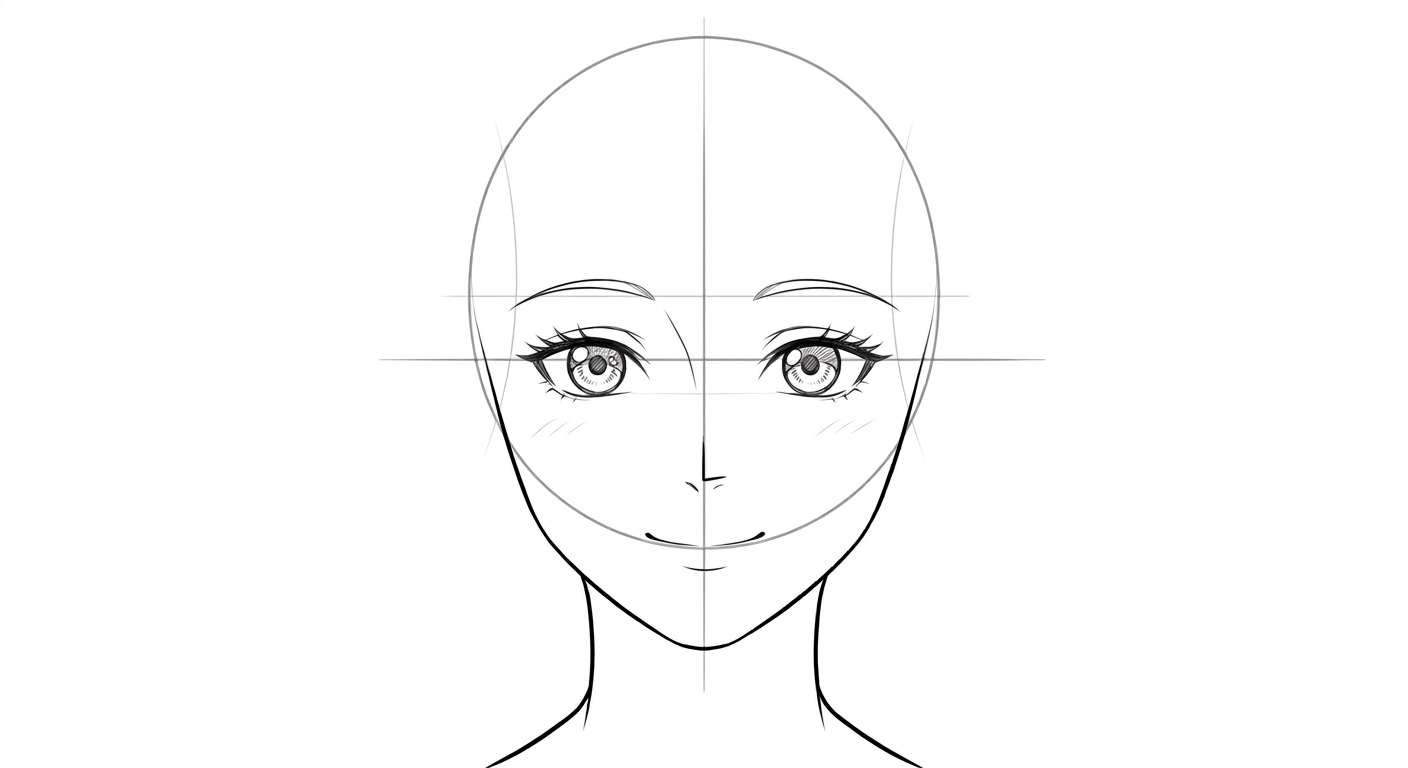
For male characters and shounen styles, the nose is drawn as an L-shape or a short angled line that suggests the bridge. Draw a small diagonal from between the brows down toward the nose tip, then a short horizontal tick at the bottom.
This style adds masculinity because it implies structure. The sharper the angle of the line, the more defined and mature the nose reads. Keep the L-shape compact; it should fit within the space between the eyes and the mouth without dominating them.
Step 4: The Shaded Nose (Semi-Realistic Styles)
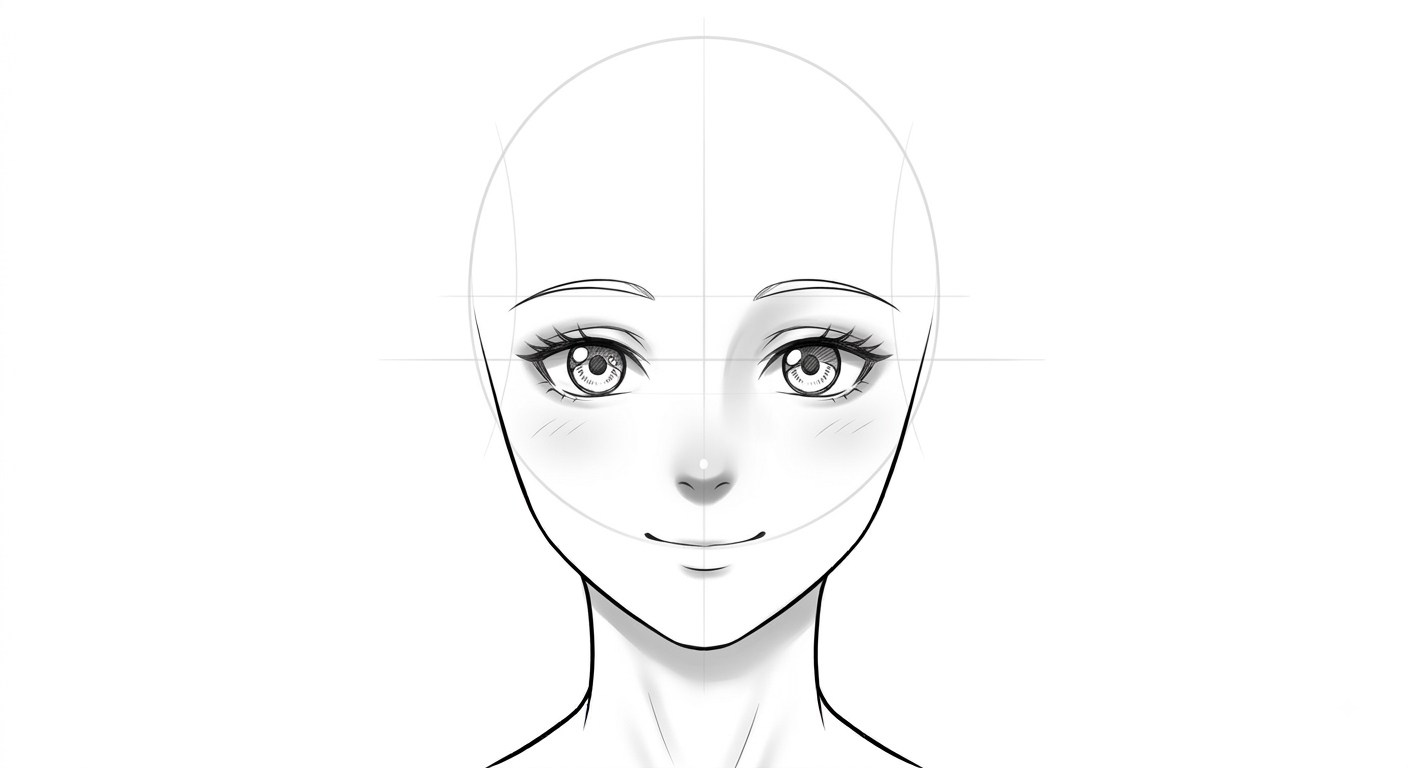
Semi-realistic and older styles use shading to suggest the nose instead of a line. A small crescent of shadow under the nose, or a soft gradient along one side of the bridge, creates volume without a visible outline.
Place the shadow on the opposite side of the light source from the face. A common setup is a soft shadow falling to the lower-left of the nose with a small highlight on the tip. This approach is best for close-ups and character portraits where the face is large on the page.
Step 5: The Nose at Different Angles
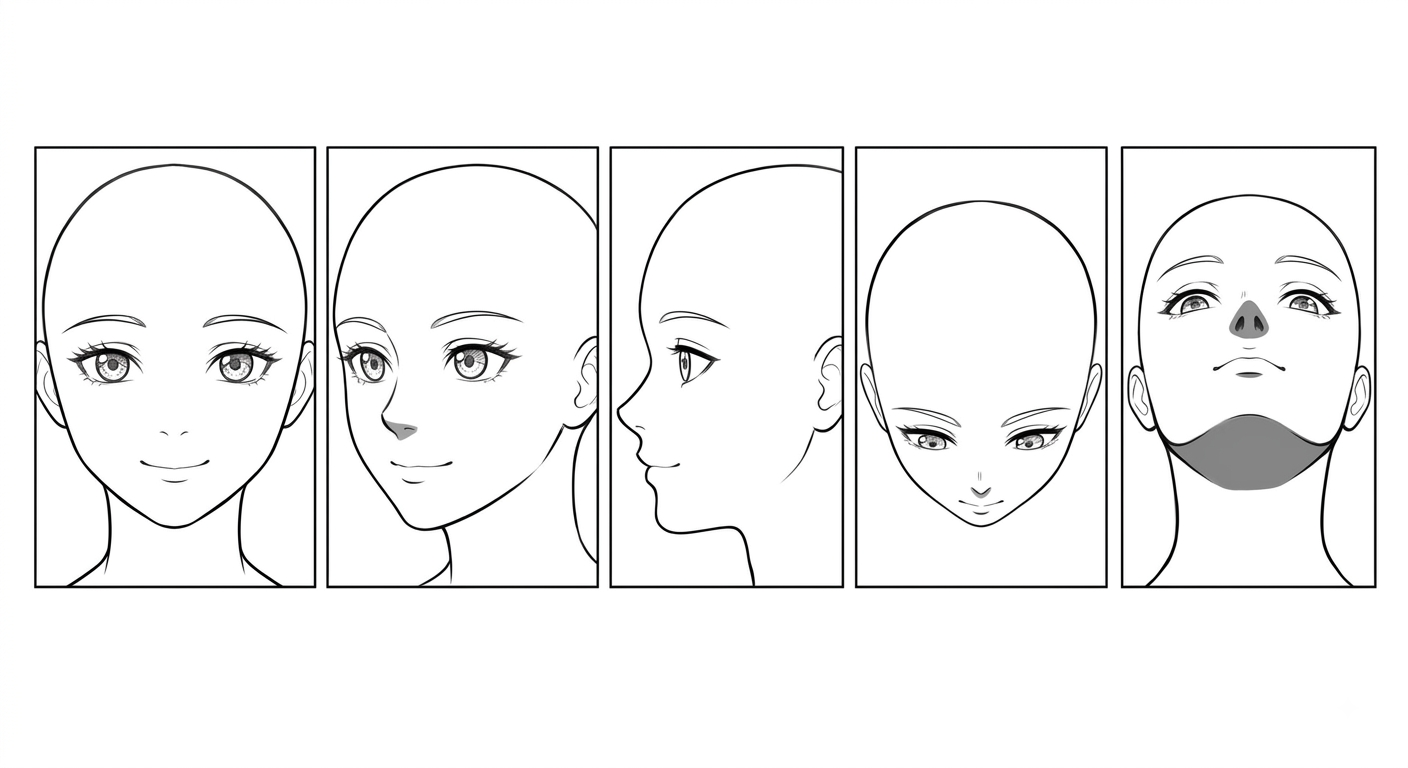
The nose changes more with angle than any other feature because it projects forward from the face.
- Front view: A dot, dash, or shadow under the nose position. No bridge line needed.
- 3/4 view: The nose becomes the key perspective anchor. Draw a short bridge line running from the brow down toward the nose tip; it should overlap the far eye socket slightly. The tip sits on the shifted centerline.
- Profile view: The nose projects clearly from the face, usually as an L-shape or a short diagonal that breaks the silhouette. The bridge line is continuous with the forehead S-curve.
- Top view: The nose reads mostly as a small vertical line; the tip is hidden by the cranium.
- Bottom view: Nostril openings become visible from beneath the nose, and the nose casts the strongest shadow on the face.
Step 6: Expressions and Shading Effects
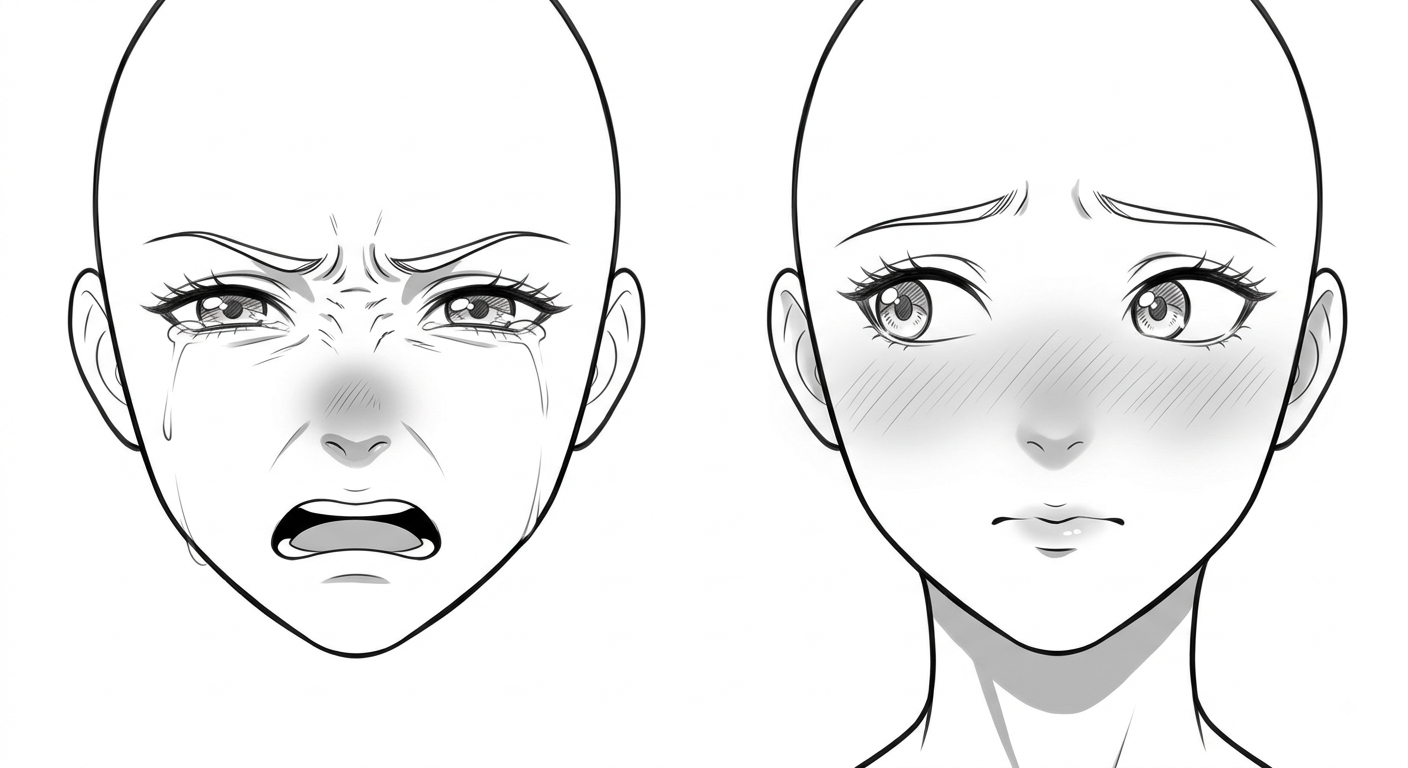
The nose participates in expressions in two ways: through movement and through shadow.
When a character scrunches their face — crying, laughing hard, or squinting — the nose wrinkles and small crease lines appear at its bridge. When a character is embarrassed, blush often sweeps across the nose tip. And under strong lighting, the nose casts a shadow onto the upper lip, which adds realism to close-ups.
For crying scenes, a reddened nose tip is a classic emotional cue in anime. Adding a few light tick marks across the bridge sells the scrunched, upset look instantly.
Common Mistakes
- Nose too dark or too thick — it should recede behind the eyes.
- Nose too large — keep it compact relative to the eye spacing.
- Nose off-center — anchor it to the vertical centerline in front views.
- Bridge missing at 3/4 — the bridge line sells the turn.
- Nostrils drawn in cute styles — reserve nostril detail for semi-realistic or male designs.
Practice Advice
Draw a row of the same face five times, changing only the nose style: dot, dash, L-shape, shaded, and semi-realistic. Compare how the character’s perceived age and gender shift with each style. Then redraw the same nose style in front, 3/4, and profile to internalize how the placement mark moves with the angle.