How to Draw Anime Head Proportions
Go deeper than the basics. Learn the head-height system, how to divide the face into zones, how proportions shift with age and angle, and how to use the 3/4 head-turn grid.
Introduction
The circle method gets you a face that looks like an anime face, but proportions are what make that face look like a specific character at a specific age, in a specific style. Proportions are the invisible grid underneath every good anime drawing: a system of zones and ratios that tells you exactly where each feature goes relative to the others.
This tutorial moves beyond the basic “eyes at the halfway line” rule into the full proportion system. You will learn how to divide the head into zones using the head-height method, how male and female faces differ in proportion, how child faces are structured differently, and how all of this shifts when the head turns to 3/4. Once this system is internalised, you will be able to construct any anime face from memory without guessing where the nose or mouth should go.
What You’ll Learn
- The head-height system: dividing the face into equal zones
- The exact placement rules for every facial feature
- How proportions differ between male, female, and child faces
- How the proportion grid shifts in 3/4 view
- Common proportion errors and how to self-correct
- Using the eye-spacing rule to check your work
Step 1: Understand the Head-Height System
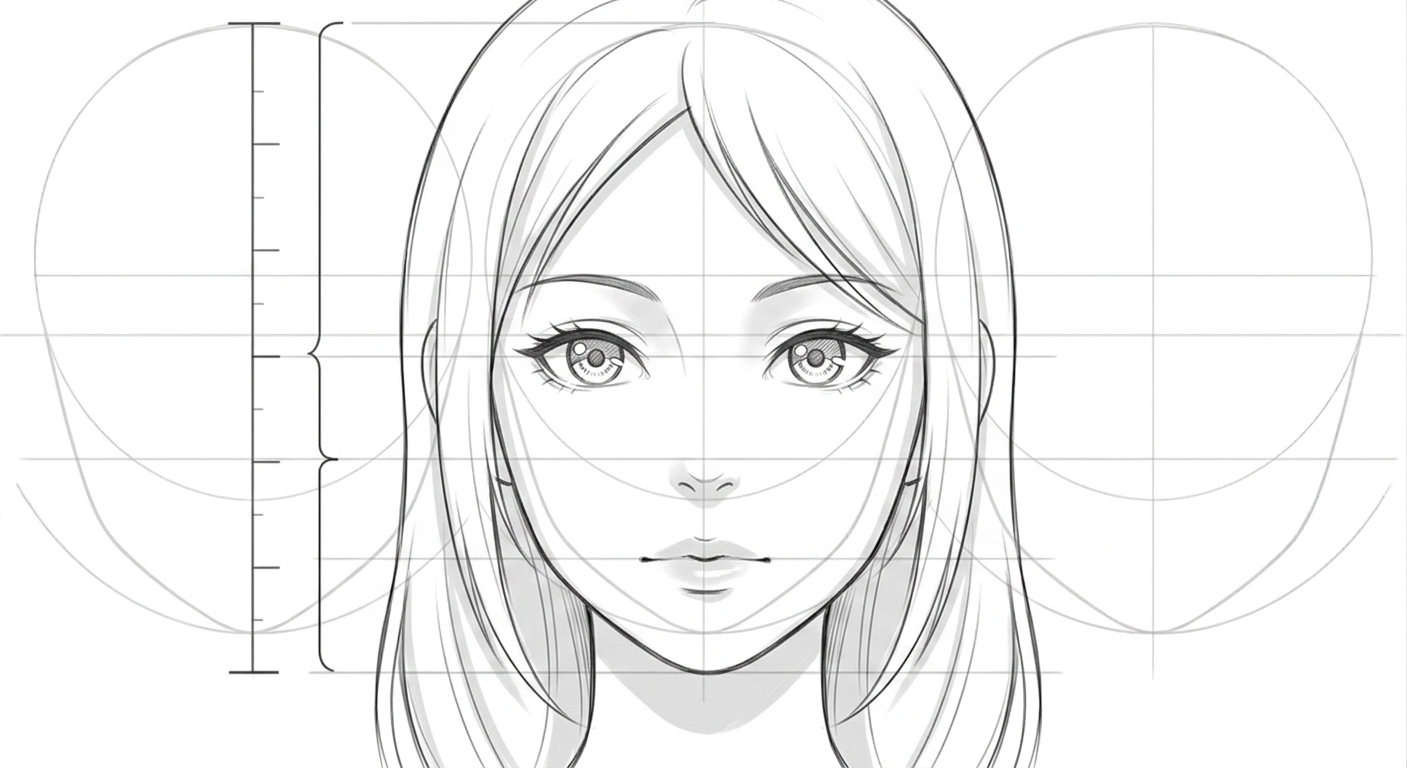
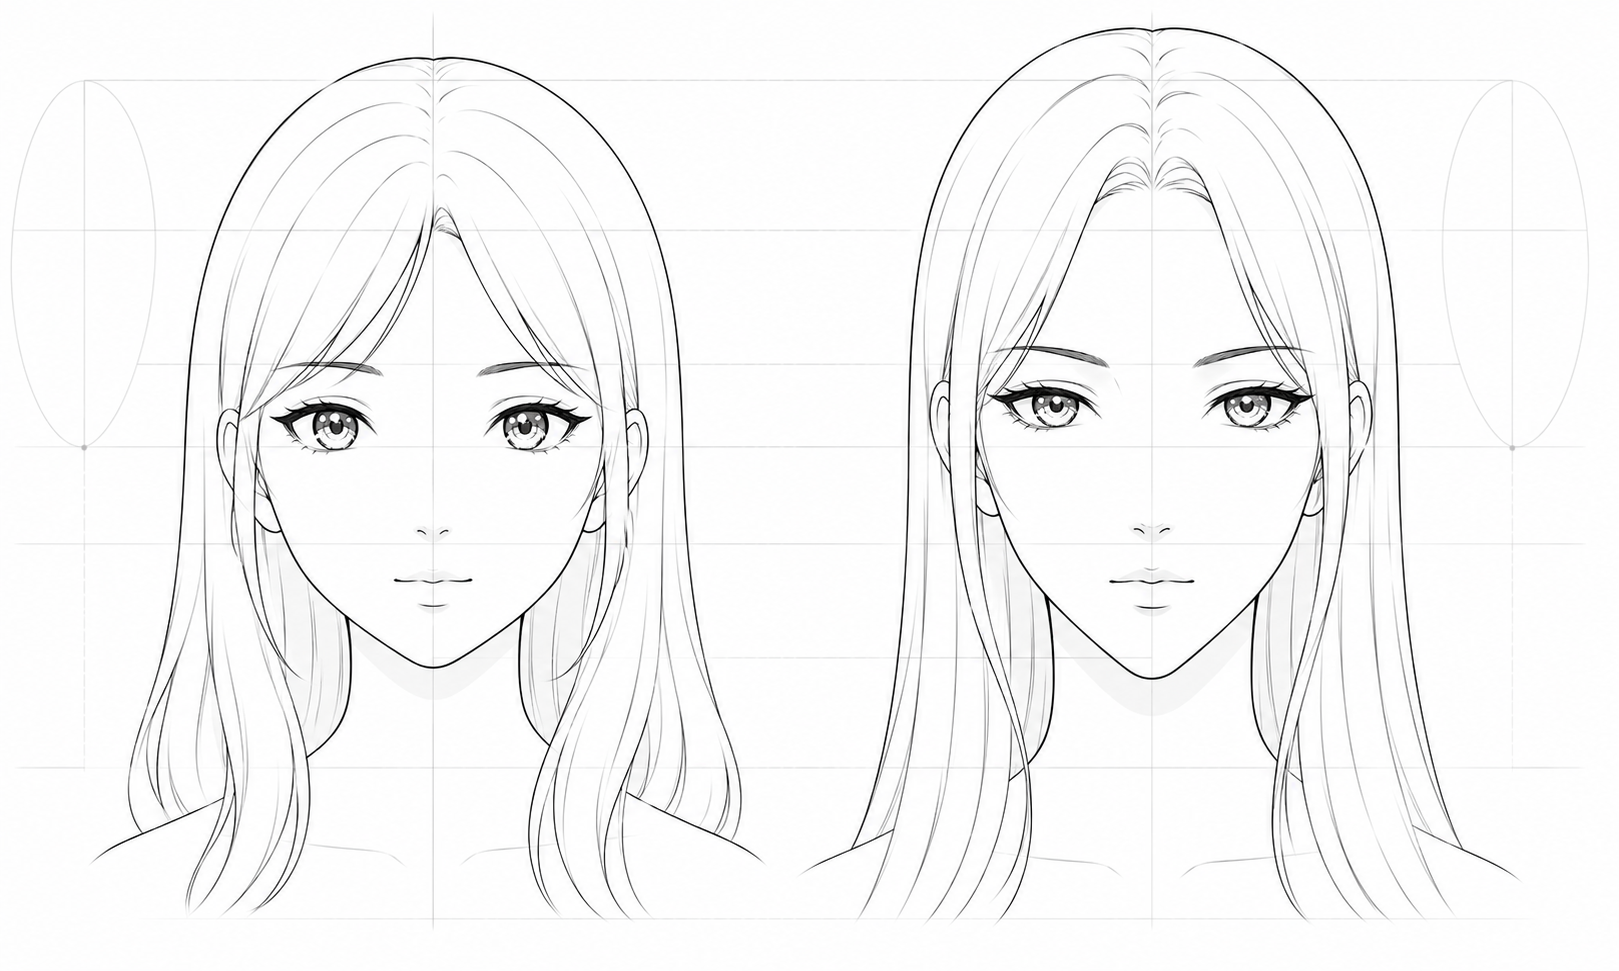
The head-height system treats the total height of the head — from the top of the cranium to the bottom of the chin — as a single unit of measurement. Everything on the face is placed as a fraction or multiple of that unit.
For a standard anime face, the head height divides into roughly equal zones:
- Zone 1 (top): Hairline to eye-line (the upper half of the head)
- Zone 2 (middle): Eye-line to nose line
- Zone 3 (lower middle): Nose line to mouth line
- Zone 4 (bottom): Mouth line to chin
In most anime styles, the eyes sit at the halfway point of the total head height. The nose sits roughly halfway between the eye-line and the chin. The mouth sits roughly halfway between the nose and the chin. These three halfway rules — eyes at 1/2, nose at 3/4, mouth at 7/8 — are the backbone of anime proportion.
Key rule: Eyes at 1/2, nose at 3/4, mouth at 7/8. Memorise these three numbers and you will never misplace a feature in front view.
Step 2: Apply the Eye-Spacing Rule
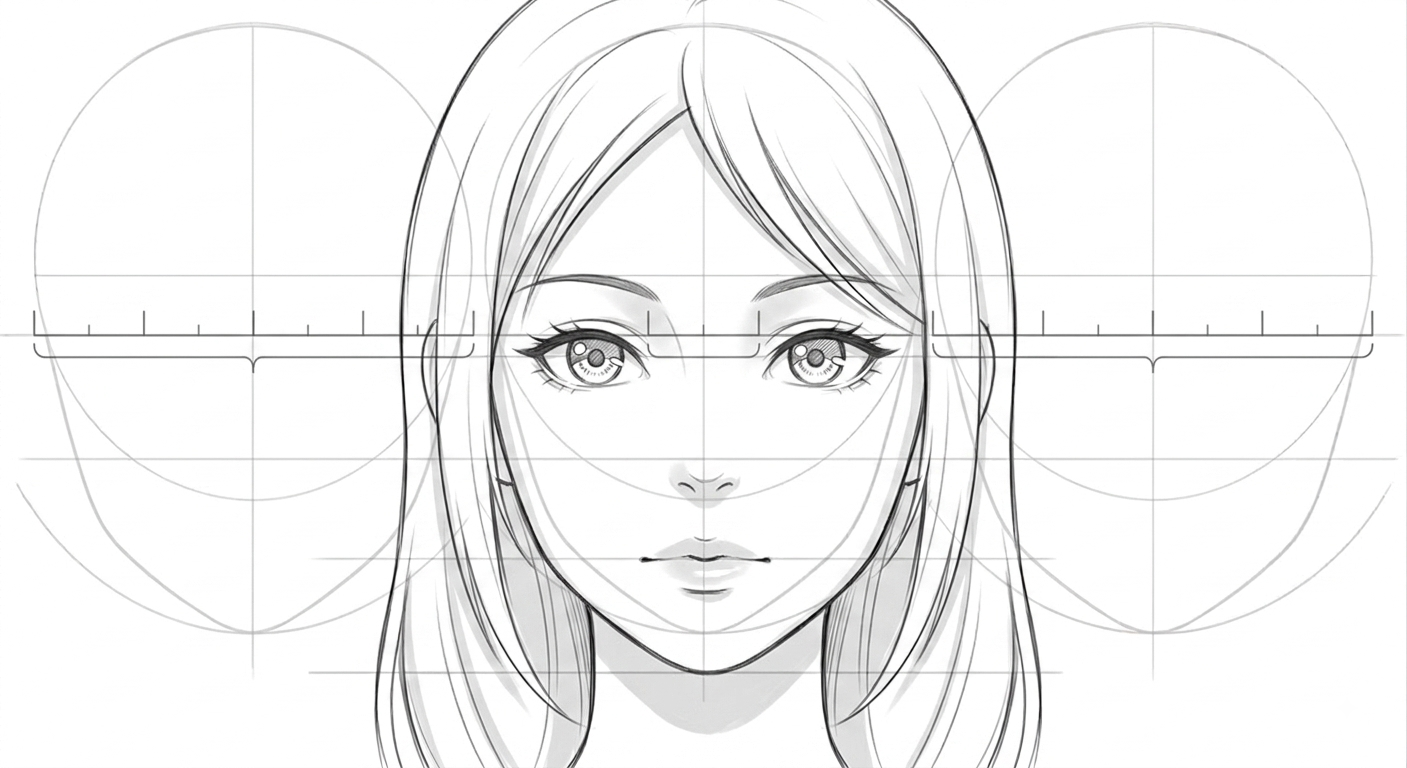
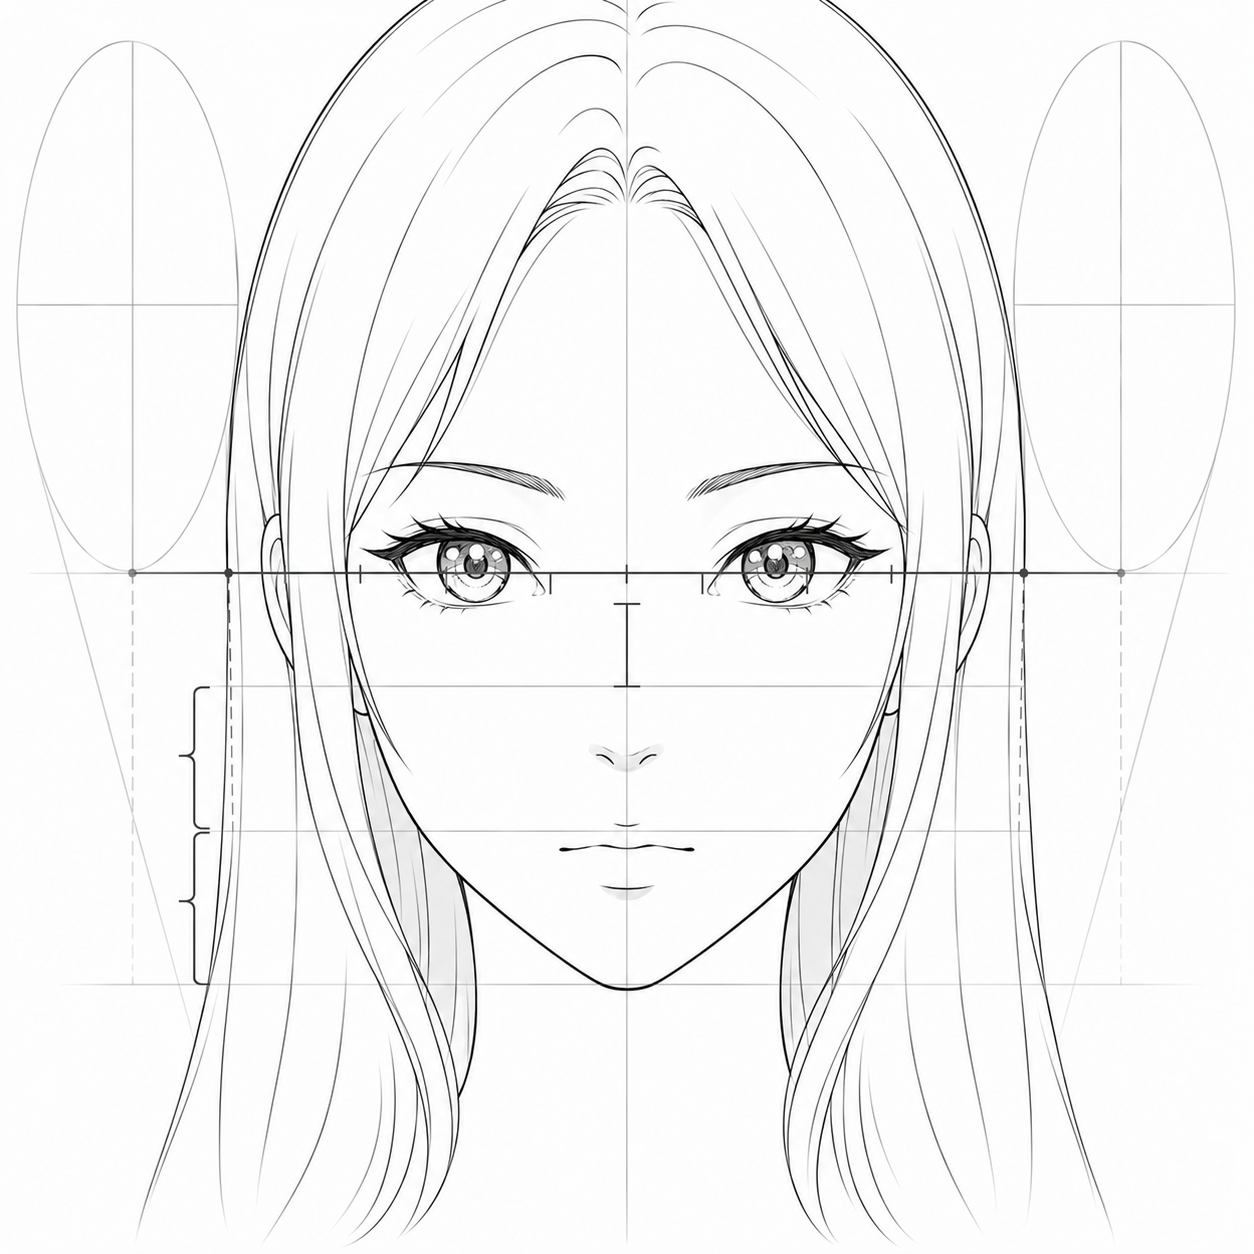
The eyes are not just placed on the halfway line — they are also spaced using the eye itself as a unit of measurement. In front view:
- The space between the two eyes is approximately one eye-width
- The margin from the outer edge of each eye to the edge of the face is also approximately one eye-width
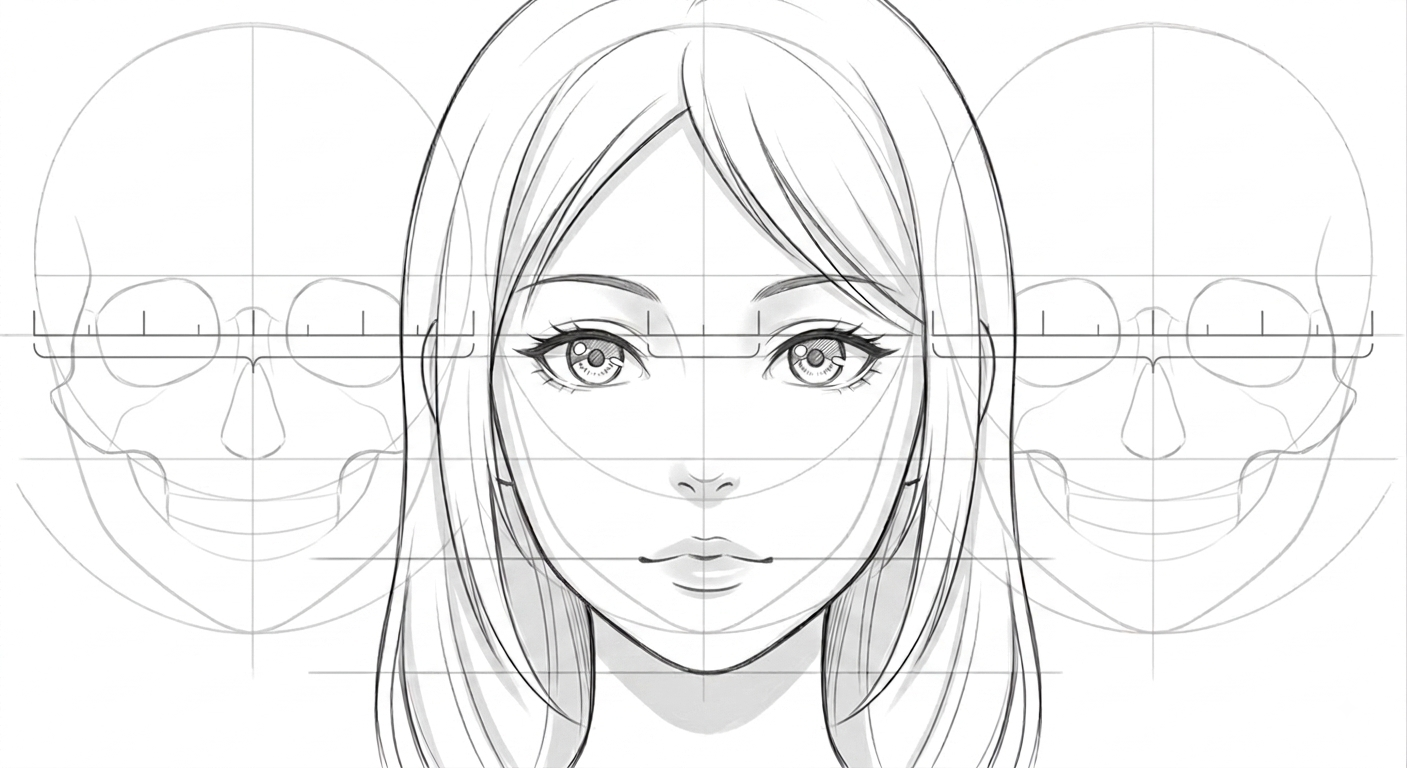
This means the total face width, measured at the eye-line, is roughly five eye-widths: one for the left margin, one for the left eye, one for the gap, one for the right eye, and one for the right margin.
Most beginners draw the eyes too close together. If you measure your sketch and find the eyes are less than one eye-width apart, push them outward. Wider-set eyes read as more mature and serious; closer-set eyes read as younger and cuter.
Step 3: Draw the Nose and Mouth Using the Halfway Rules
With the eyes placed, the nose and mouth positions follow automatically:
- Nose: halfway between the eye-line and the chin. In front view this is usually a small mark or a short line on the vertical centerline.
- Mouth: halfway between the nose and the chin. The mouth line is slightly curved, dipping gently in the center.
The mouth width is also proportional: in most anime styles, the mouth spans roughly two eye-widths at the corners. In shoujo styles it can be slightly wider; in shounen styles slightly narrower. A mouth that spans the full distance between the eyes is too wide for most anime proportions.
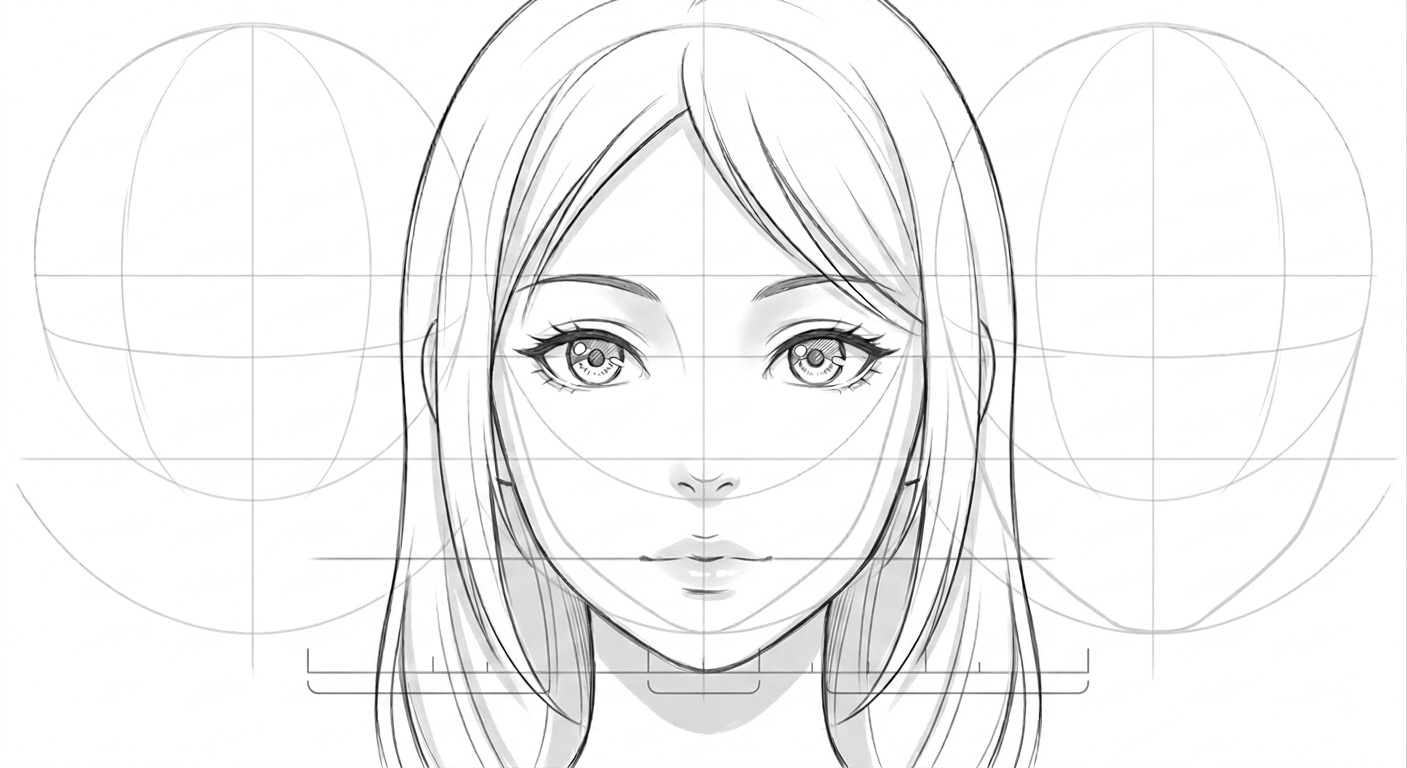
Step 4: Adjust Proportions for Gender
Male and female anime faces share the same basic grid but differ in two consistent ways:
- Female faces: the jawline is softer and tapers to a narrower chin. The distance from the mouth to the chin is slightly shorter, giving the lower face a more delicate proportion. The eye line may sit slightly above the exact halfway point for a more youthful look.
- Male faces: the jaw is broader and the chin is wider. The lower face (nose to chin) is slightly longer, giving the face a more mature, grounded proportion. The nose and mouth sit closer together, and the brow ridge may be more pronounced.
In both cases, the eyes stay at the halfway line. What changes is the shape of the zone below the eyes. A female face has a shorter, tapered lower zone; a male face has a longer, broader lower zone.
Step 5: Adjust Proportions for Age
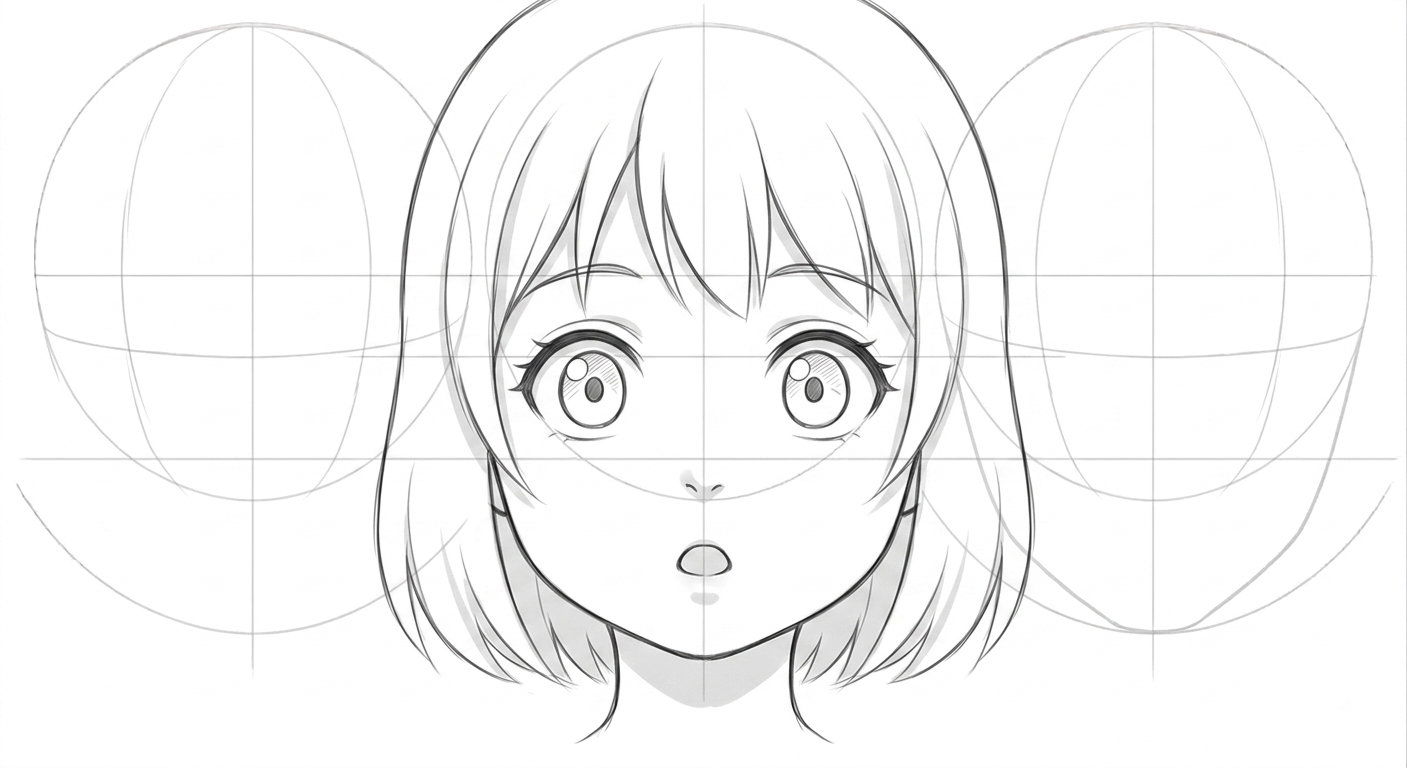
Child and chibi faces break the standard grid deliberately to read as younger. The key changes are:
- Eyes sit higher — in child faces the eyes are often placed at roughly 1/3 of the head height from the top, not 1/2. This makes the forehead appear larger and the face more youthful.
- Nose is lower and smaller — the nose barely projects and sits very low on the face. It is often just a small mark rather than a defined shape.
- Mouth is small and low — the mouth sits closer to the chin, and the distance between nose and mouth is short.
- Head is rounder — the cranium circle is proportionally larger relative to the jaw, giving the head a top-heavy, cute silhouette.
The most important rule for child proportions is: make the eyes bigger and higher. Everything else follows from that shift.
Step 6: Shift the Grid in 3/4 View
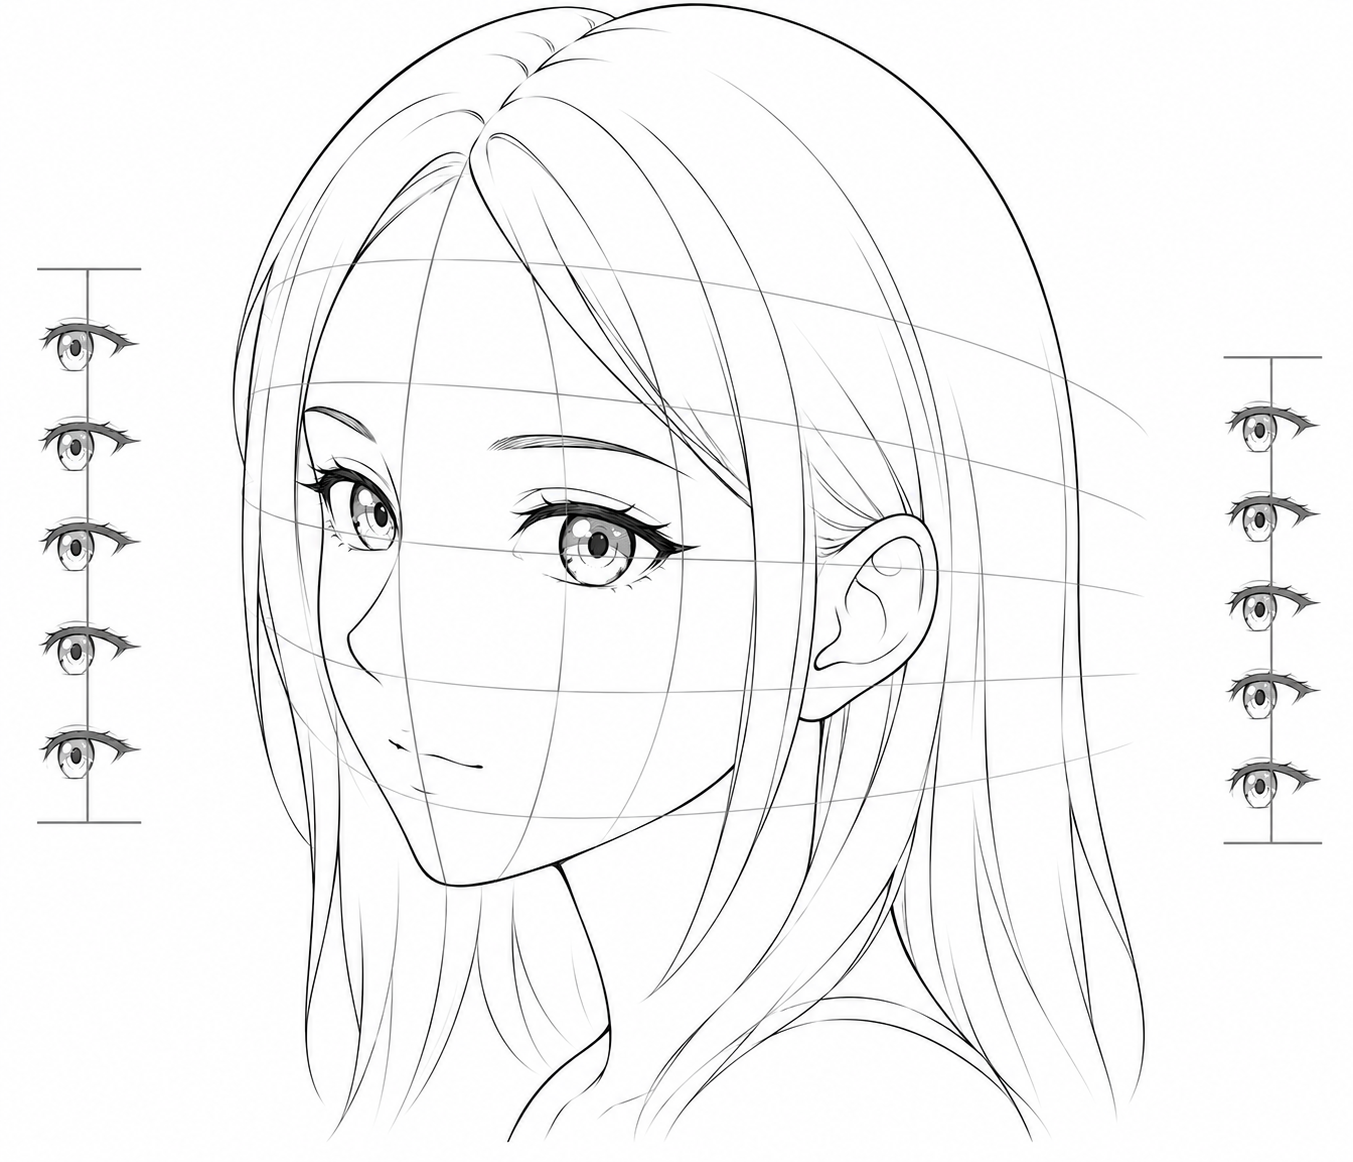
In three-quarter view, the front-view proportion grid becomes a perspective grid. The horizontal guidelines still exist, but they curve and compress depending on the angle.
- The near eye stays at its normal width and sits on the curved eye-line.
- The far eye compresses to about two-thirds of the near eye’s width and sits slightly higher or lower on the eye-line depending on head tilt.
- The nose bridge runs across the face from the brows toward the nose tip, overlapping the far eye socket. This overlap is what sells the 3/4 turn.
- The mouth shifts toward the near side of the face along the curved centerline.
- The chin sits on the curved centerline, closer to the near side of the page.
The five eye-widths rule still applies at 3/4, but it reads as a tapered shape rather than a straight line. The near-side margin is wider; the far-side margin compresses toward the profile edge.
Step 7: Use the Proportion Grid to Check Your Work
Once you have drawn a face using the grid, there are three quick checks you can run:
- Eye-line check: draw a straight horizontal line through both eyes. The bottom of the nose should fall exactly halfway between that line and the bottom of the chin.
- Eye-width check: measure the width of one eye with your pencil. Can you fit roughly five eye-widths across the face at the eye-line?
- Zone check: does the space from the eye-line to the nose look roughly the same as the space from the nose to the mouth? If not, adjust.
These checks take seconds but catch the majority of proportion errors beginners make. Run them on every face you draw until they become automatic.
Step 8: Build Proportion into Your Style
Once the standard grid is comfortable, start varying it deliberately to develop your own style. Some things to try:
- Move the eyes slightly above the halfway line for a more shoujo, youthful look
- Widen the eye gap for a more mature, serious character
- Shorten the lower face zone for a cute or child character
- Lengthen the lower face zone for a rugged or older male character
- Compress the far-side features more aggressively for a dramatic 3/4 angle
The grid is not a prison. It is a starting point. Every anime style you admire is a deliberate variation on this same basic proportion system. Once you know the default, you know exactly what you are changing and why.
Common Mistakes
- Eyes too close together — always check against the one-eye-width rule
- Nose too high or too low — it sits halfway between the eye-line and the chin
- Mouth too wide — it should be narrower than the eye spacing
- Child face using adult proportions — move the eyes higher and make them bigger
- 3/4 face with a straight centerline — the centerline should curve toward the far side
- Ignoring the five-eye-width rule — measure it on every face until it sticks
Practice Advice
Draw the front-view proportion grid twenty times from memory. Each time, draw the circle, the cross, the five eye-widths, and place the features without measuring. When you can do this in under two minutes with consistent results, move to 3/4 view and draw the same grid in perspective twenty more times. Finally, draw the same face in profile and verify that the eye-line, nose-line, and mouth-line still sit at the correct relative heights. This sequence — front, 3/4, profile, repeated — is the fastest way to internalise anime face proportions permanently.