
How to Draw Anime Ears
Master anime ear drawing from every angle. Learn the three-part ear structure, how to simplify it for cute styles, and how ears relate to the rest of the face.
Introduction
Ears are one of the most overlooked features in anime drawing, and that is exactly why getting them right sets your work apart. Most beginners either draw ears too large, too detailed, or forget them entirely. In anime, the ear follows a simple internal logic: it is made of three stacked parts, it sits in a predictable zone on the head, and its shape changes depending on the angle and the character’s age. This tutorial gives you that logic so you can draw ears confidently in any style.
What You’ll Learn
- The three-part ear anatomy (outer rim, inner ridge, lobe)
- How to place the ear correctly on the head using the eye-line and nose-line
- Drawing ears in front, 3/4, and profile views
- How ear size signals age and gender
- Simplifying ears for chibi and cute styles
- Common ear mistakes and how to avoid them
Step 1: Understand the Three-Part Ear
The human ear has three major structural parts, and anime simplifies rather than removes them:
- The outer rim (helix) — the curved edge that wraps around the top and back of the ear. In anime this is usually one clean, bold line.
- The inner ridge (antihelix) — the Y-shaped ridge inside the outer rim. In many anime styles this is drawn as a single inner curved line rather than a full Y-shape.
- The lobe — the soft bottom of the ear. Anime lobes are either attached (a small rounded bump) or detached (a free-hanging curve). Detached lobes are more common in realistic styles; attached lobes are standard for most anime.
Memorise these three parts. Every ear you draw, no matter how simplified, still needs at least a nod to all three.
Step 2: Learn the Placement Rules
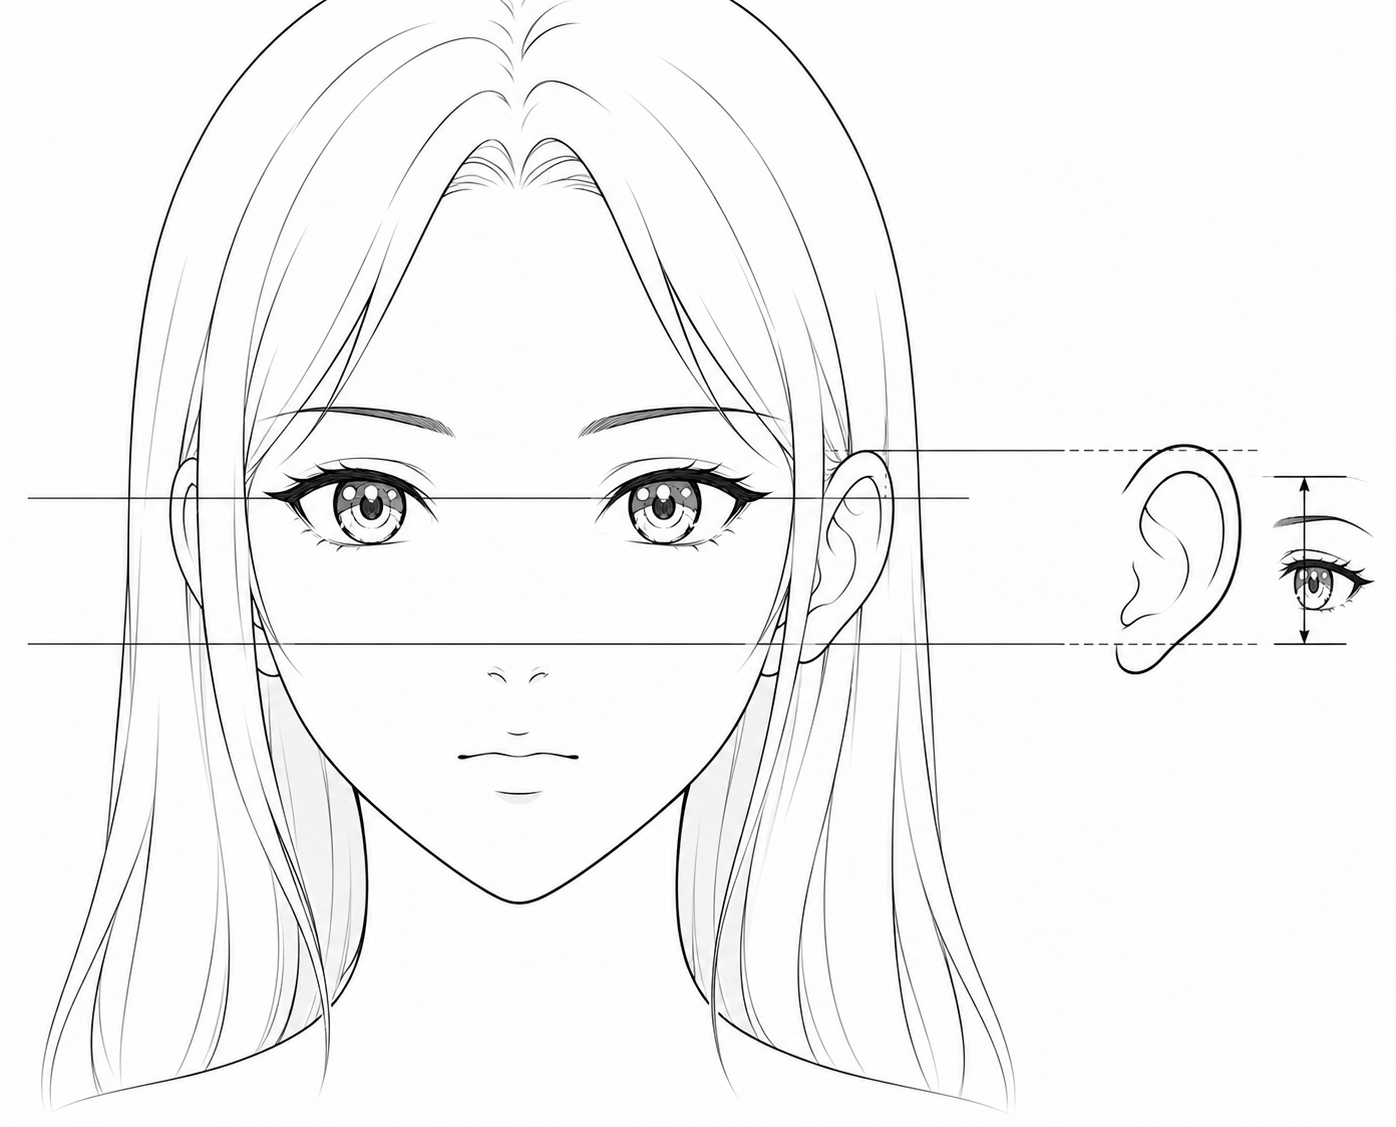
The ear is anchored by two lines on the face:
- Upper point: aligns with the eye-line (the horizontal guideline at eye level)
- Lower lobe: aligns with the nose line (the position of the nose in front view)
The ear sits behind the jaw circle in profile, and in front view it is tucked between the temple and the hairline. Its width is roughly the same as the distance between the eye and the eyebrow. If the ear looks too big or too small, compare its width to that eye-to-brow gap.
Key rule: If you can line up the ear’s top with the eyes and its bottom with the nose, your placement will be correct nine times out of ten.
Step 3: Draw the Ear in Front View
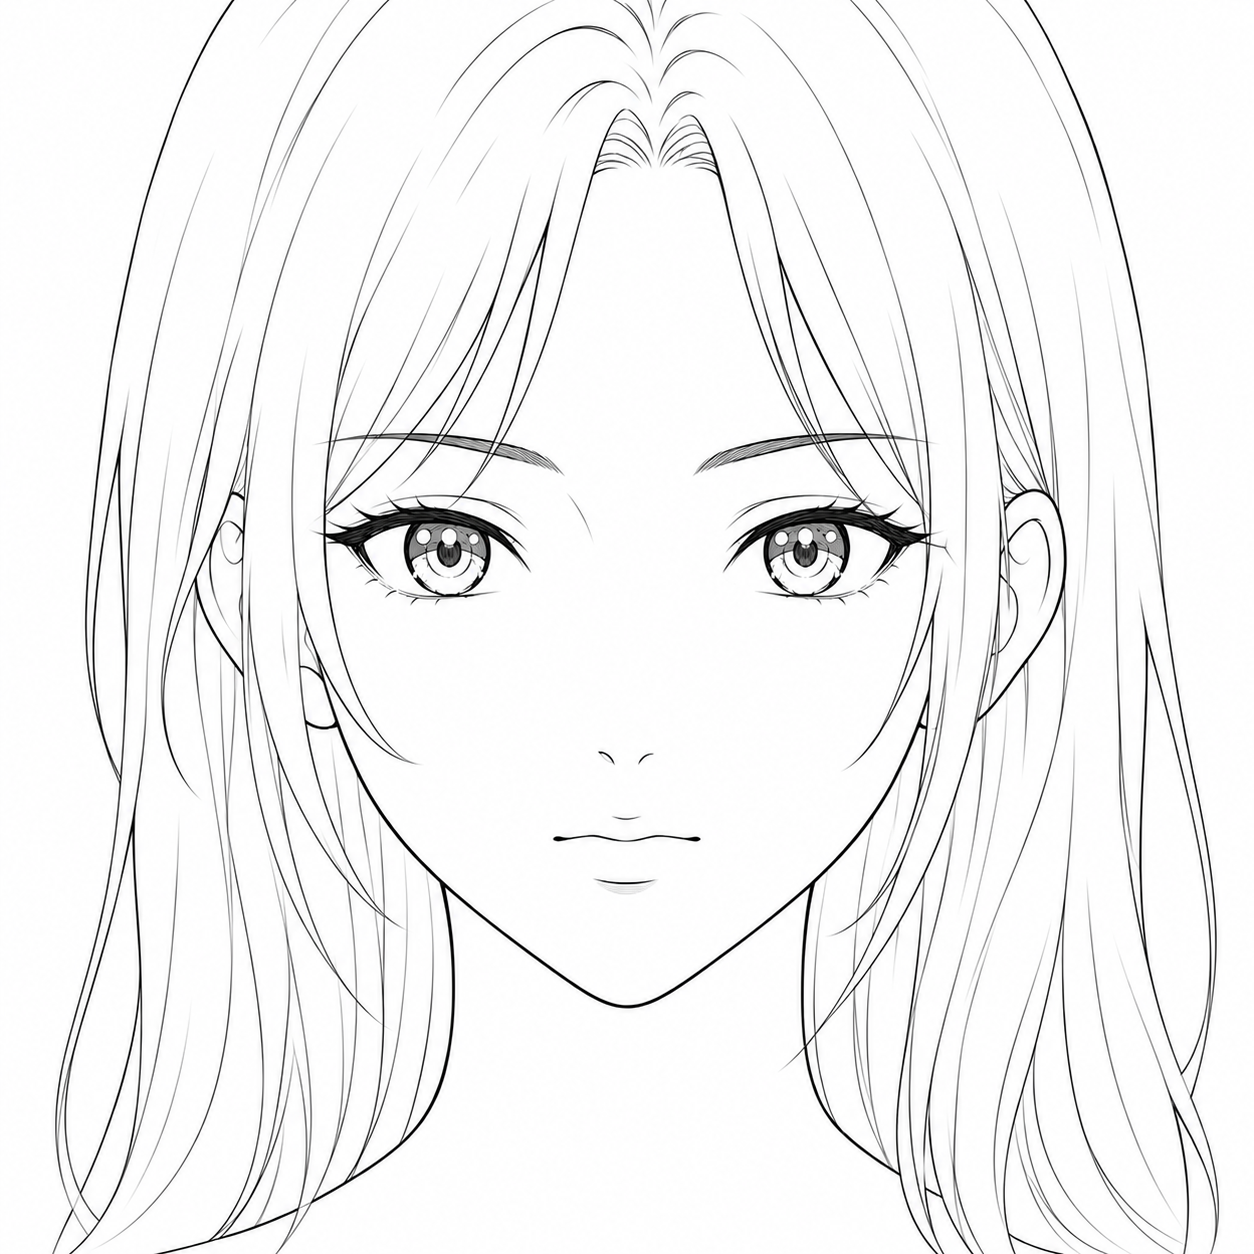
In front view the ear is a slightly flattened almond shape sitting on the side of the head. Start with the outer rim: a bold C-curve that opens toward the face. Add the inner ridge as a softer curve inside, running roughly parallel to the outer rim but shorter. Finish with the lobe at the bottom — a small rounded bump for attached lobes, or a short free curve for detached ones.
Front-view ears are partially hidden by hair in most character designs. That is not laziness — it is good composition. Let the fringe or side hair overlap the front edge of the ear to keep the face clean and the focus on the eyes.
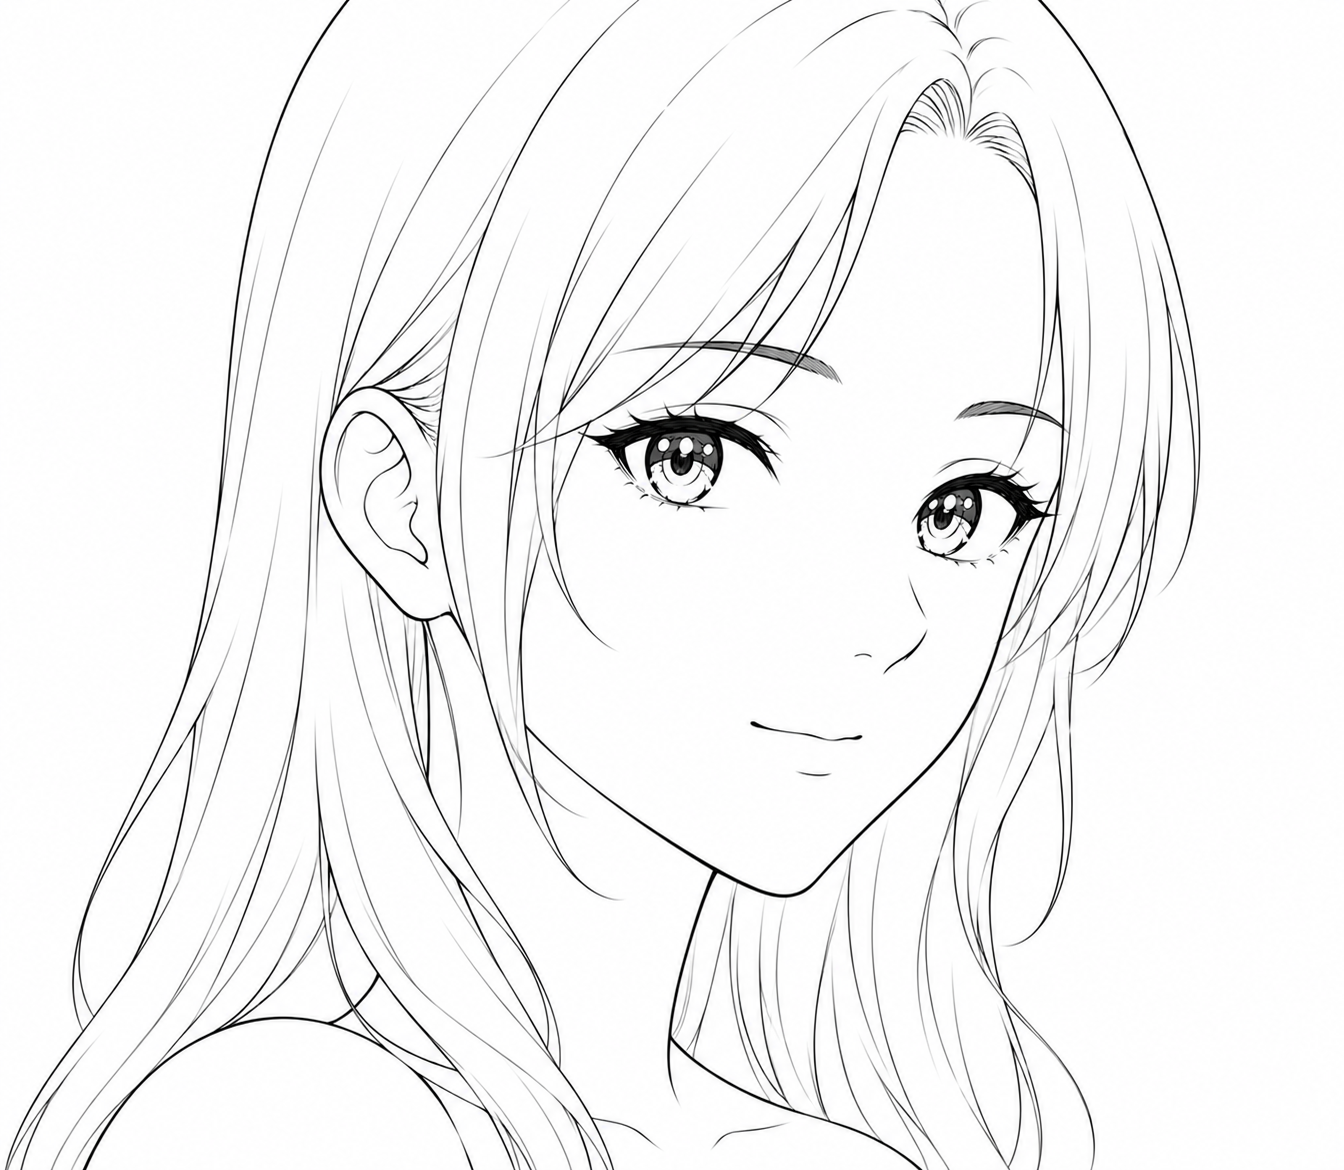
Step 4: Draw the Ear in 3/4 View
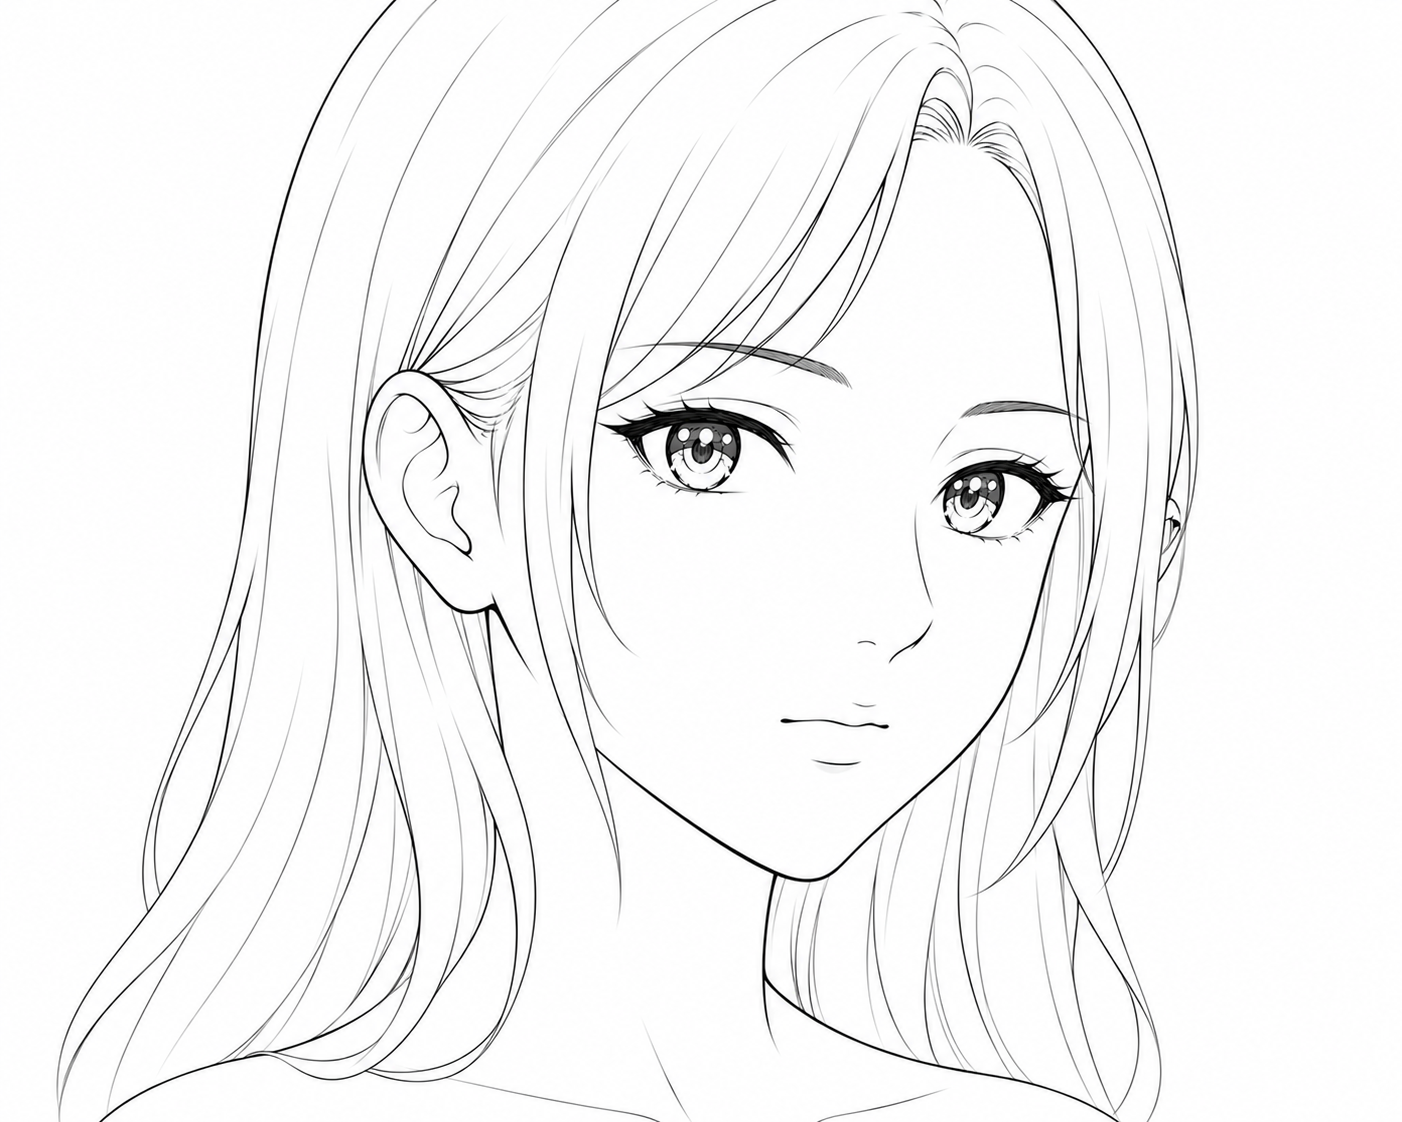
At three-quarter turn, the near ear is almost fully visible and the far ear is mostly hidden behind the head. The near ear reads as a slightly compressed version of the front-view almond, with the opening tilted slightly toward the face.
The inner ridge becomes more visible at 3/4 because you are seeing the ear from an angle that reveals its depth. Draw the inner line a little longer and more defined than you would in front view. The far ear, if visible at all, is just a small sliver peeking out from behind the hair.
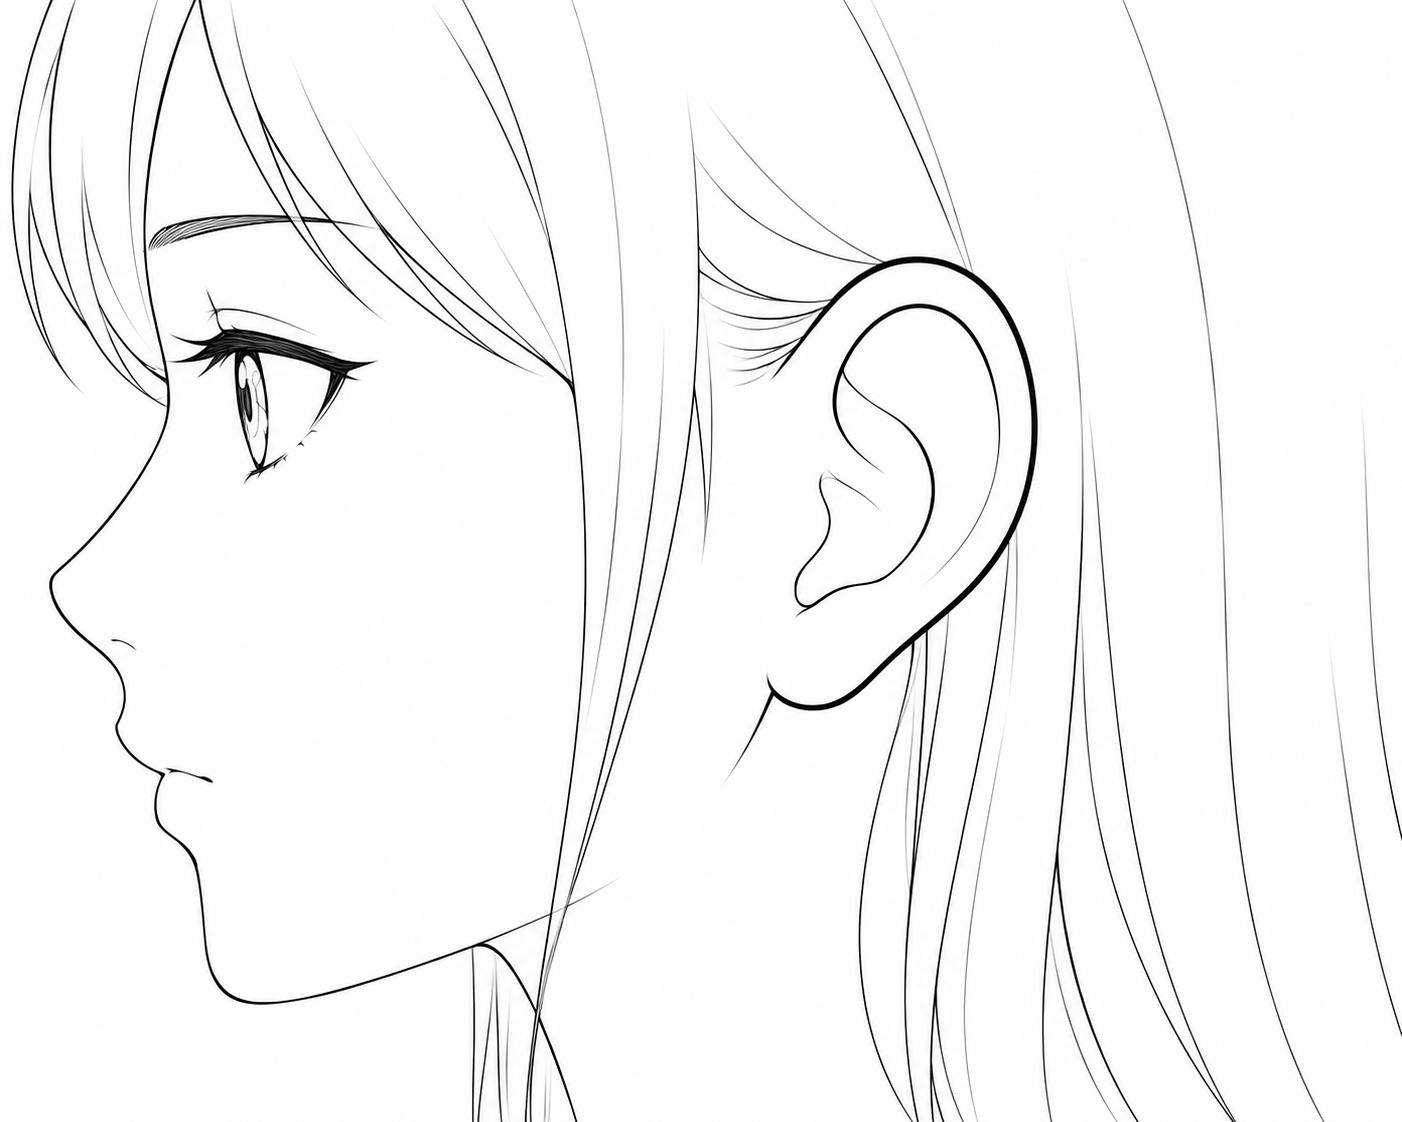
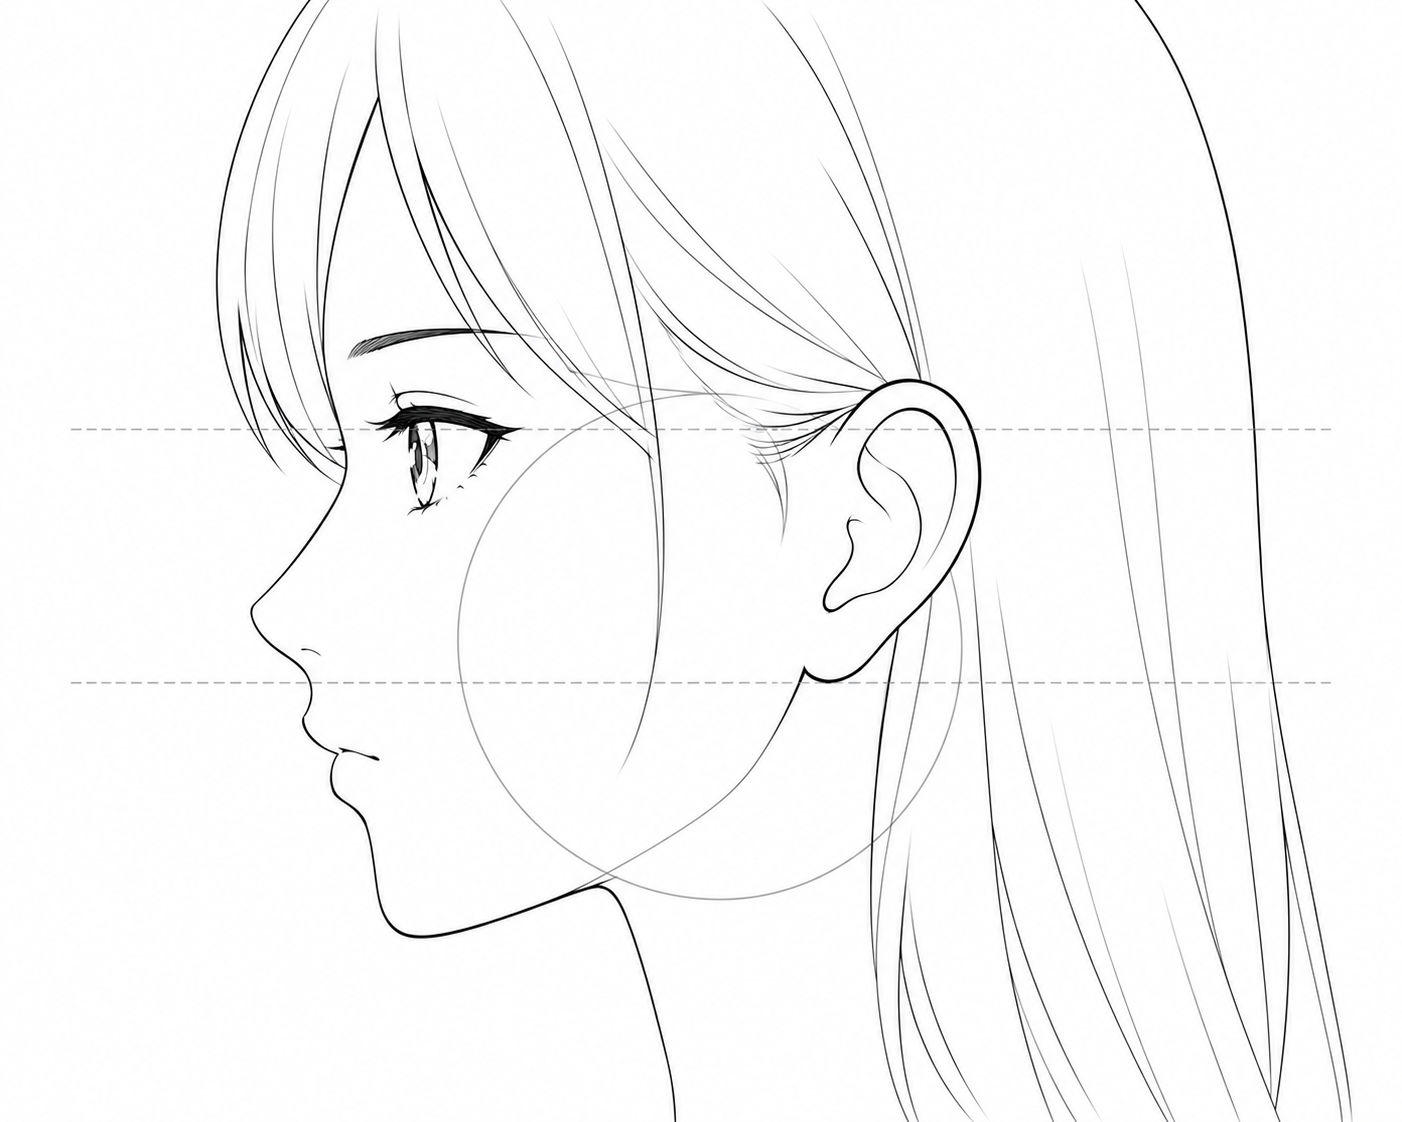
Step 5: Draw the Ear in Profile
The profile ear is the most important view because it is the only angle where the full ear structure reads clearly. The outer rim forms a strong C-shape, the inner ridge creates a shallow inner curve, and the lobe closes the bottom.
In profile, the ear is one of the few features that does not follow the S-curve of the face. It sits behind the jaw circle, roughly level with the eye. Its top should align with the eye-line and its bottom with the nose line. Use these two alignment checks every time you draw a profile ear.
Step 6: Adjust Ear Size for Age and Gender
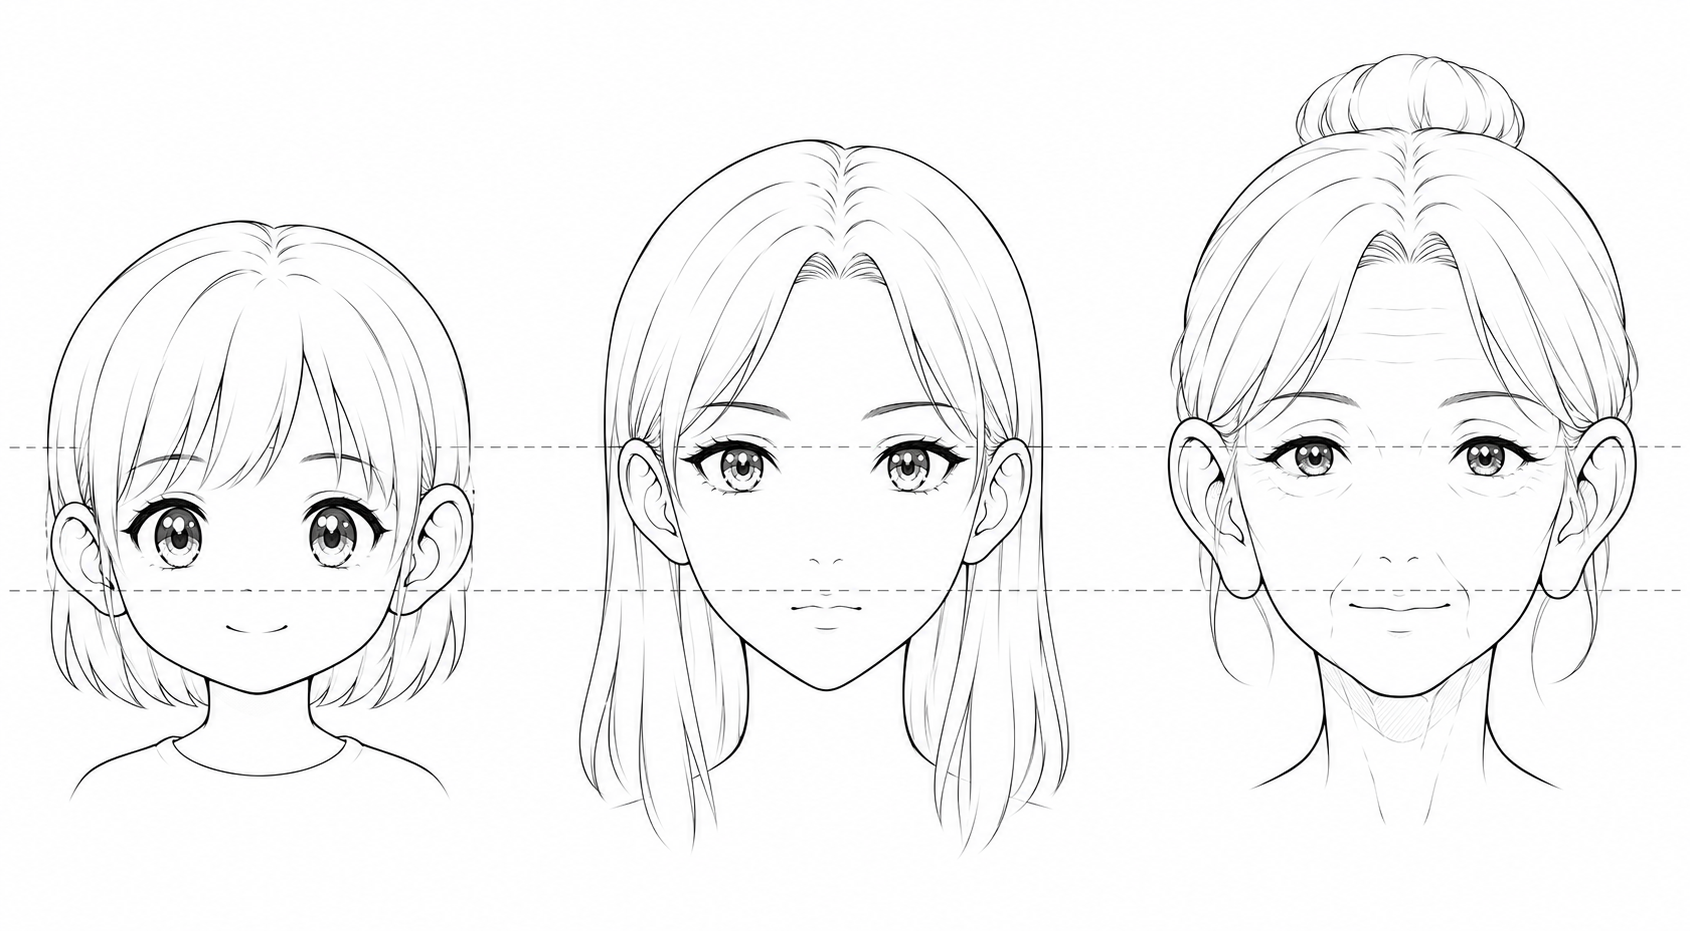
Ear size relative to the head is one of the quickest ways to signal age in anime:
- Child / chibi characters: ears are proportionally larger, often extending above the eye-line and below the nose-line noticeably. The ear takes up more of the side of the head.
- Teen characters (standard anime): ears sit exactly between the eye-line and the nose-line. This is the default proportion.
- Adult characters: ears may appear slightly smaller relative to the head, and the lobe may be more defined.
- Elderly characters: ears are often drawn noticeably larger, with a more pronounced detached lobe and more defined inner ridge lines.
For gender, female ears tend to be slightly smaller and more delicate, with a softer outer rim. Male ears are broader, with a more angular outer rim and a more defined inner ridge.
Step 7: Simplify for Cute and Chibi Styles
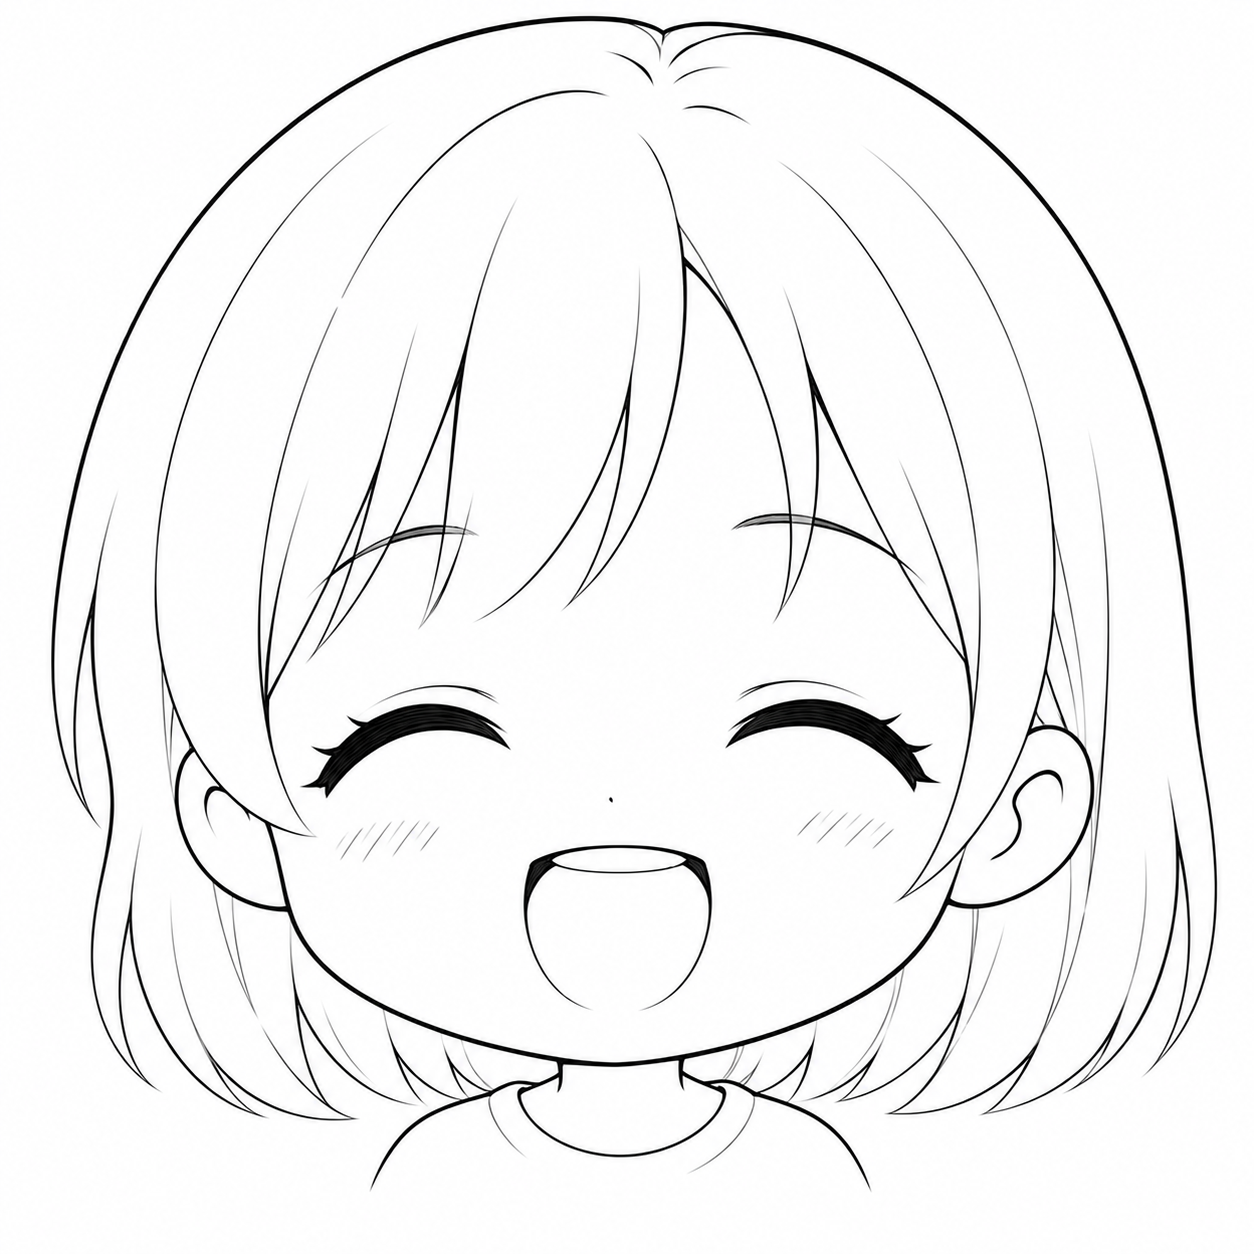
In chibi and super-deformed styles, the ear is often reduced to a single curved line or a small bump. The key is to keep the placement correct even when the detail is gone. A chibi ear should still sit between the eye-line and the nose-line; it should just be simpler.
A common chibi ear shortcut: draw a small C-curve on the side of the head at the correct height, and optionally add a tiny inner line. That is enough. Do not add the full three-part structure — it will look out of place on a chibi face.
Step 8: Final Cleanup and Integration
Once the ear is drawn, check it against the face using three quick tests:
- Height test: does the top align with the eye and the bottom with the nose?
- Width test: is the ear roughly the same width as the eye-to-brow gap?
- Perspective test: in 3/4, does the far ear disappear behind the head?
Finally, adjust the line weight. The outer rim of the ear should be slightly bolder than the inner ridge, just as the outer contour of the face is bolder than interior details. If the ear is partially hidden by hair, the hidden edge should be lighter or erased entirely.
Common Mistakes
- Ears too large — compare ear width to the eye-to-brow gap
- Ears floating away from the head — they sit between eye-line and nose-line
- Too much inner detail — one inner line is enough for most anime styles
- Forgetting the far ear at 3/4 — the far ear should tuck behind the head
- Ears too high or too low — use the eye-line and nose-line as anchors
Practice Advice
Draw a simple head construction five times and add the ears in profile, front view, and 3/4. Use a ruler or your pencil to check that the ear’s top aligns with the eyes and its bottom with the nose. Once the placement is automatic, draw ten more ears in isolation, varying the size from chibi-large to adult-small, until you can draw any ear size from memory in under ten seconds.